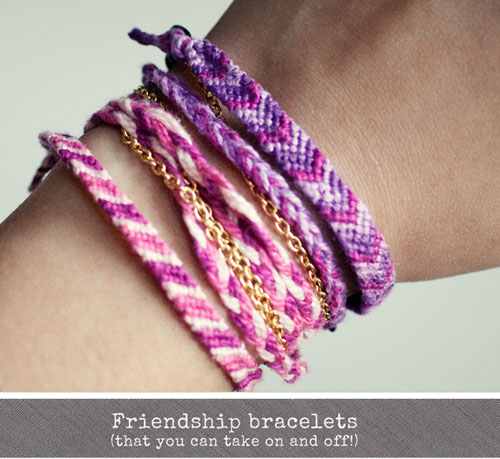
The friendship bracelets trend is back in full force and I jumped on the bandwagon this summer, making quite a few. I noticed quite a few other bloggers making them too and it’s fun just to see how everyone makes them just a little bit differently and the color combinations you put together. I love the look of the friendship bracelets but one thing that I didn’t like was that I felt like after I tied it on, I was kind of committed to wearing them for at least a week before I got sick of it and tried to un-knot it or cut it off. I came up with a super easy way to making them kind of like bangles so that you can actually slip them on and off. I also came up with a really easy way to use your embroidery floss to spruce up old bangles which you’ll find the tutorial at the bottom of this post.
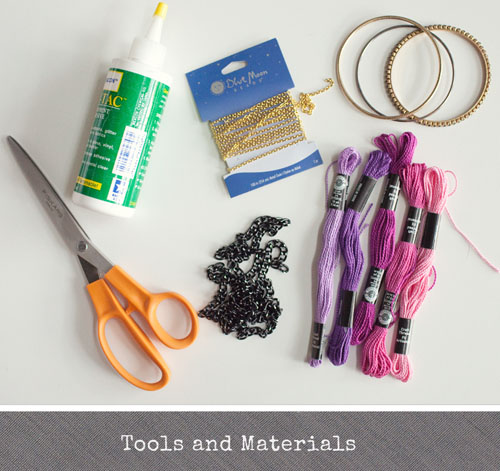
Pretty self explanatory but a few of the essentials to make this project.
- Scissors
- Glue (to be used as the very last step)
- Thin chain – which I used on my middle bracelet above
- Bangles (I used ones I already had or get this stack of 20 bangles for $5) – for the last tutorial
- Embroidery Floss
- Thicker chain to attach to the bracelets
Tutorial 1:
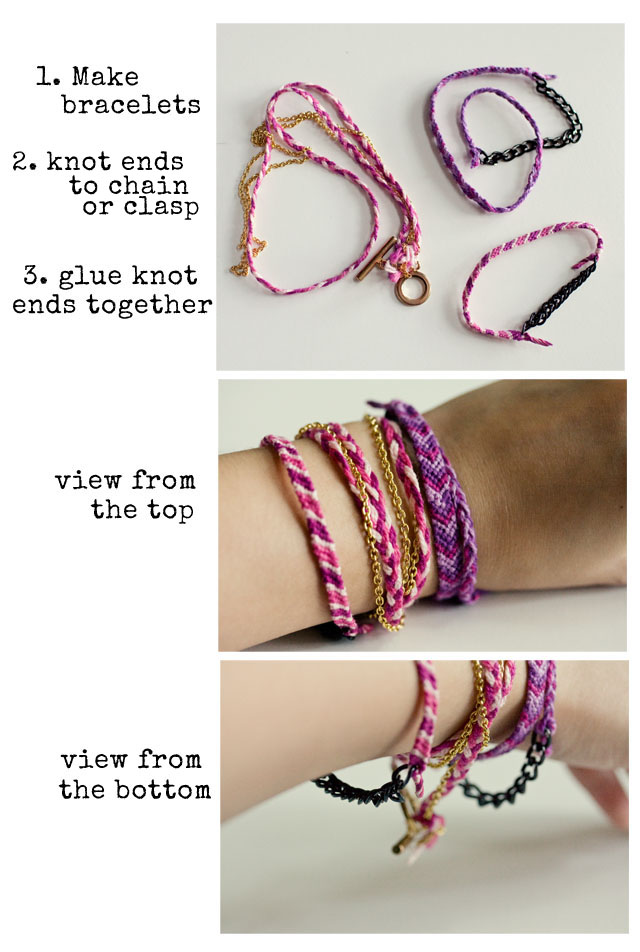
Basically once you are done making your bracelet, take your ends and
knot them through your chain. I try to leave my ends very long so it’s
easy to slip through the chains. Double knot it to make sure it’s
secure. Cut the ends to a shorter length and with a craft glue, dab a
small amount onto the ends and just squish the threads together so that
the frayed ends are glued together.
one, I just wrapped it twice in one area and kept the spacing even
between the wraps. If you do it nice and tight, the thread doesn’t
move. You don’t even need glue for this one because when you start it,
keep the beginning trail of thread on the underside of the bangle and just wrap
around it which keeps everything in place. When you are done, just tuck the
end into the already wrapped sections (also on the underside). For the rhinestone bangle I
wrapped in between each of the rhinestones but I didn’t like it with just one time around so I wrapped the entire thing twice.

Have fun and let me know if you make one! 🙂
Like this post? Also check out my “Make your own cocktail rings” post for an easy way to turn old earrings into rings!

23 replies on “Friendship Bracelets Tutorial”
This is a great idea! I love your DIY posts 🙂 Very creative and I will definitely be trying to give this one a go 🙂 Thanks for the idea
katattack2000.wordpress.com
That's awesome, didn't think about it.lol Although I wish I could make those bracelets, I can only do one kind & it's not even any of those. D:
I love this post!
Such a great post! I never realised how easy these are to make, thanks so much for posting! Love the colours you used.
XO
so cute ♥
Such fun and simple ideas! Great way to spice up simple bangles, I think I have some old ones that could be totally renewed!
Cess O. <3 The Outfit Diaries
Such a great DIY, you are very creative! you made something so simple, totally different, thanks for a great post!
What a great idea! Now that I'm older, I don't like being tied (no pun intended) to wearing them everyday and this is the perfect solution.
so fun!!!
I love this – you did a great job… very creative!
This tutorial layout is so pretty and it matches your blog! 🙂
I remember my friends and I used to make it when we were in middle school. LOL This is such a great tutorial. Awesome pics too!
Love this! I'm going to do the last one, wrapping the thread around the bangle as I have lots that I don't use anymore, thanks for sharing! 🙂 x
Tiffany these are great ideas!! I like how you tie the ends of the embroidery floss to a chain or clasp – maybe something I'll do for Christmas gifts!
And the next time I'm at a thrift store, I'll rethink some skinny bangles I got, and see if they can be jazzed up as a friendship bracelet!!
Helo! I love your style! You have very beautiful pics! I will follow you:)
Big hug & kiss:)
http://nikandpic.blogspot.com/
Love the colour combination, really cute.
I should really get into making them in time for xmas 🙂
xo Emma
Great tutorial= Brings me back to my childhood friendship bracelet making business! xo
http://tryitonmegirl.blogspot.com/
Such a cute idea! Thanks for posting 🙂
xo, tasha
twenty-something blog
follow me
Such a cool tutorial – thank you thank you for sharing – totally am going to try these out!
I love these. My sister could have use this tutorial two weekends ago for my nieces b-day party. : )
I really like the bangles concept. Gives it a totally new look. Nice.
great idea i would definately make one , can like your outfit too
i mean i like the outfit too with the plaid shirt