Categories
crafty-ish Cricut fashion Mommy and Me mommy style

How to make custom mama and me hoodies with your Cricut Explore 3

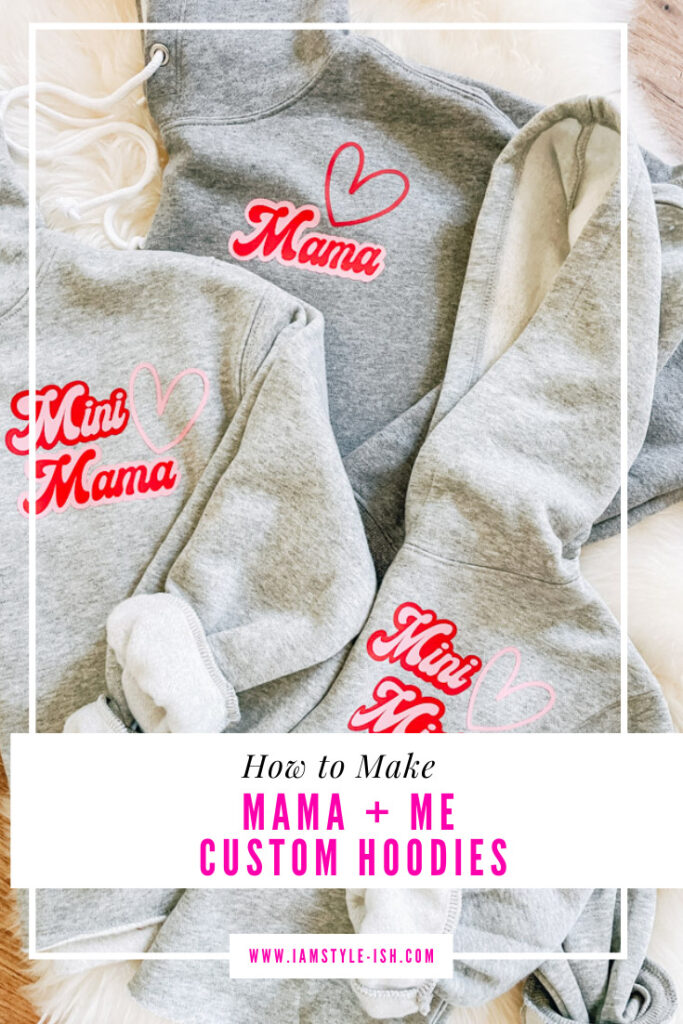
As a mama of two little ones, I am all about mommy and me outfits. My favorite thing of all is matching tees and sweatshirts and I love making them with my Cricut Explore 3. Kids in hoodies are the most adorable thing and something that we would get a lot of wear out of. I picked up a few hoodies for me and my girls and made some custom mama and me sweatshirts.

These are great to make for you and your kids but I also love to use my Cricut to make personalized gifts! Just a fun thing to keep in mind when you are wanting a unique and fun gift for someone.

How to make custom hoodies with Cricut Explore 3

Cricut Design Space makes it so easy as you can easily search through fonts and images. They make it very simple and easy to lay out your designs, change fonts, change sizes, anything that you need to customize your design!
I highly recommend getting the Cricut Access Premium subscription as you get unlimited access to over 100,000 images, 7,000 projects, and 400 fonts, 10% off physical purchases on Cricut.com, including machines and more! It’s helped me so much to create projects easily and quickly.

Get your Cricut Access Premium subscription here!

It’s really easy to get inspiration and ideas from the “projects” tab but I found the cutest “Mama” and Mini” designs when I searched under “image”. It was exactly what I wanted!

I have been loving my new Cricut Explore 3 and the Smart Iron On material. Not having to use a mat makes my projects go by so fast!

Materials to make Custom Mama and Mini hoodies

I decided that instead of just Mama and Mini on the hoodies that I wanted to make it a little bit more special. We often call my oldest daughter “mini mama” because of how much she helps me out with taking care of her sister. It was just perfect for her hoodie! And the little one got “mini mini” because she is literally a mini version of me and her big sister!
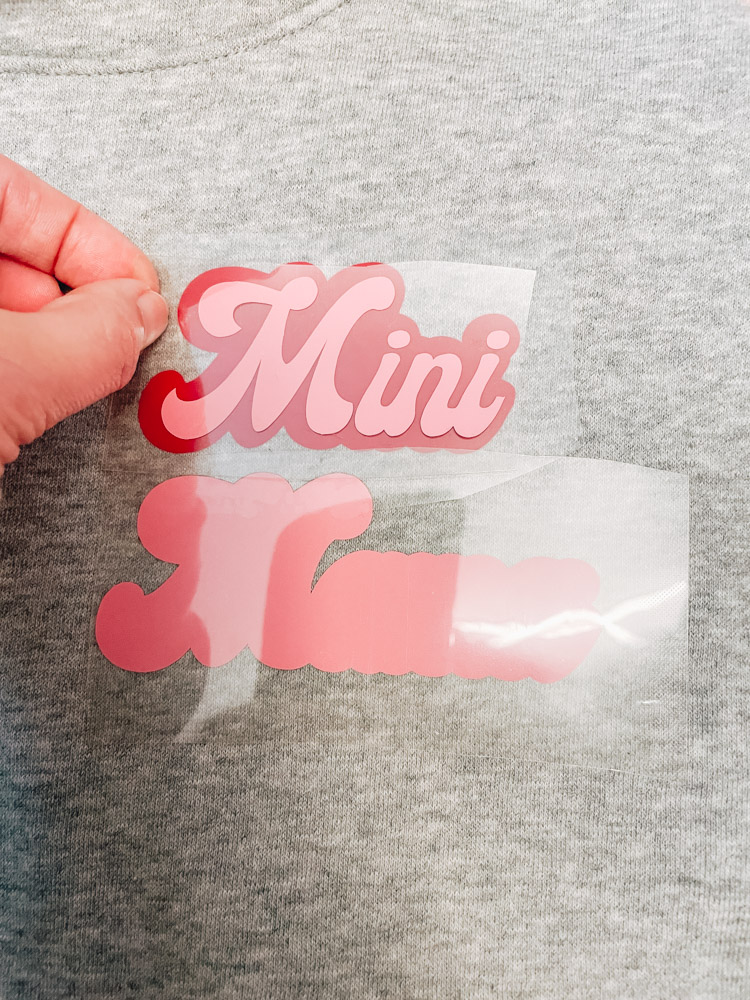
Once the Cricut cut out all the pieces, I laid them onto the shirts to see how they would look. I ended up adding a heart (also found in the images search of Cricut Design Space).

Just a reminder that the words look like just one piece but actually are two different layers, so you’ll need to press down each layer individually. I recommended lining it up on your shirt exactly how you want it before you heat press anything to your shirts!
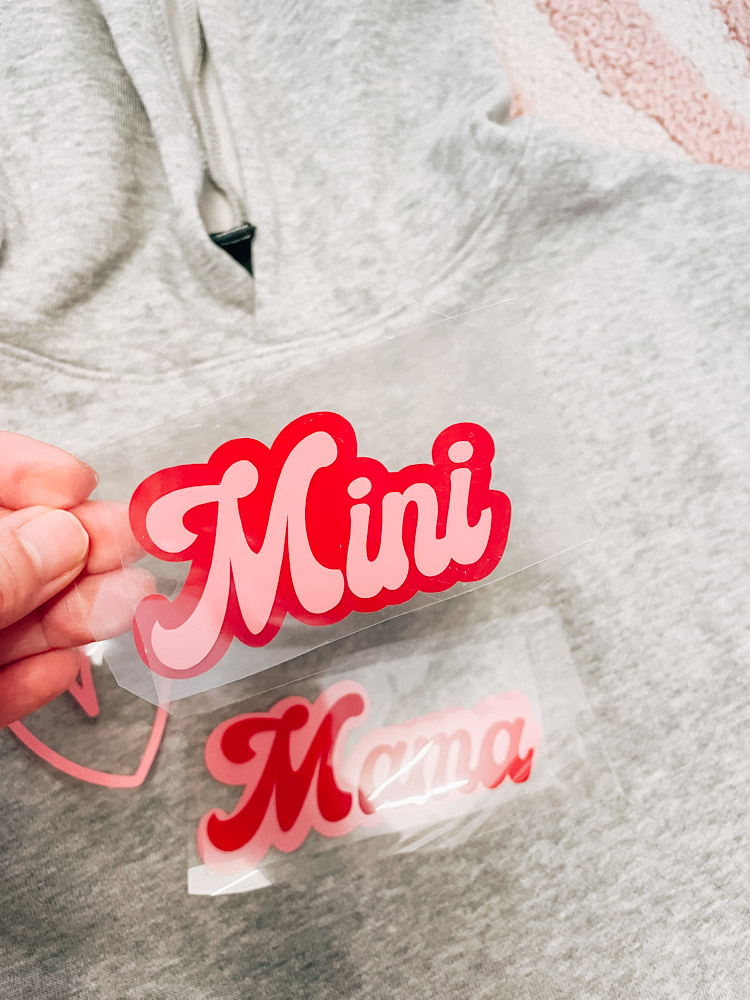
Here’s how they turned out! Aren’t they so cute? I am so happy with how they turned out and the whole project took me less than an 30 minutes.

My girls and I love wearing out mama and me hoodies and we love that they are custom made just for us!

If you are new to using Cricut machines, this is a great project to start with! Since the “mama” and “mini” come as files that are ready to cut, you really don’t have to do too much with it except for size it to what you are putting it on.

I love sharing easy custom Cricut projects as it’s really become one of my favorite crafting tools. It can create things so quickly and easily but it looks so professional!

Check out my other Cricut blog posts:

The Ultimate Road Trip Survival Kits for Kids

Cricut Explore 3 Unboxing & Review
Categories
crafts crafty-ish DIY gifts sponsor

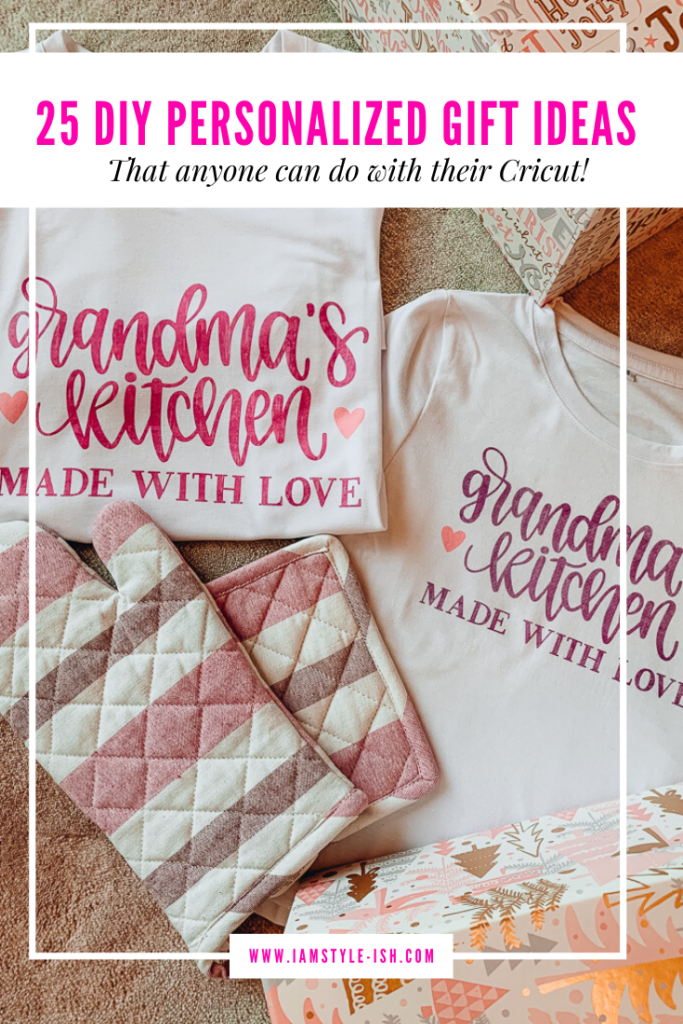
25 DIY Personalized Gift Ideas that anyone can do with their Cricut

This is a sponsored conversation written by me on behalf of Cricut. The opinions and text are all mine.

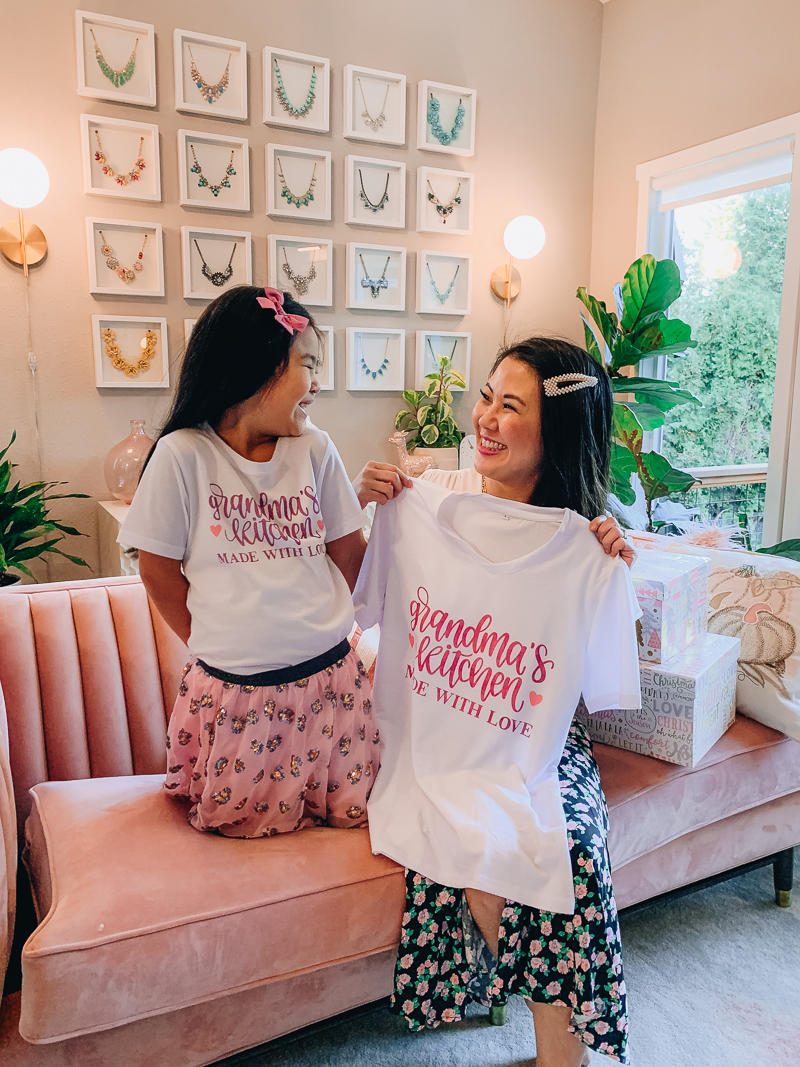
Ever since I was young I have loved making my own gifts and ever since I got my Cricut Maker, it’s opened the door to making so many fun things. I created these Grandma’s Kitchen tees for Layla to gift to Grandma and I loved seeing how excited Layla was about the gift. It even inspired her to pull out her arts and crafts box to make her own gifts to give to family which I love!

As much as fun as it is to shop for a gift, personalizing something yourself just makes gift giving that much better. Sometimes I can get stuck on ideas on what to gift which is why I wanted to round up the 25 best DIY Personalized Gift Ideas that you can make with your Cricut. I hope that this not only helps you out with some gift ideas but it will be a great list for me to refer to when I’m creating my presents every year!

25 DIY PERSONALIZED GIFT IDEAS THAT ANYONE CAN DO WITH THEIR CRICUT

Gifts to make for the home

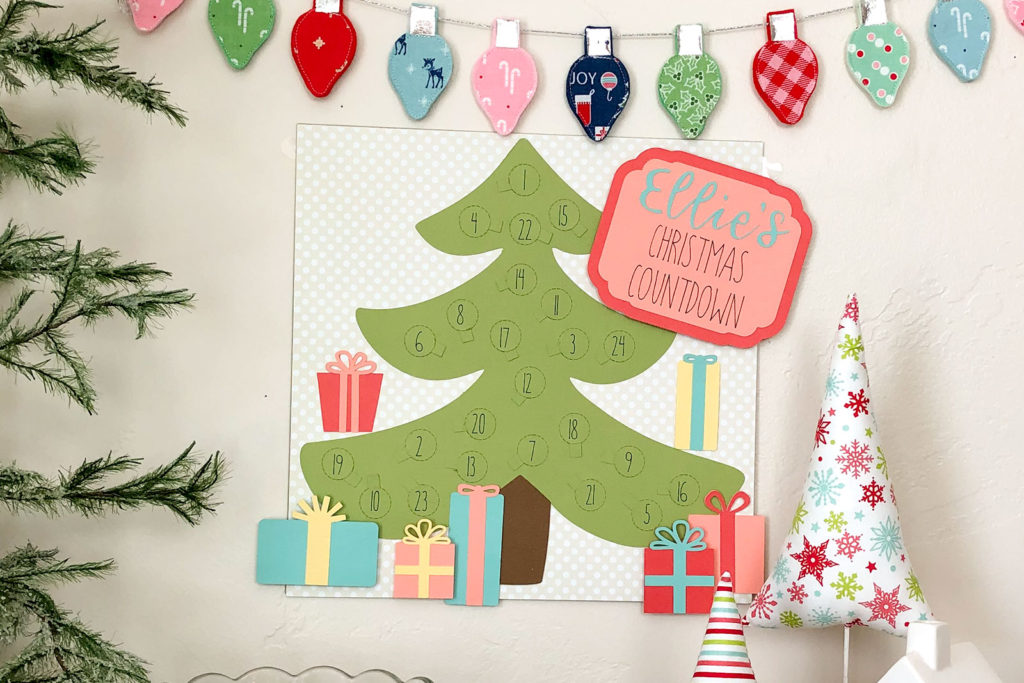
Personalized Christmas Countdown

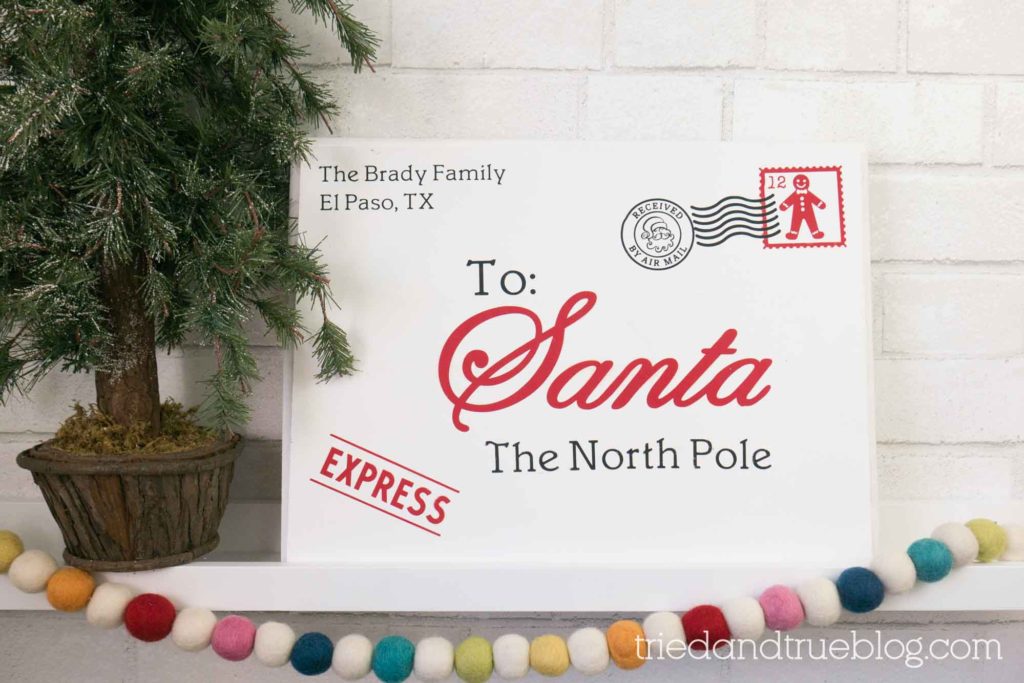
Personalized Letter to Santa

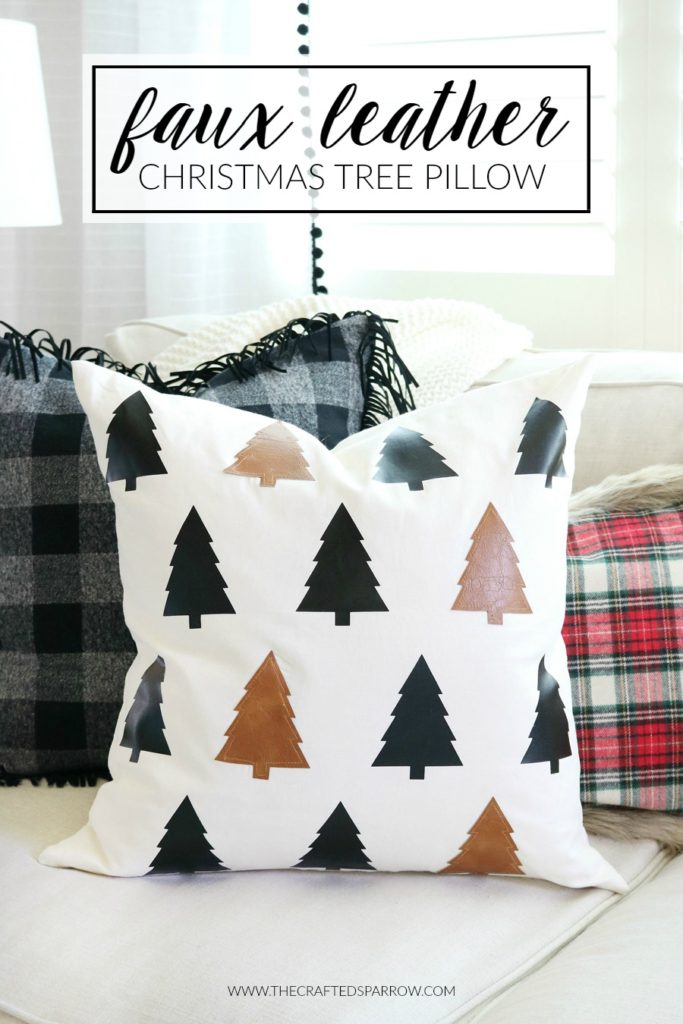
Faux Leather Christmas Tree Pillow

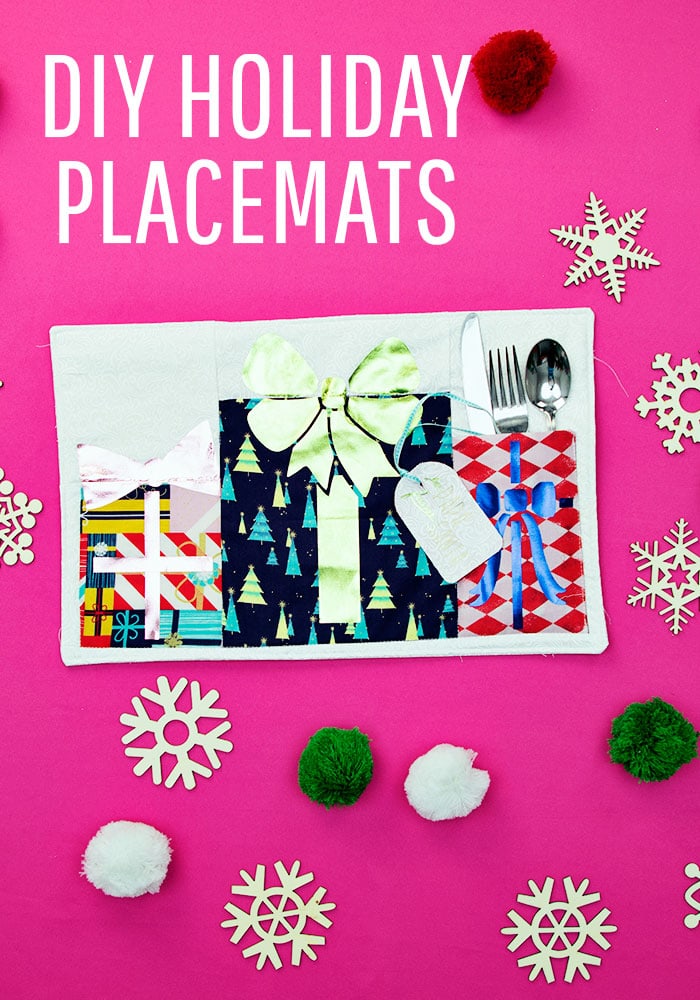
DIY Placemats for the holidays

Baby it’s cold outside teapot set

DIY Holiday Pillows

DIY Clothing and accessories

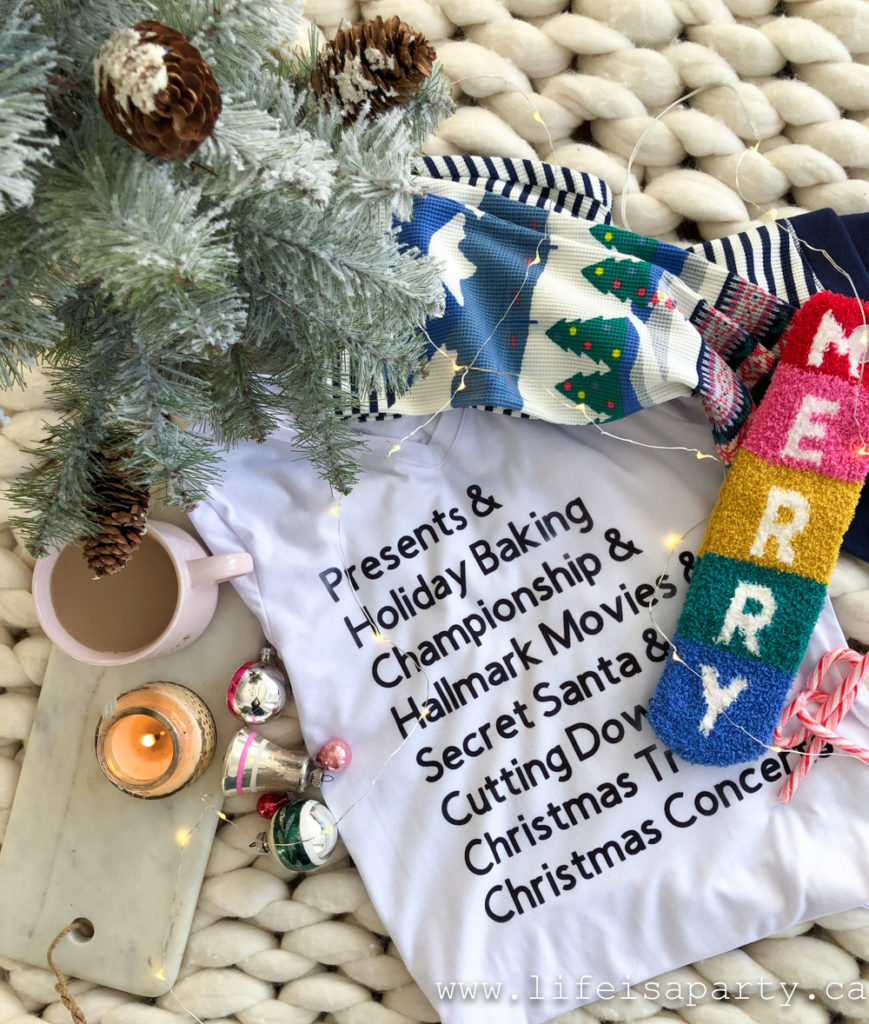
Favorite Things Pajamas

Grandma’s Kitchen – matching Grandma and Granddaughter shirts

cricut infusible ink gifts

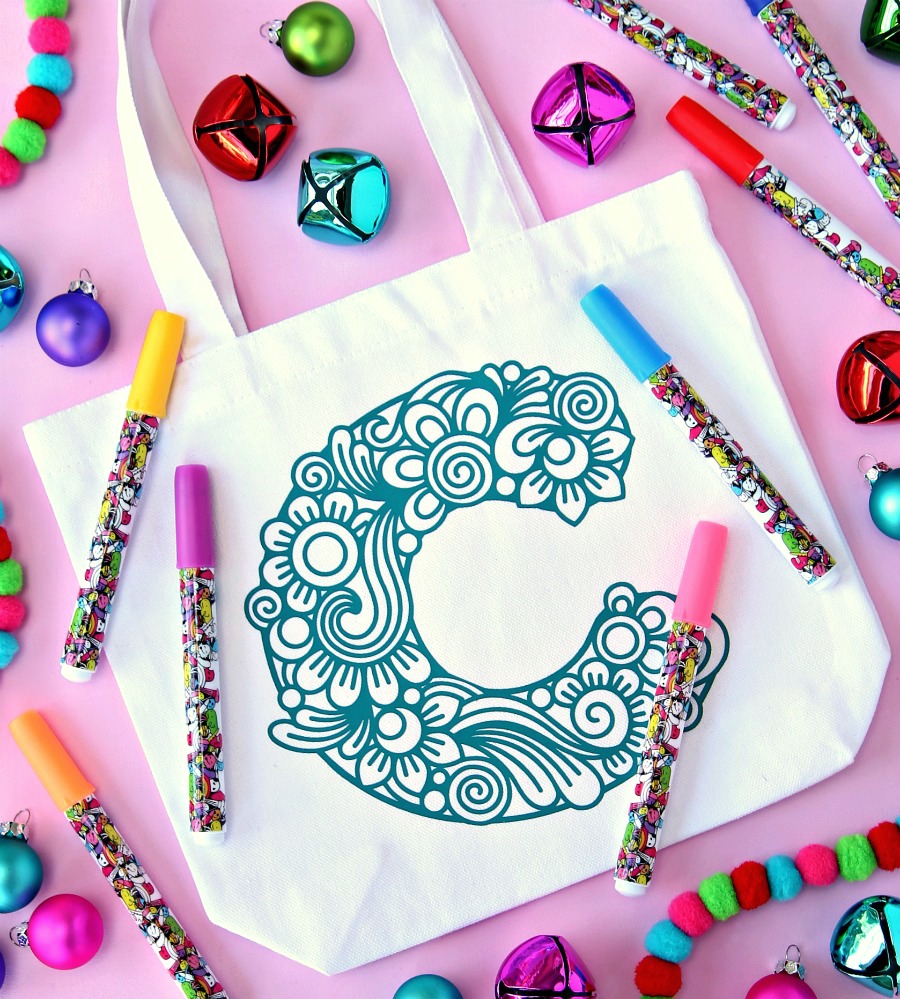
Personalized Color your own gift bags

11. Special Delivery Gift Bag

Personalized Scarf and Gloves Gift Set

Engraved Charm Bracelet

Personalized Makeup Bags

Gifts for Kids

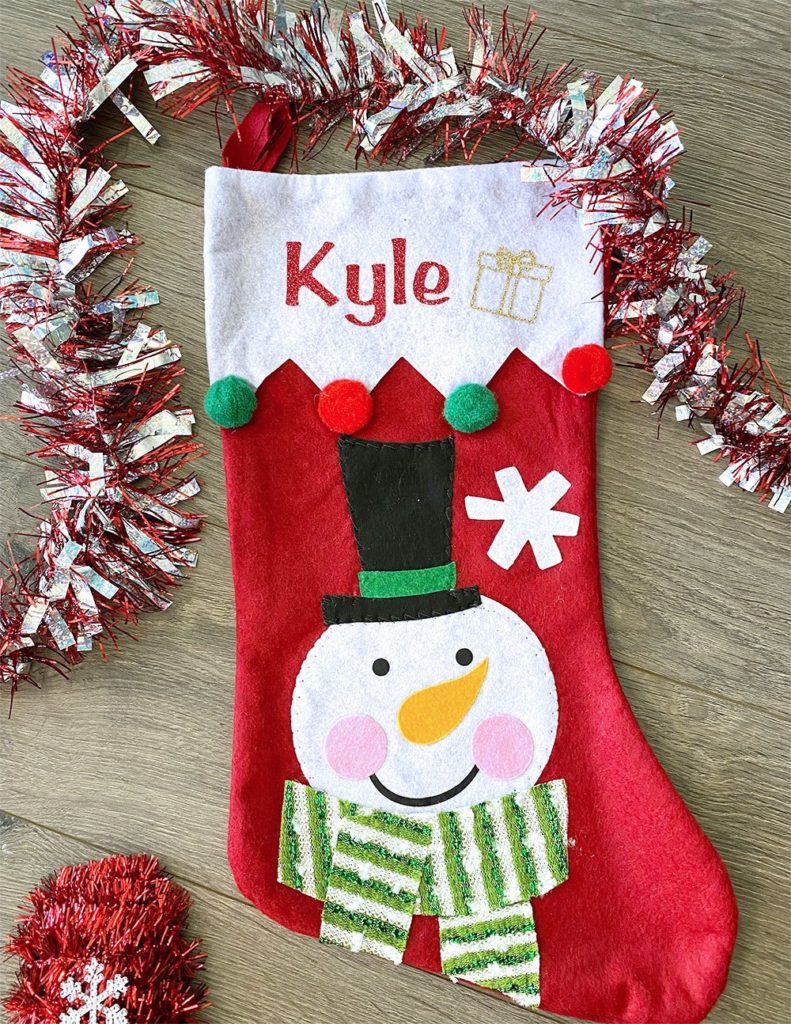
Personzalized Christmas Stockings

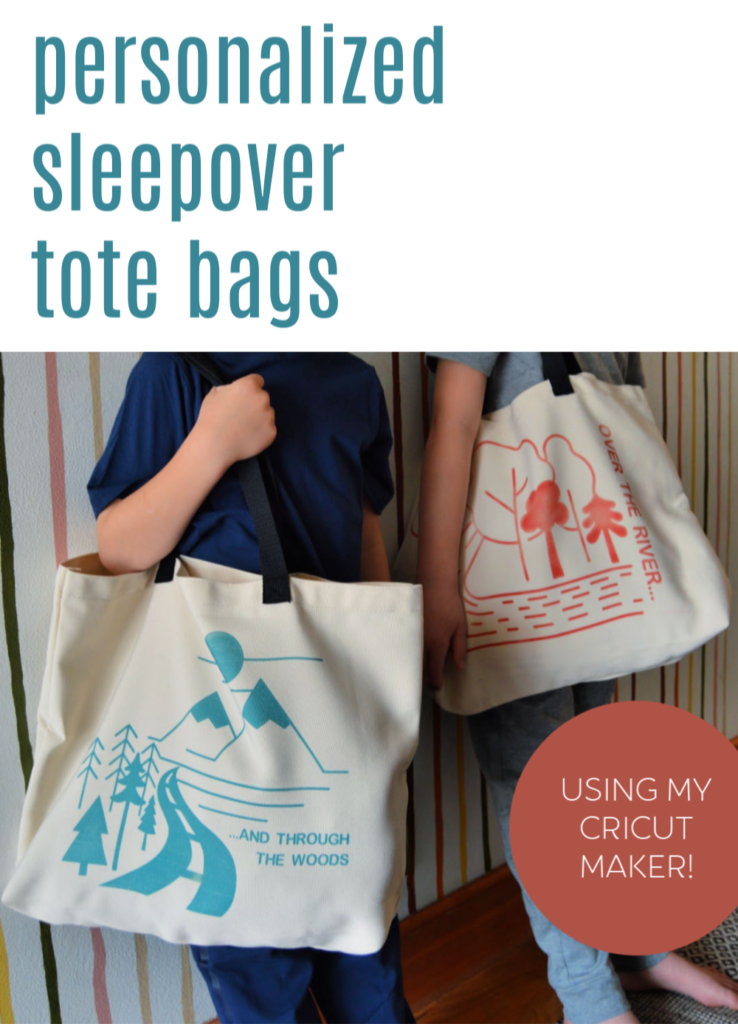
Personalized Sleepover Totes

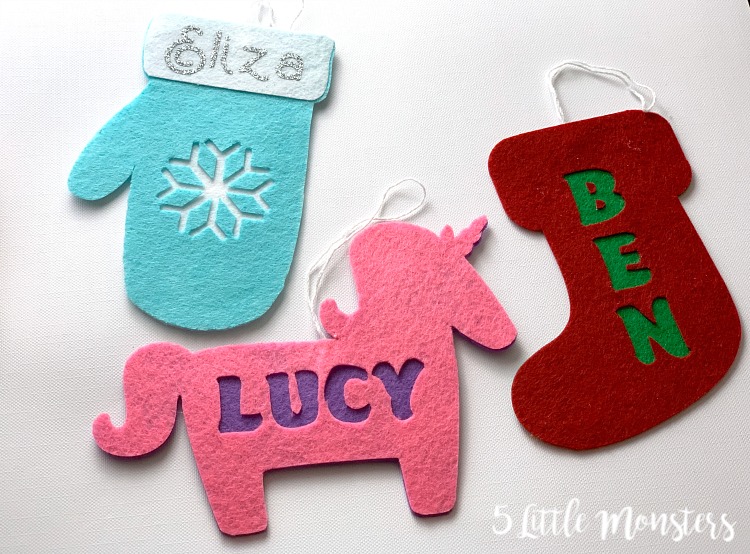
Personalize Ornaments

Baby’s First Christmas Ornament

Monthly Mom and Me Gift Box

Shirts to announce a Disneyland Trip

Personalized Chemistry Set for Kids

Gift Ideas for the Hostess

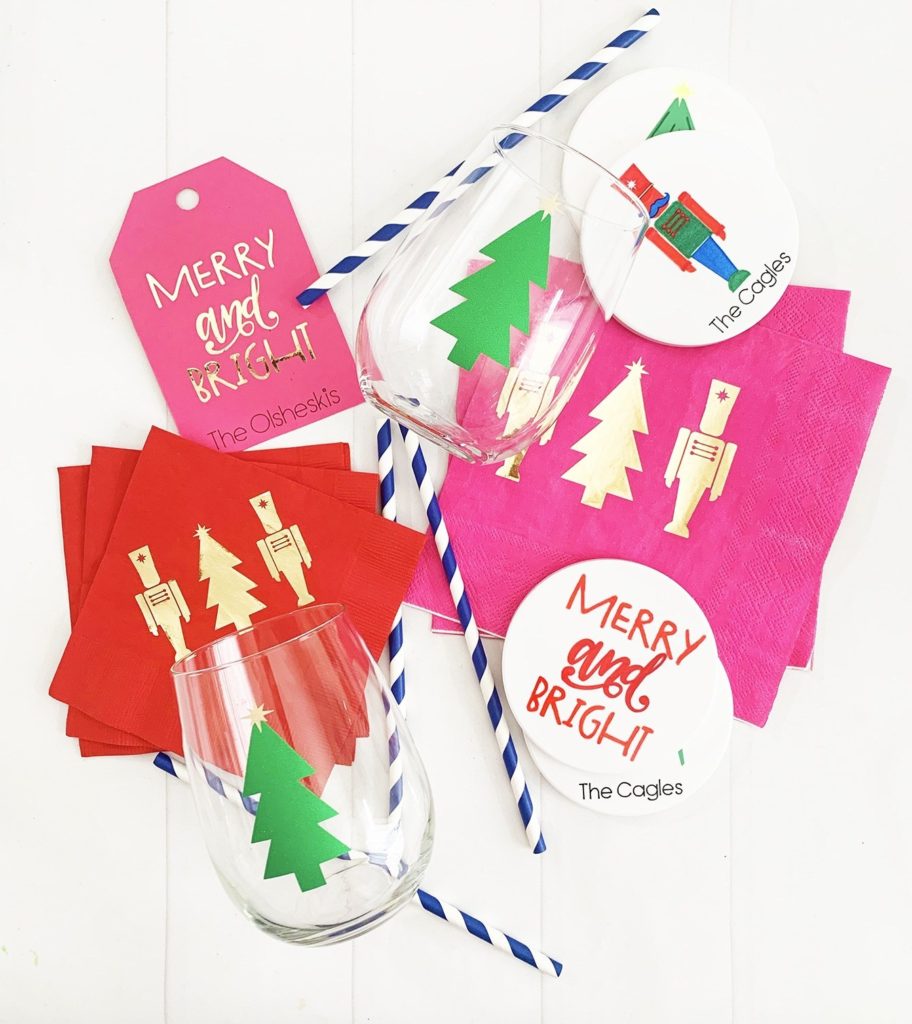
DIY Christmas Hostess Gift

Rainbow Glitter Tumblers

Christmas Tea Towels

DIY Coasters for the Boss Babe

Gifts for the Coffee Lover

As you can see there are so many ideas and things you can do. I would love to see your project too! If you make something, tag me on instagram (@tiffanyish) so I can see it and share it on my stories too!

 25 DIY PERSONALIZED GIFT IDEAS THAT ANYONE CAN DO WITH THEIR CRICUT

Categories
costume crafts crafty-ish DIY fashion halloween Kids momlife Mommy and Me

Cute & Simple DIY Halloween Costumes for moms

Can you believe it is almost Halloween? I always love dressing up for Halloween with my daughter and with the baby also coming so soon I am trying to plan ahead this year. We love to get creative and make our own costumes, so I wanted to share a couple of cute DIY options.

My best tips for DIY Costumes

My two biggest tips when it comes to DIY costumes is first to check what you have already, as often times you may have some items that will work already in your closet and in your craft supplies. And the second tip is that if you make the main part of costume fairly simple and really focus on fun accessories, it cuts the time and cost down a ton!

Check out 7 cute and simple DIY halloween costumes below.

cute and simple DIY halloween costumes

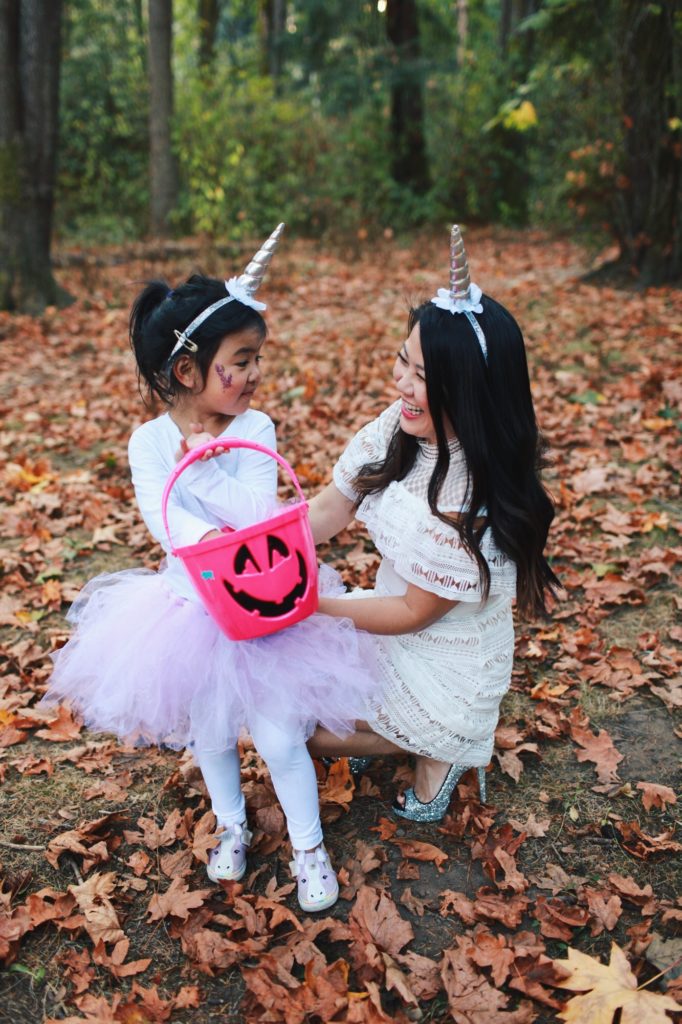
DIY Mommy & Me Unicorn Costume

DIY Mommy & Me Unicorn Costume

My daughter is obsessed with unicorns so I knew I had to make our own unicorn costumes. Making the tutu myself took the longest out of the entire process and even that was very simple to do. The main requirement was lots of glitter and we found cute horn headbands to match which brought it all together. My daughter LOVED wearing this and I thought both looks turned out so pretty! Find the step by step directions to make them here.

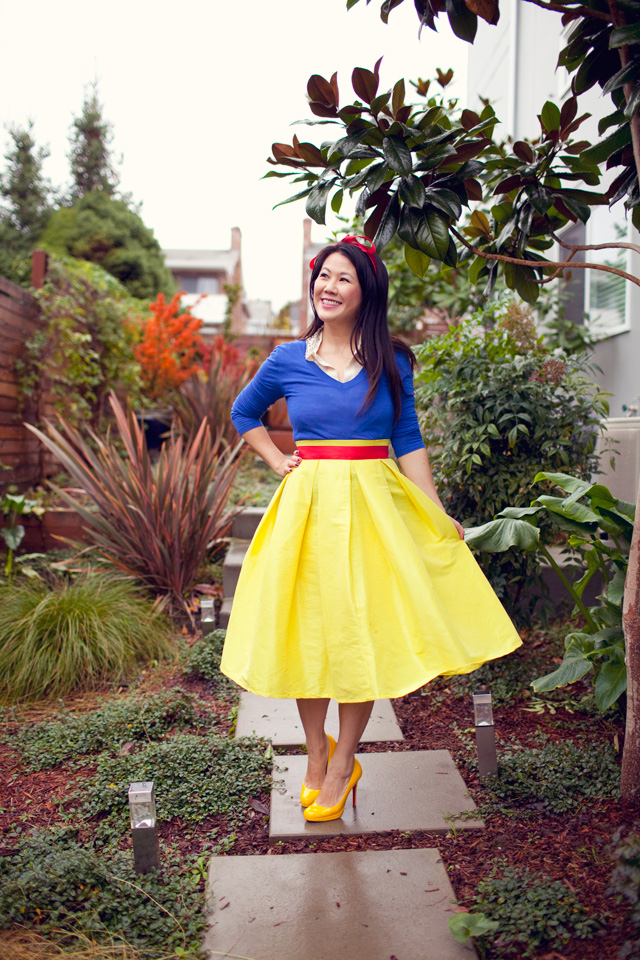
DIY Snow White Costume

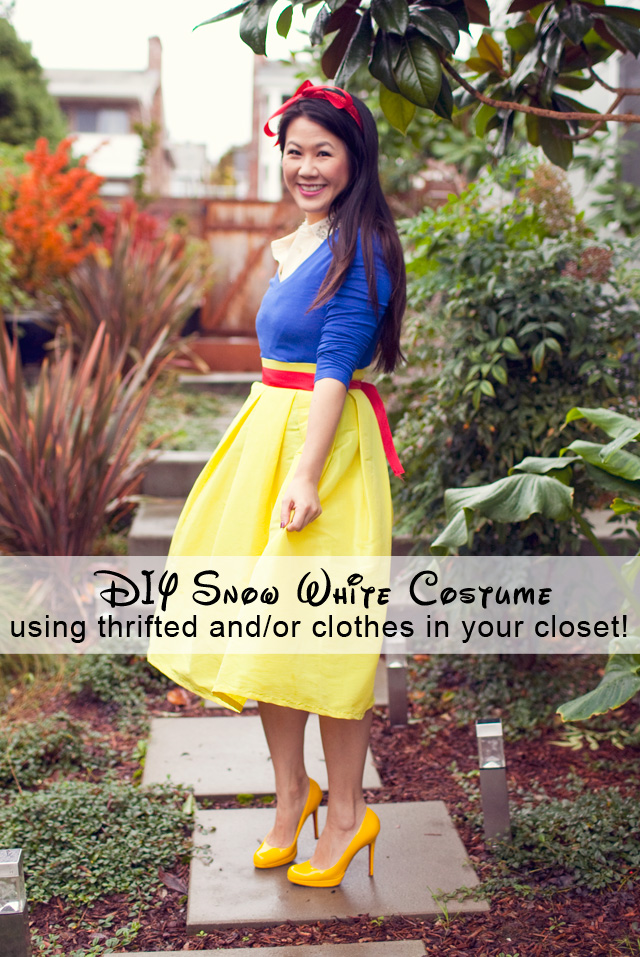
DIY Snow White Costume

I am obsessed with Disney princesses and when I was looking through my closet this yellow midi skirt jumped out at me and I knew it’d be perfect for a Snow White costume. Since I already had the skirt, I went to the thrift store to find the rest of the items I needed and was able to create this costume for under $20! Thrift stores are a secret weapon for DIY halloween costumes and really make it easy to create something cute AND affordable. Head here to find directions to make this costume yourself!

DIY Mommy & Me Strawberry and Banana Costume

DIY Mommy & Me Strawberry and Banana Costume

Another cute mommy and me idea! These strawberry and banana costumes were so easy to make (took under 30 minutes) and were so comfortable, which was a win win for us. These are a great option if you need something last minute and you can get creative and do any kind of fruit! Find the step by step directions to make them here.

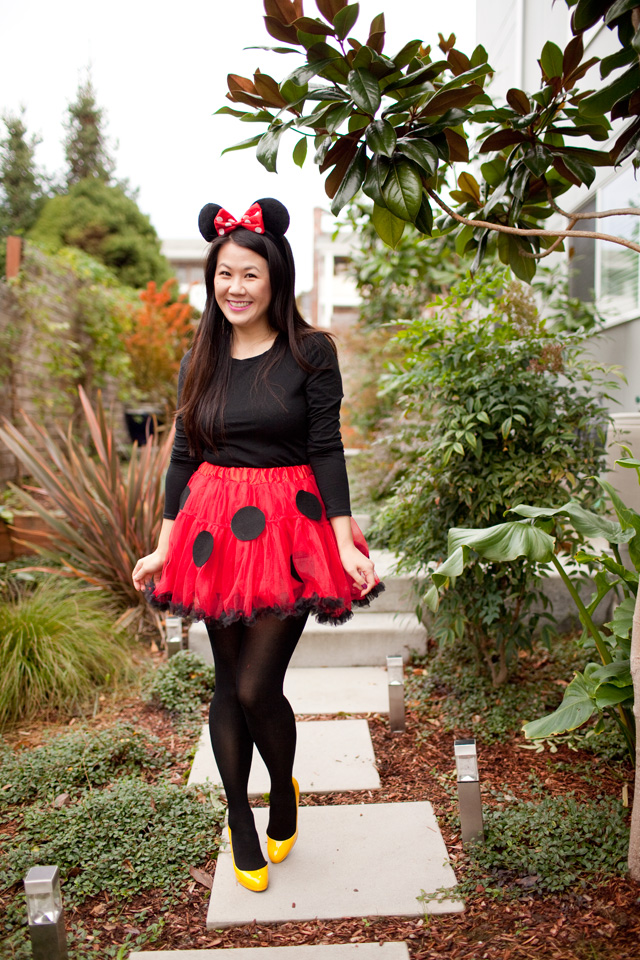
DIY Minnie Mouse Costume

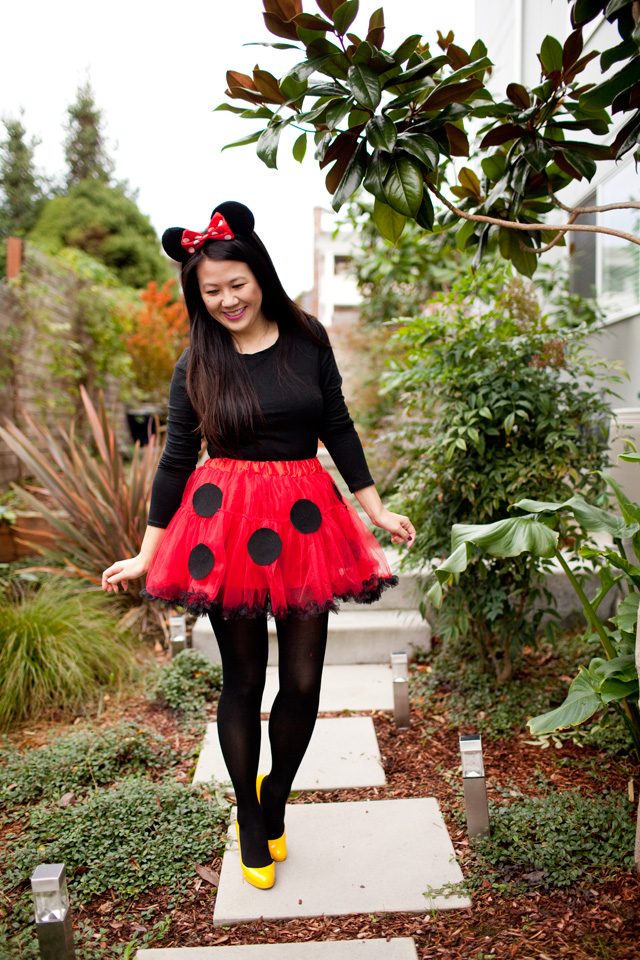
DIY Minnie Mouse Costume

My daughter loves Minnie Mouse so this costume was a no brainer for me. This is by far the easiest DIY costume I’ve done as I only needed to get the tutu, ears and some felt to complete it. This took me less than 10 minutes to put together and really is the perfect option for a last minute costume if you’re in a rush. Find the step by step directions to make this costume here.

Easy DIY Costume Inspirations

I am always looking for inspiration so here are a few more ideas I’ve seen that are on my list to try!

DIY Bubblegum Costume

DIY Bubblegum Costume

If you don’t know about Studio DIY you need to go check it out ASAP. The site has so many DIY ideas and tutorials and everything is SO CUTE. I saw this DIY Bubblegum Costume and thought it was amazing so I had to share. Check out all of the details and a full tutorial here.

DIY Tinkerbell Costume

DIY Tinkerbell Costume

I love following along with Courtney from Color Me Courtney and her DIY Tinkerbell Costume turned out amazing! I adore how she added the pom poms to her heels – it’s such an easy detail that really adds so much to the look. Head here to see directions to make this yourself.

DIY Ice Cream Cone Costume

DIY Ice Cream Cone Costume

I saw this DIY Ice Cream Cone Costume on Treasures and Travels and thought it was just adorable. I love the sprinkles and this would be so fun to make in a mini version if you have a daughter too! Find the step by step directions to make it here.

Let me know if you make any of these costumes as I would love to see! Hope you have a fun Halloween!

Categories
costume crafty-ish DIY halloween sponsor Uncategorized

DIY Minnie Mouse Costume

I love dressing up for halloween but try to come up with cute but easy to put together costumes.  This DIY Minnie Mouse is definitely one of the easiest ones that I’ve made and you only need a few pieces to pull it all together.

EASY DIY MINNIE MOUSE COSTUME IDEA

I was big on Halloween as a kid and teenager; I LOVED picking out my costume and trick-or-treating. In the past few years, Halloween has been less about costumes and more about passing out candy to the neighborhood kids. But this year, my daughter is old enough to be excited to dress up for Halloween and I’m so loving that!

I wanted to dress up with her and, since Minnie Mouse is her favorite character in the world, I had to dress up as Minnie.

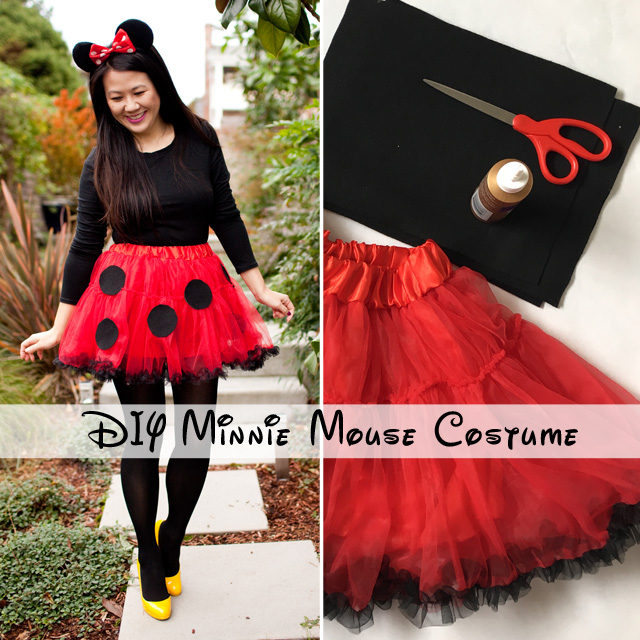
MINNIE MOUSE COSTUME MATERIALS

Although you can get plenty of pre-made costumes, I wanted the costume to be a little bit more me, so I ended up getting a red tutu and Minnie ears, and I had the makings of a cute Minnie Mouse!

I stopped by the craft store to pick up some felt to make polka dots on my tutu and got to work! And, seriously, this is the easiest DIY ever.

Let’s be real: I don’t have time for extensive DIYs, so this took me all of 10 minutes to do.

I used a mug as a stencil, and then just cut out all the circles, used tacky glue, and stuck them on the skirt.

Supply list for the DIY Minnie Mouse Skirt

  • Red Tutu
  • Black Felt
  • Scissors
  • Mug (or anything round as your template)
  • Tacky Glue

Complete your Minnie Mouse costume with items from your closet

I added the Minnie ears, a black long sleeve shirt, black tights, and, of course, my yellow pumps to become Minnie Mouse!

Tip: If you are headed out to trick or treat and it’s a bit chilly, add a pair of fleece lined tights to keep your legs warm

EASY DIY MINNIE MOUSE HALLOWEEN COSTUME WITH TUTU

I had fun creating my costume and loved that I could just grab what I had in my closet with a few additional pieces.  

I really only had to buy the tutu, mouse ears and felt which was not expensive at all so I was happy to not have to spend a ton of money on my costume!

For more fun Halloween ideas check out these posts!

Easy DIY Snow White costume (using clothes in your closet!)

5 Cute and Easy Mommy and Me Halloween Costume Ideas

halloween costumes for moms, halloween costumes for moms and daughters, mommy daughter halloween costume ideas, DIY halloween costumes, DIY costumes for moms and daughters, halloween 2019, cute and easy halloween costumes for moms and daughters, mom blog, halloween ideas, cute halloween costumes for kids
Categories
crafts crafty-ish Uncategorized

two easy DIY’s!

I’ve taken a bit of an unexpected blogging break… It’s been hectic here with running my business and taking care of my daughter and all the times I’ve tried to sit down and blog, I just get pulled into something else as my husband and I are still working on getting our home decorated as well.  And to be honest, if I’m not working, I want to spend every moment with Layla.  She is at such a fun age where she is doing new things every day and I just love being with her.  But I am going to come back eventually, I have no idea when but hopefully sooner rather than later and I want to thank those of you who have stuck around and are still reading!  You guys are the best!
Instagram is the easiest way for me to do any kind of social media these days so would love to have you guys follow me over there (and please do let me know your username as well!  I would like to follow my readers/followers back but a lot of your accounts are private so don’t want to intrude.)
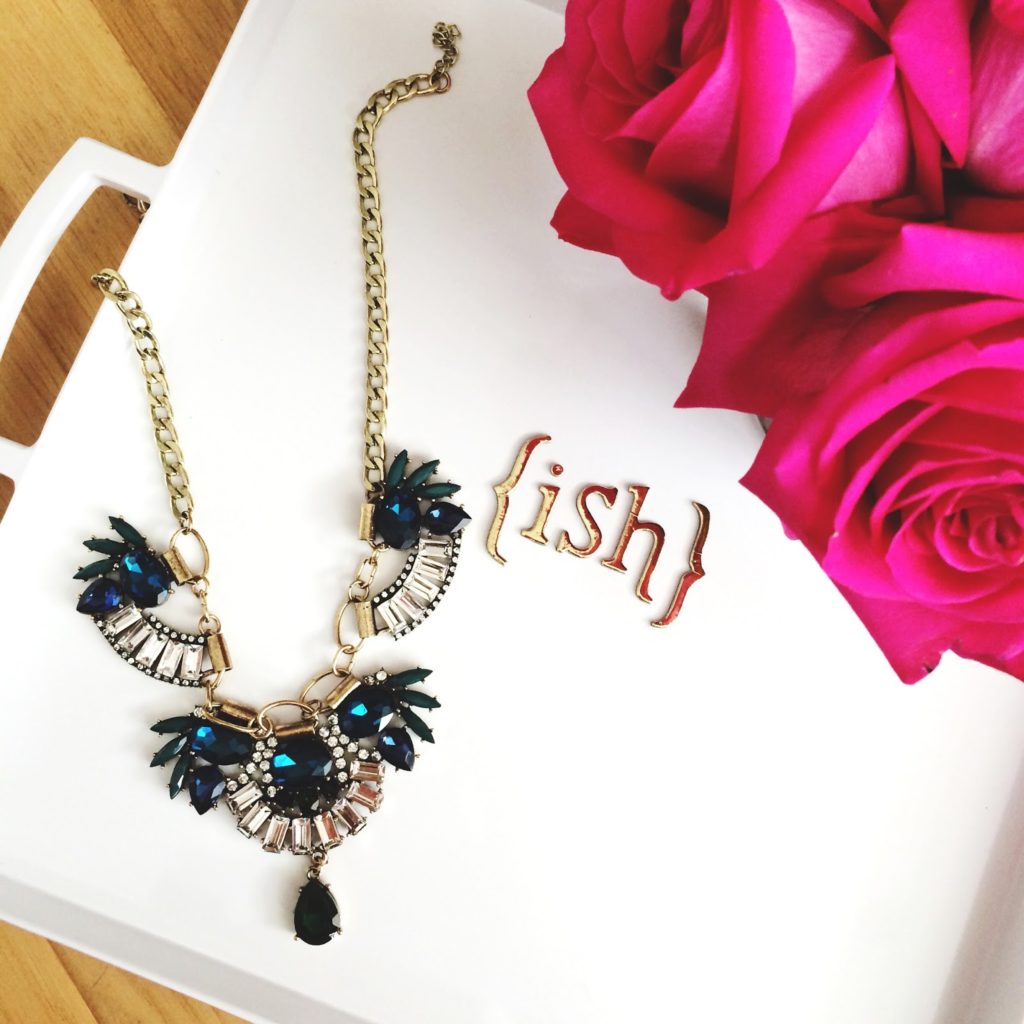
I put together two fairly easy DIY’s that I wanted to share.  Even a busy mom like myself has time for these!  The first is a mongram tray.  I’ve been wanting one for awhile but I haven’t been able to find any that are reasonably priced and the ones that I did find were not quite my taste.  I was shopping at Target and (of course as you do at Target, you see random things and think “I need that!) which is how I came across these stickers.  I knew I had to do something with them so I brought them home and thought about what I could use them for and voila! A monogram tray popped in my head.  
The sticker brand is called “Thickers” and they are a nice quality sticker that sticks up a little bit but not too bad that you can’t put stuff on top of it.  There are a ton of fonts and colors but I’ve been on a gold kick lately so of course had to get the gold ones.  The tray I got off Amazon, it is this exact tray and it also comes in a variety of sizes and colors so you could really customize your tray to exactly how you like it!  It looks great on our table and so easy to add a few items to decorate with.  I don’t use it to carry food so not sure how it will hold up if you put a cup on it and water gets on the stickers but for decor, it is perfect and for being about $25 total to make the project, it’s well worth it!
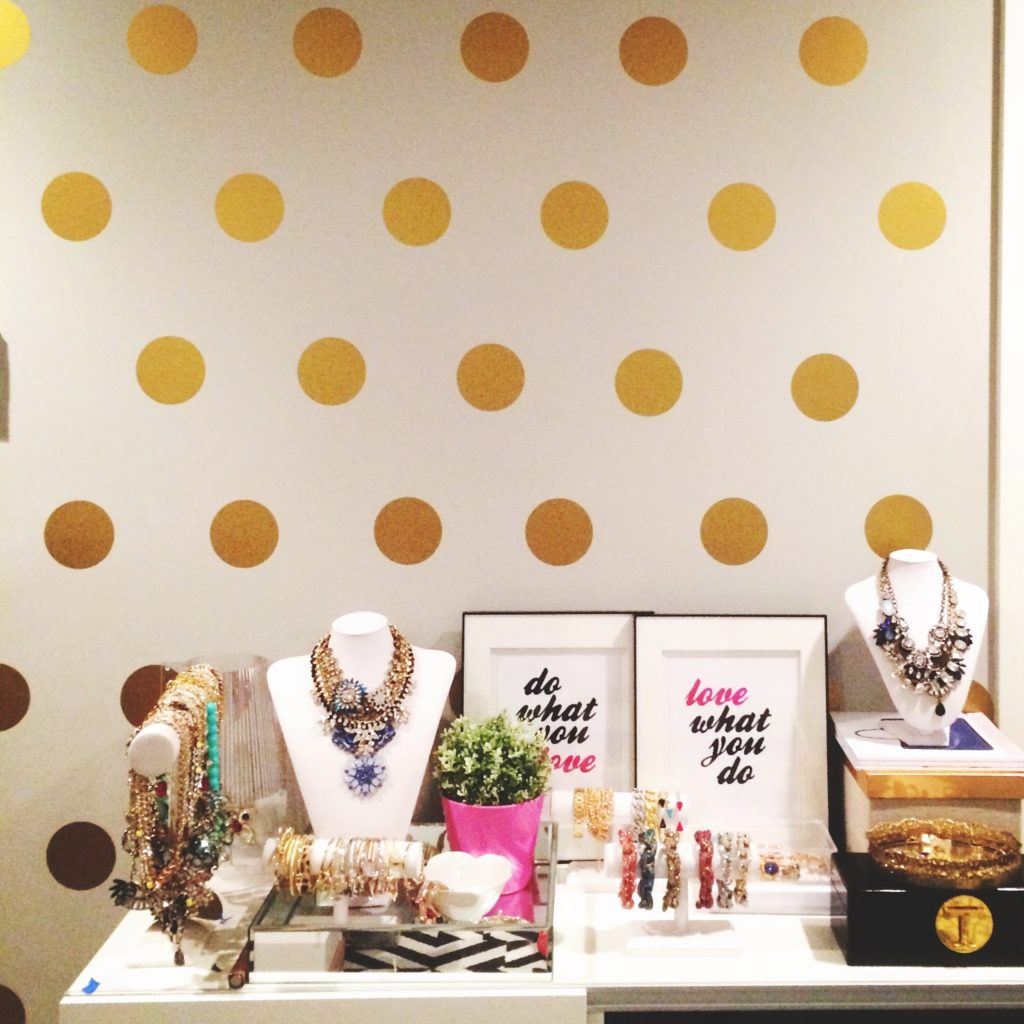
Sorry for the grainy photo here, I literally took this photo at 2am.  I had bought these polka dot vinyl decals about a month ago (mine are the 4″ ones) and knew it was going to take some time to put them up so I kept on putting them off until one night after I put Layla to bed, I was determined to just tackle it all in one night!  The decals themselves are very easy to put on.  It’s the measuring of the wall, the distance between your dots and trying to get them spaced just right is the hard part.  I absolutely love how it turned out though and my office is that much more fun with this wall!

My biggest tip is to cut all the circles individually (it comes in a whole tube like wrapping paper, just cut squares so you can see the circles on the backing).  It’s a pain in the ass but you will thank me later when your line of dots are not on all crooked. 

My steps:
1. Measure your wall and determine how many circles you can fit on the width (the entire width so like you’d be laying circle next to circle) split that in half so you now know how many circles you will be using and how many spaces in between.  From there it is much easier to determine spacing between the circles.  (You will have to adjust numbers depending if you want smaller spacing but this worked out for my larger spacing)
2. Once you have the approximate measurements, use painters tape to tape up your circles (you still have not removed it from the backing yet) and mark where you want all your circles.  Stand back and make sure the lines are not crooked or spacing is off.  After you are happy with that, now you know where exactly to put the circles.  Start peeling off the backing and go for it! 

I will say that I did have a few mistakes but the circles were very easy to peel off and put back on.  They are not reusable but they are removable.  So if you make a mistake it will be easy to peel off and put back on right away but if you leave it for a few days, you probably won’t be able to reuse it after that. 

Categories
beauty crafts crafty-ish DIY Uncategorized

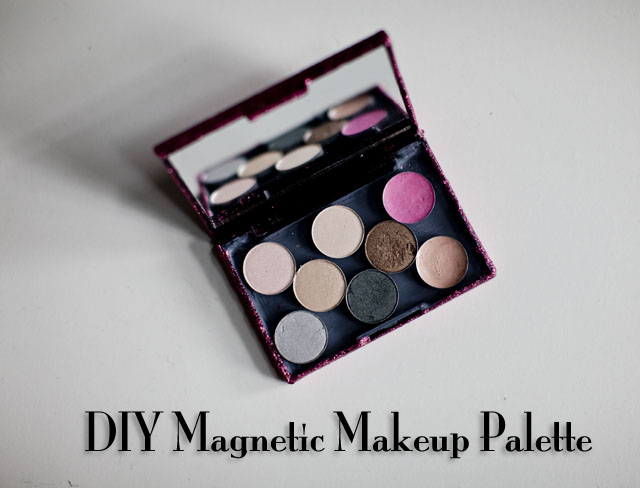
DIY Magnetic Makeup Palette

I have to tell you how excited I am about this DIY Magnetic Makeup Palette only because it is something that I desperately needed.  I’m so happy that I can make an endless supply of them!  I buy a lot of palettes but it always ends up that I like some colors better than others which is fine, except when I travel, I have to take the entire palette with me just so I can use those 2-3 colors.  My makeup bag ends up bulging with 3-4 different palettes and I know that I don’t need to bring all of them but I really like those specific colors.  I did end up buying this large magnetic palette and depotted quite a few of my shadows but at $25 for each palette, they certainly aren’t cheap and I’d almost like to spend that money on more make up, know what I mean?

You can find inexpensive palettes easily by shopping at stores that sell makeup geared towards tweens and teenagers. Forever 21 has this palette for under $9 that would work great. I got mine in store at Forever 21 for around $5 and got lucky since these have a mirror built into them.

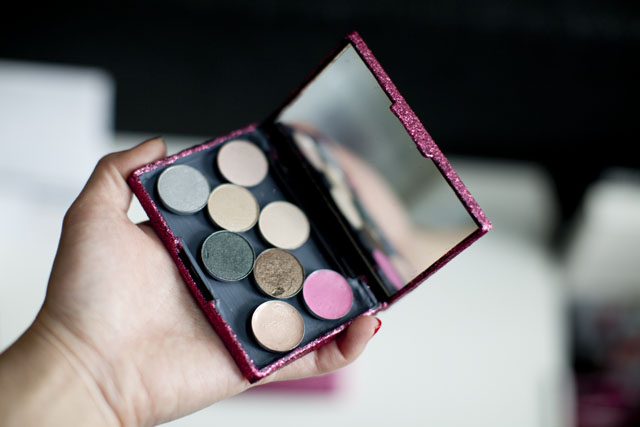
Here’s my finished product!  And of course I glittered it too. 🙂

DIY MAGNETIC MAKEUP PALETTE

You want to know what my secret ingredient is?  Magnetic Paint!  I didn’t even know they made such a thing I just googled it, hoping something like that existed and indeed there was!  Just a tip, if your local craft store is small it’s going to be impossible to find it as I found most places here didn’t carry it (even my local Jo-Ann’s).  I just ended up ordering it on Amazon. 

Even though I wasn’t sure it was going to work, I documented the process.  So thank goodness it did work!

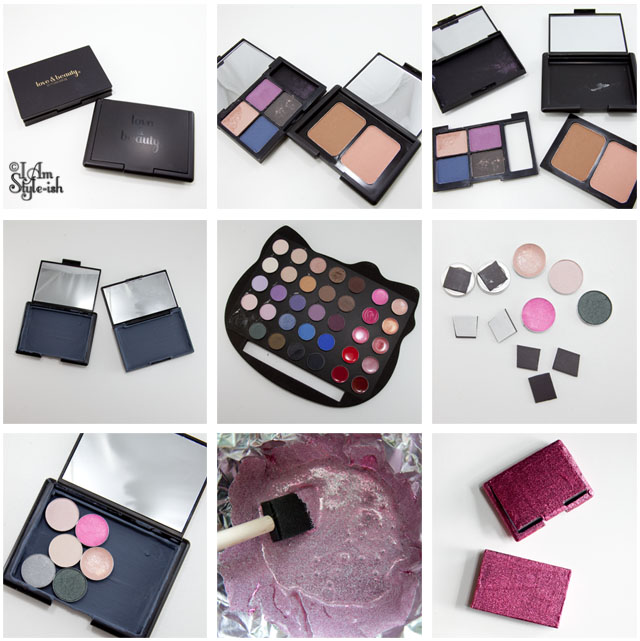
First your tools:

DIY MAGNETIC MAKEUP PALETTE

1ST STEP: REMOVING THE CURRENT MAKEUP PANS

  • With your palettes, take out the entire part that is holding the current pans.  In most of the palettes, you can usually find where it’s glued together and with a little strength, it’s easy to pull off or use a tool to get it underneath and pop it off.
  • Clean the glue residue off the inside of the bottom of the palette.

2ND STEP: PAINTING AND ADDING MAGNETS

  • Paint the inside with the magnetic paint (it took me about 4-5 coats before I was happy with the magnetic-ness.  I tested my magnets to make sure it stuck.  You can paint coats every 2-3 hours but once it’s done, let the paint dry overnight.
  • Take your palette and depot the pans.  This palette was easy as it popped right off.  It was just a bit of glue on cardboard but some are harder to depot.  (I’m not going to get into depotting as that it’s own animal but google “depot eyeshadow” and you’ll find tons of tutorials)
  • Cut the magnet sheet to the size as needed.  Stick the adhesive side to the bottom of the pans.

3RD STEP: ADD YOUR CUSTOM COLORS AND GLITTER!

  • Fill your pans to see how it looks/fits and if the magnets are sticking well.
  • You could stop here if you didn’t care what the outside of your palette looks like.
  • I have so much glitter left over from my previous glitter projects (here and here) so I wanted to use it and make my palettes even prettier.  (ha! I just love any excuse to glitter!)
  • I’ve gotten a lot of questions about the mix of glitter to mod podge.  You want to make sure that all your specks of glitter are covered in mod podge.  This is how you ensure the minimal fall out.  1 parts glue to 2 parts glitter is what I aim for.
  • If you have your pans still in the palette, take them out before doing any painting.
  • Coat in glitter and let dry between coats.  Paint until every single area is covered in glitter!
  • Instead of glittering it, you could also just paint the case and it would look just as cute.

And there you go!  A glittery, magnetic case that you can change out the pans to suit your different looks!

DIY MAGNETIC MAKEUP PALETTE
Here it is with a few other items that I keep in my hangbag so you can see the size.  It fits in perfectly don’t you think? 🙂
DIY MAGNETIC MAKEUP PALETTE

*If you are wondering about my makeup palette that I depotted, it is this Hello Kitty for Sephora palette.  I loved the colors but hated how big and clunky the case was so I rarely took it out to use it.   Now that I’ve depotted all the makeup, I’ve got a fun case to hold other stuff and am actually using the palette now.

If you liked this post, check out my other glitter DIY posts!

Categories
crafts crafty-ish DIY Uncategorized

Glitter… Everything!

Ever since I made my glitter clutch, I’ve been looking around at everything that we have around the house that I can glitter.  I told you I had a lot of glitter projects to share, I finally gathered them together to photograph!

First up are these little tea light holders that were totally boring on their own…


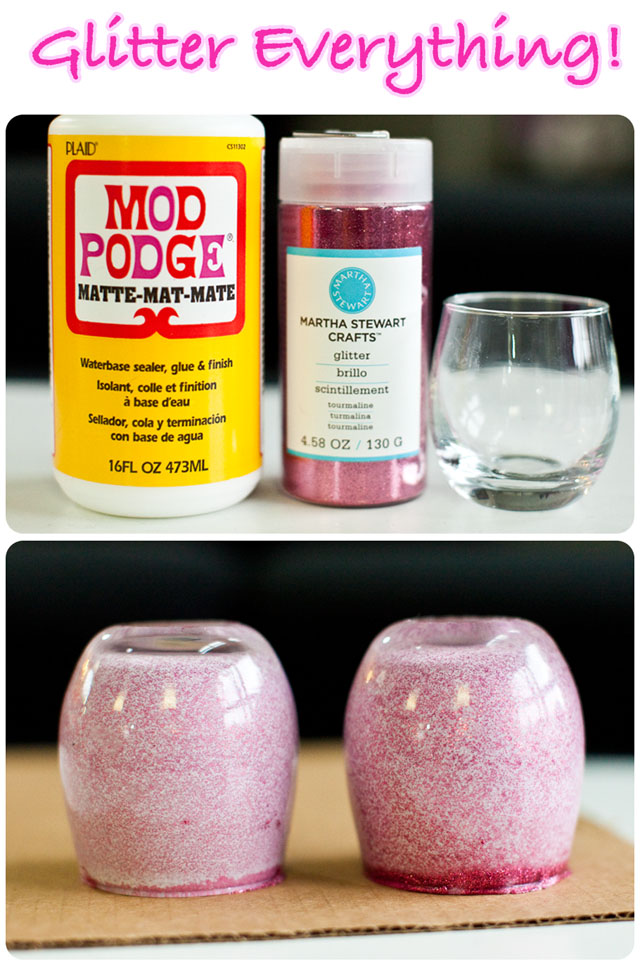
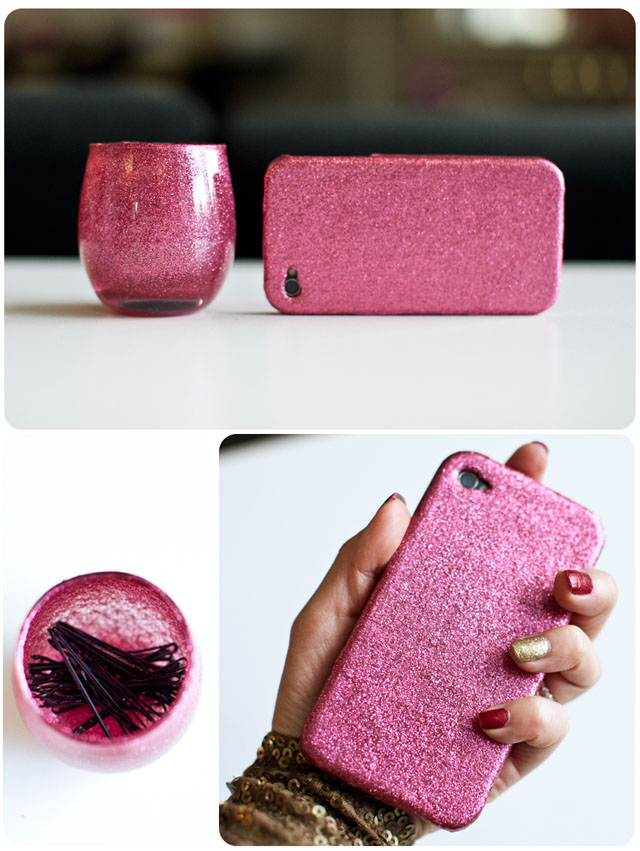
I put together a mixture of Mod Podge and glitter (same as the glitter clutch) but this time I dumped the mixture in the candleholder, swirled it around until it covered every area and then let it dry upside down for a day.  Now, they are adorable and I keep one in the bathroom to hold my bobby pins which has made my life so much easier when doing my hair!  Obviously the other thing I glittered was my iPhone case.  I had a freebie case that I wasn’t using from when Apple was giving out free cases (because of the antenna issue).  A plain black case instantly turned into something very girly and glam that I use all the time now!  (I just used the mixture and dipped a foam brush into it and painted the mixture right onto the case.  It needed about 3 coats.) (get the set of Mod Podge and brushes here)
*A note on the tea light holders, you can still use tea lights in them even with the glitter, just get the battery operated ones. They look just as cute and they even flicker a little!  I have ones that I always keep in my candle holders.
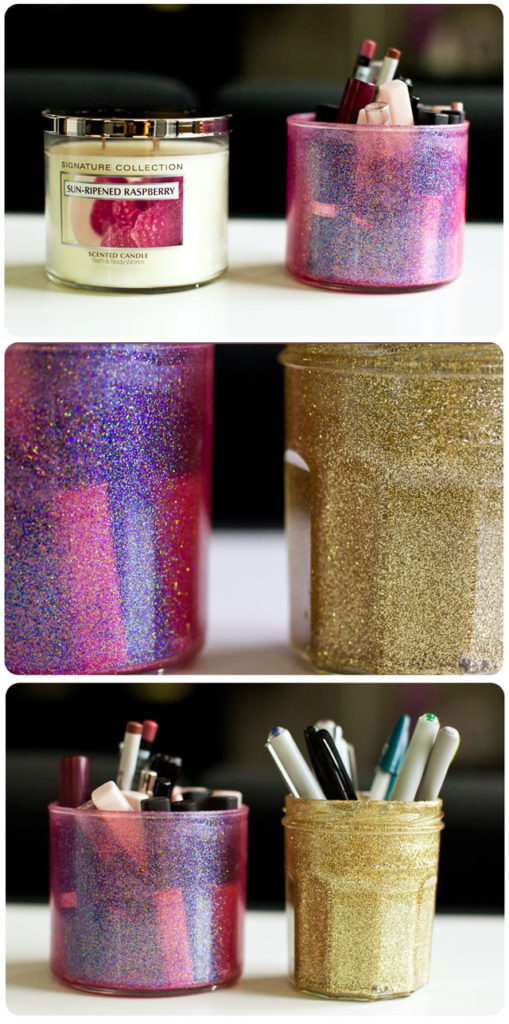
I buy a ton of candles and always try to keep the jars once they are done being candles because they are great storage holders (I use a few to hold my makeup brushes).  So instead of just cleaning it out and leaving it as is, I glittered it!  I used a different glitter than the Martha Stewart for this one and it was a very fine, almost powdery glitter which I didn’t like as much.  It took many more coats to get it to be that glittery.  The Martha Stewart glitter is the perfect consistency and opaque which I think looks better.  To clean out almost empty candle jars, boil a pot of water with about an inch or two of water (depending on how big your candle jar is and how much wax is left) and put the candle in the pot.  It will melt the remaining wax in the jar and then you can dump the wax straight into the garbage and then wash the container out.  Use a fork to scoop out the wick holders.
I filled it with my lipglosses and lip liners.  Now my bathroom has a lot more glittery additions! And lastly, a jam jar converted into a gold pencil holder that makes my desk much more fun!
There are so many things you can do with Mod Podge and glitter. Just look around your house, I’m sure you’ll find as much stuff as I did!