Categories
crafts crafty-ish DIY Uncategorized

DIY Glitter Clutch

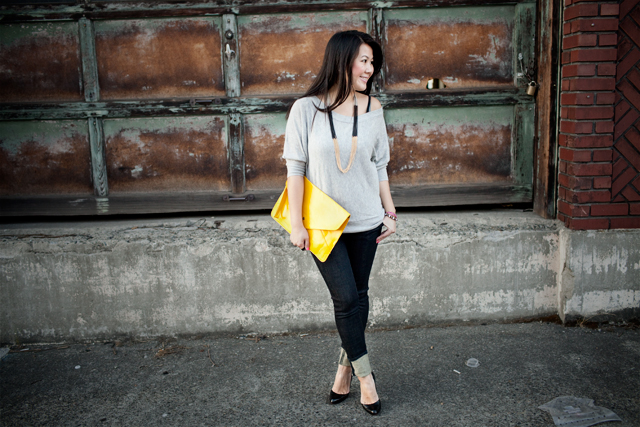
Do you remember this clutch from this lookbook?Rag_Bone_Jeans
Well, now it looks like this!
DIY_clutch2
I made it gold and glittery!  I LOVE it!!  

You see I’ve been in love with the gold sequin Zara clutch that I’ve seen on a ton of bloggers (seen here on my sister) and all over Pinterest.  But I missed out on getting it online and don’t have a Zara nearby so I was searching for other cute sparkly clutches when I thought, “why don’t I just make one?” I wasn’t super attached to the yellow clutch so thought it would be the perfect canvas to make it glittery.  Obviously the Zara one is covered in sequins but I did glitter because it was easier but just as pretty.  Pictures don’t do this baby justice, it looks amazing in person!
What you need:
  • Clutch 
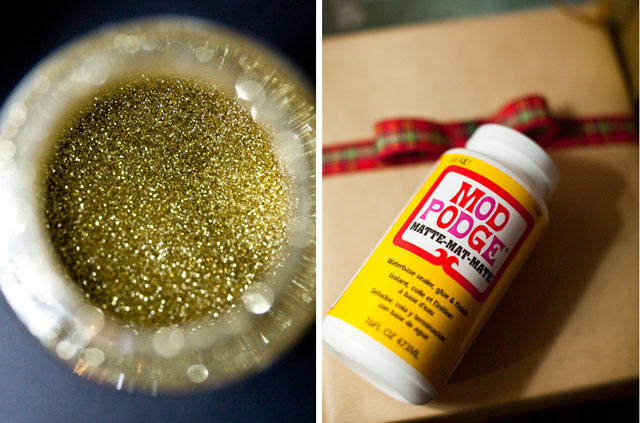
  • Mod Podge
  • Very Fine Glitter – I used Martha Stewart Glitter (and after this project, I’m seriously considering buying this set of all of the colors! I want to glitter everything now!)
    *You could try chunky glitter if you want the look of the clutches above.  I’m not sure how it will turn out but I do like the smoothness of mine. 
  • Foam Brush
  • Bowl
  • Patience 🙂

I don’t have step by step pictures because I did this over two days and it was kind of a trial run for me anyway, but you don’t need the pictures because it’s super easy.

  1. Mix the glitter and Mod Podge into a bowl (I lined my bowl with foil so that it wasn’t a sticky mess and clean up was easy.) I’d say 1 parts glue to two parts glitter is good.  I just eyeballed it though until I thought you could see enough glitter through the glue mixture.  You want more glitter because when it dries you want as much glitter stuck on as possible, otherwise you’ll have to do way more coats.
  2. Start painting the clutch with the foam brush.  Do only one side!  When you paint it on, it will be all white and goopy, don’t worry, it dries clear and all you see is glitter.
  3. Wait 20 minutes or longer until it’s dried and you see the glitter.
  4. Wash your brush thoroughly between layers of painting because you don’t want your brush to get hardened and not be able to paint anymore.
  5. Paint the next layer with the same mixture.
  6. Repeat steps 3 – 5 until the entire surface is covered in glitter or until you are happy with how it looks!

(I wasn’t sure how much Mod Podge and glitter I needed so I just bought the big sizes of both, but ended up using about only 1/3 of both of them.)

Tada!  That’s it.  Mine took about 4 coats on each side.  My clutch has a zipper on the back and I just painted over the entire thing so you can’t open the zipper anymore but it didn’t matter that much to me.  I never used that back pocket anyway.

The best part about doing it this way is that there is no glitter fall out!  I have been leaving this clutch all over the place, on our dining room table, on the couch, on my bed and no glitter has fallen off.  Hubs loves it because usually when I do glitter projects, we find glitter EVERYWHERE.  haha!  And it’s great because it doesn’t come off on your hands.  Now I have the perfect glitter clutch for the holidays!

DIY_clutch
Have fun and let me know if you try it too! I’d love to see how yours turn out 🙂  I actually ended up glittering a few other things so will share them soon!
Categories
crafts crafty-ish jewelry Uncategorized

Friendship Bracelets Tutorial

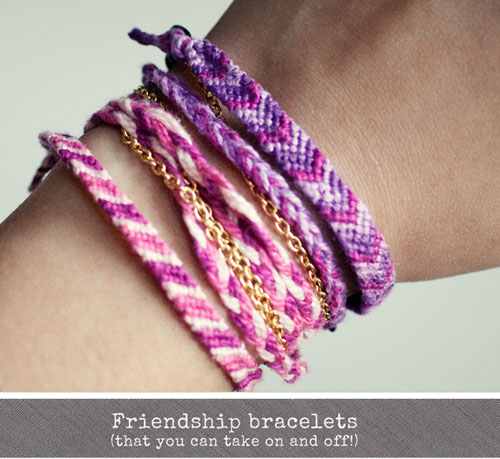
The friendship bracelets trend is back in full force and I jumped on the bandwagon this summer, making quite a few.  I noticed quite a few other bloggers making them too and it’s fun just to see how everyone makes them just a little bit differently and the color combinations you put together.  I love the look of the friendship bracelets but one thing that I didn’t like was that I felt like after I tied it on, I was kind of committed to wearing them for at least a week before I got sick of it and tried to un-knot it or cut it off.  I came up with a super easy way to making them kind of like bangles so that you can actually slip them on and off.  I also came up with a really easy way to use your embroidery floss to spruce up old bangles which you’ll find the tutorial at the bottom of this post.

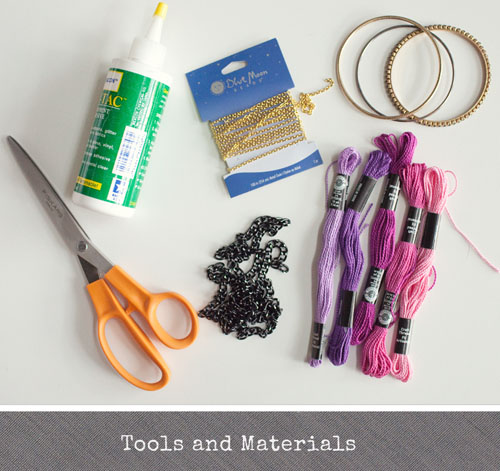
Pretty self explanatory but a few of the essentials to make this project.

  • Scissors
  • Glue (to be used as the very last step)
  • Thin chain – which I used on my middle bracelet above
  • Bangles (I used ones I already had or get this stack of 20 bangles for $5) – for the last tutorial
  • Embroidery Floss
  • Thicker chain to attach to the bracelets

Tutorial 1:
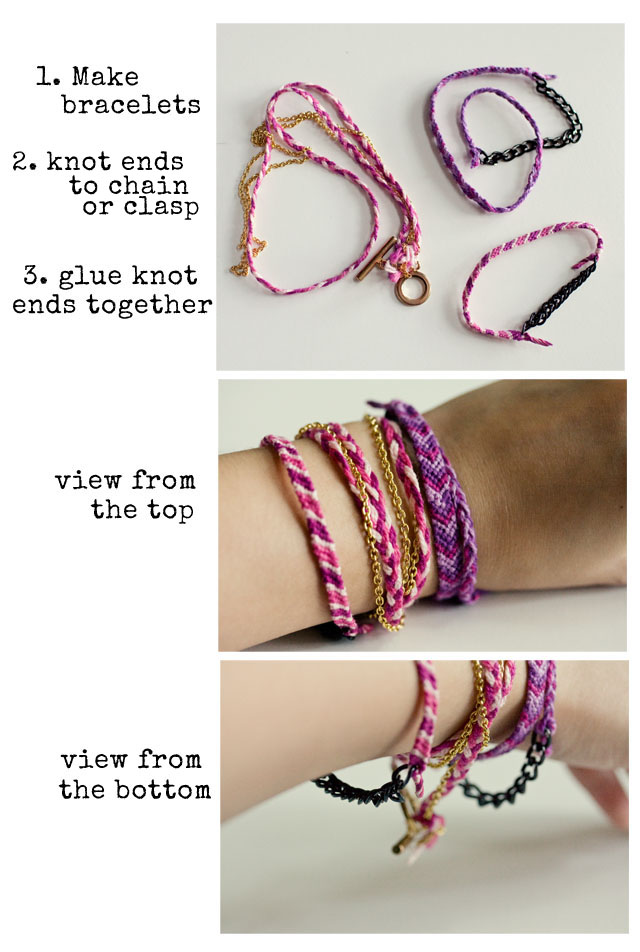
Basically once you are done making your bracelet, take your ends and
knot them through your chain.  I try to leave my ends very long so it’s
easy to slip through the chains.  Double knot it to make sure it’s
secure.  Cut the ends to a shorter length and with a craft glue, dab a
small amount onto the ends and just squish the threads together so that
the frayed ends are glued together.

You’ll notice for the middle one with the chain, I attached a clasp to it because I wanted to be able to open it and wrap it on my arm rather than slipping it on like you have to do with the chain.  What I love about this is that the chain or clasp is always going to be heavier than your bracelet so the chain always stays on the bottom and the bracelet doesn’t flip.
Tutorial 2:
This one is super easy and fast!  Just take a bangle and start wrapping the embroidery floss around.  For the plain
one, I just wrapped it twice in one area and kept the spacing even
between the wraps.  If you do it nice and tight, the thread doesn’t
move.  You don’t even need glue for this one because when you start it,
keep the beginning trail of thread on the underside of the bangle and just wrap
around it which keeps everything in place.  When you are done, just tuck the
end into the already wrapped sections (also on the underside).  For the rhinestone bangle I
wrapped in between each of the rhinestones but I didn’t like it with just one time around so I wrapped the entire thing twice. 
Almost all of the materials that I used in both bracelets were found at a craft store for pretty inexpensive.  The only thing that I bought separately at a jewelry supply store was the toggle clasp for the pink/chain bracelet above.  (And of course the bangles but they were just sitting in my jewelry box.) Overall though I think each bracelet probably cost less than a dollar to make!

Have fun and let me know if you make one! 🙂

Like this post?  Also check out my “Make your own cocktail rings” post for an easy way to turn old earrings into rings!

Categories
crafty-ish DIY jewelry Uncategorized

Easy DIY! Make your own cocktail rings

I had a few sharp eye readers notice my vintage earring to ring DIY that I occasionally wear on my lookbooks and ask for a tutorial.  It’s really quite easy and not much skill is needed except the ability to use pliers and glue! 🙂  When I go vintage shopping, I often find pretty brooches or earrings and I think “that would look fabulous as a ring!” which is basically how I came up with the DIY.  I stumble upon a lot of vintage clip on earrings that I love but wouldn’t wear as earrings so this is a terrific way to make good use out of them.

1. Find the pieces that you’d like to turn into rings
2. The tools: Glue | Pliers | Felt | Ring Base
3. & 4. The earring you want to make into a ring + the ring base
5. Take the clip of the earring off by gently removing the entire piece with pliers
6. Cut out a piece of felt that just covers the base of the earring
7. Glue the felt to the earring with glue (I used Beacon Gem-Tac Glue)
8. Glue the ring base to the felt (I used Aleene’s Jewelry & Metal Glue)
Hold the ring base down tightly to the jewelry for a few minutes
9. Voila!  A new ring for you to wear!
A few notes: 
  • I used 2 different glues because the Gem Tac glue is a lot less stronger and glueing the felt to the earring doesn’t require a super strong glue, whereas the ring base is really light and can fly off really easily so I used a much stronger adhesive to glue the ring base on.
  • I searched high and low at all the craft stores around here for ring bases and came up with nothing so you may have better luck at the stores near you.  If not, I went on ebay to get mine.  I don’t remember the seller I bought them from, but these are the same bases.  ($8 for 100 bases so not expensive at all.)  I like that they are adjustable so I can wear them on any finger.
  • The pliers I used are a jewelry pliers that also cut wire and other metals.  Really effective when you have earring bases with posts or a pendant where you want to clip off the loop where the necklace goes.  For the clip on earrings you can use regular pliers too.
  • If the earring back (or whatever you are using) is smooth, you can probably skip the felt part.  That’s just so you have a smooth surface to glue the ring base on.  
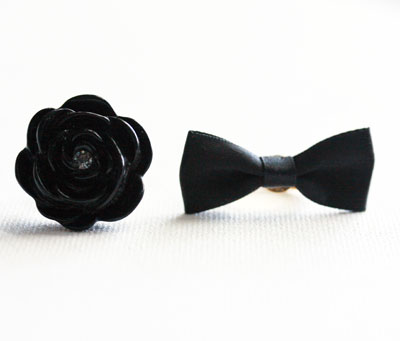
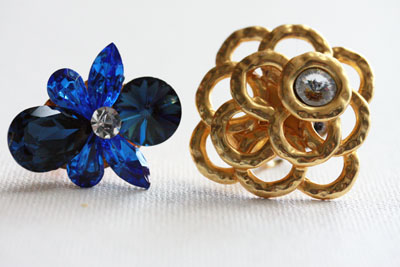
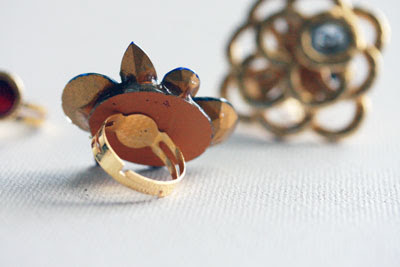
You can make rings with anything that you find that can be stuck on the ring base.  Here are a few that I made: The flower was previously a pendant that I found at the craft store for like $2.  And a bow that I also found at the craft store for really cheap and came with a pack of 6 bows.  Both make for cute rings for very little cost!
 
These two are my favorites that I’ve turned into rings.  The blue rhinestones are my mom’s earrings that she wore back in the 80’s.  I rummaged through her costume jewelry box and found lots of fun jewelry to either just wear as is or make into something new.  The gold one on the right is a vintage find from an antique mall that was previously a clip on earring.  The nice part about having earrings is that you always have one to give away to somebody!  My mom loves having her old earring that was just sitting in her jewelry box as a fun ring to wear now.

Have fun with it and even just look through your own jewelry box for things that you stopped wearing long ago and see if you can upcycle them into a pretty cocktail ring for your finger!  Just a caveat that this is not the most effective way to make into rings as the glue can become loose and it can fall off so I do recommend using very strong glue when making these and also jewelry pieces that aren’t too pricey/meaningful in case something does happen to them.  I’ve had to re-glue a few that have come loose after a long day of wearing them and accidentally smacking them into things but really, a dab of glue is not so hard to do so it’s worth it to me!

P.S. A few new posts from me over at the Smarter blog!  Check out my favorite accessory to add a pop of color to your outfit and my tips on how to style pleated skirts!

Categories
crafty-ish fashion lookbook Uncategorized

Lookbook: DIY Scarf

J and I were shopping at Blackbird, a trendy men’s store and I spotted a scarf that I had to have. It was basically a jersey knit scarf that was sewn together like a circle. That way, you didn’t ever have to worry about tucking your scarf in or tying the knot. Plus I liked the way it looked when it was on as it kind of scrunched up like a cowl neck.

I took it out to wear one day and looked at it and thought “I could totally make this.” so went off to find fabric, took out the sewing machine and there you go! Instant cool scarf. I like the extra accent it gives to my outfits and unlike regular scarves it doesn’t hang down.

What I’m Wearing:
Scarf: by me
Jacket: Club Monaco
Tank: Urban Outfitters
Jeans: True Religion
Shoes: Miu Miu

IMG_6945

And I had enough fabric left over to make one for Macho!
Instant cool dog.
macho scarf

p.s. for all you out there still curious about my digital perm, that is how my hair looks when I don’t do anything but blow dry it. More wavy than curly.
Categories
crafts crafty-ish House my babies Uncategorized

Crafty-ish: The Modern Dog Bed

I think that J and I are fortunate that we have the same taste in home decor. There is never any fighting over what kind of lamps or couch or wall decor. We pretty much agree on everything. We have pretty simple modern decor at our place but the one eyesore of the whole place was the dang dog bed. It is, of course a necessity, but no matter what kind of dog bed we bought, it just turned into a messy looking dog area. It bugged us. A lot. So we did something about it.

I’ve seen “modern” dog furniture online but everything was over $1000. I mean seriously? I love my dogs and everything but there is no way I would buy something that pricey for my dog who would probably chew the corners. J, being the genius designer he is, drafted up a brilliant plan for a dog bed using tables. When we were at Ikea picking out the tables, I noticed that they have really great looking fabric and so we ended up buying some and then we were in the dog section and found a dog bed that would fit perfectly within the space.

I’m always a bit wary of DIY projects because you know how sometimes you can have this fabulous idea in your head but when it comes out it is nowhere near as fabulous? Well, this project actually turned out just as fabulous. Maybe even better.

I present to you, our DIY modern dog bed…

dogbed

It is basically two tables stuck together. Do not ask me about how it was assembled as I don’t go anywhere near power tools, actually any kind of tools. J handled that part. I however, took the ugly dog bed (which was covered in black and white spots) and covered it with the fabric. I then took one of their favorite blankets and sewed the fabric on top so that underneath is their favorite plushy furry fabric that they can snuggle under. I found a little pillow in our closet and sewed up a pillow case just for a laugh. I like that it makes it look like a human bed.

And here are our babies enjoying their new bed!

m&s bed
m&S bed2

An added bonus of this is that we now have an extra table to put things on! Most of our furniture is that dark wood so it blends in well with everything.

So there you go! Who knew Ikea sold modern dog furniture right? 😉 All it took was some creativity and now the dog area actually matches the rest of our place.

I have to mention that painting on the table. We were in the Fremont neighborhood and stopped in the Orange Splot art gallery. We ended up loving these paintings by Ryan Henry Ward and J bought one for us. Later on we found out that he’s doing murals all over Seattle (for free) and we have been going around the city hunting for them. They are incredible pieces of art and it is so cool that he is brightening up the city with his artwork. Click here to read more.

p.s. I know it looks weird that there’s just that one picture of J above the dog bed, but the rest of the pictures on that wall are individual pictures as well so it looks good when you see the entire thing. J is not THAT vain that he would have a picture of just him hanging up. haha!