I love decorating my home for holidays but I don’t love to spend a lot of time or money. My trick is to create small areas in my home that I can decorate with a few key items that are festive for the holiday and I try to DIY a lot of it myself!
I also try to keep it in line with my current home decor so I like to keep it modern, but fun as well.
Easy DIY Modern Halloween Decor
My necklace wall is one of the first things you see when you walk into my home and I don’t like to change too much for the decor. I went on a hunt to find a pink pumpkin and luckily found this cute one that fit right in!
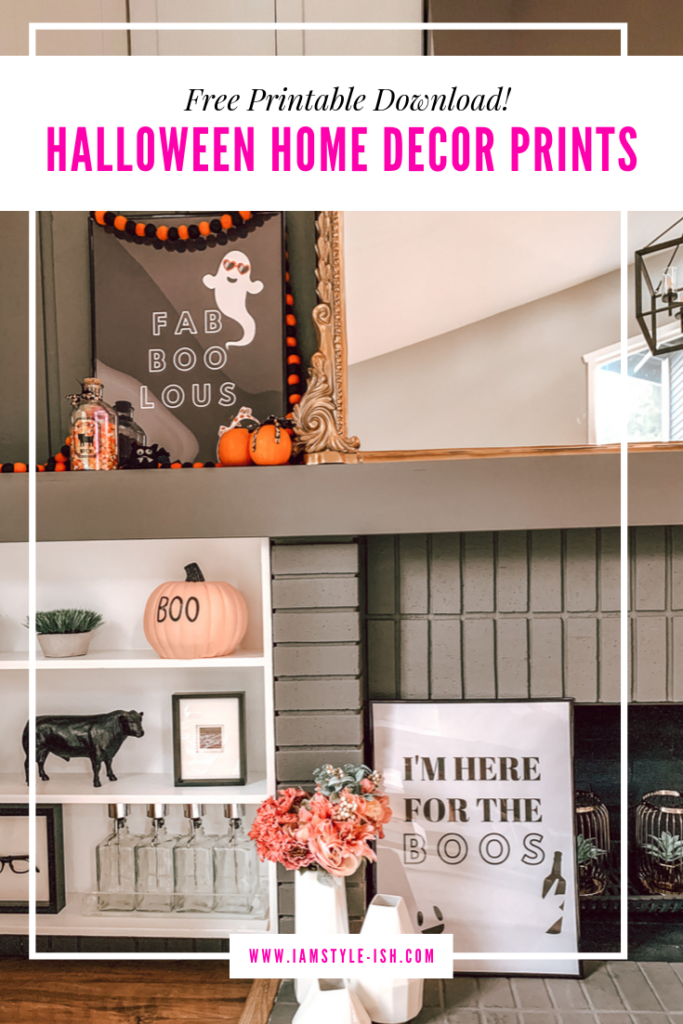
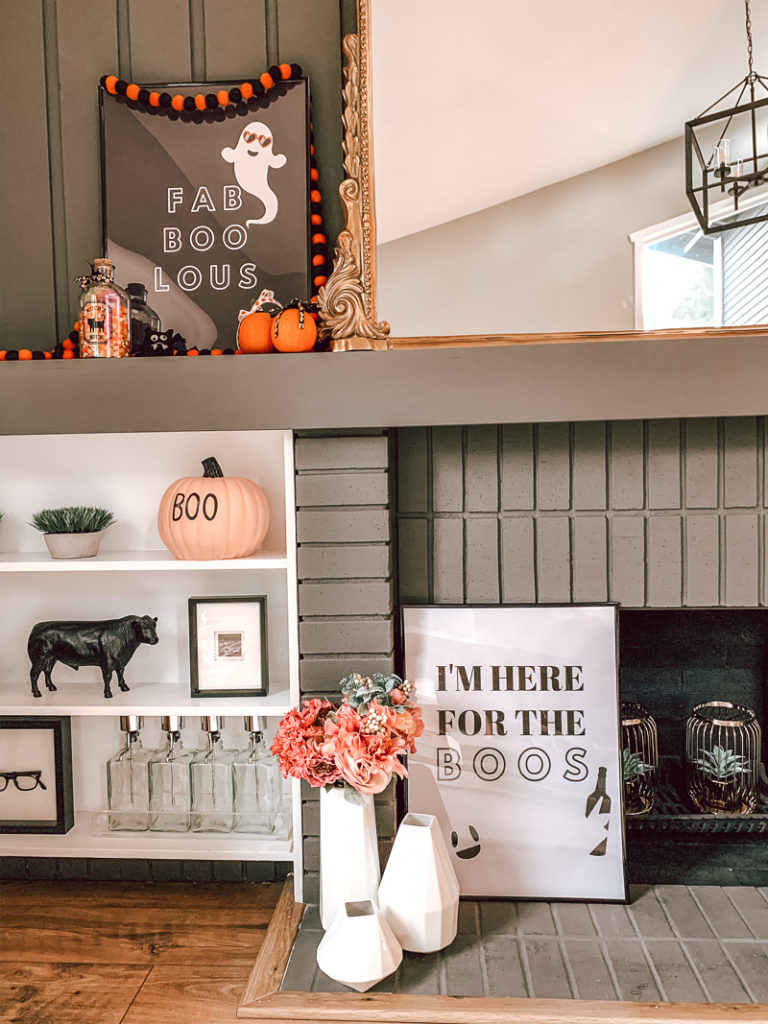
One thing that I always do is to add a few prints to my decor that are funny and cute. It’s such a simple and easy way to decorate and it doesn’t cost a lot! Keep scrolling below to get this printable for FREE and I’ll share how I printed it too!
Girly Glam Halloween Decor
It’s easy to decorate your bookcase with some touches of halloween. I loved that I found these pastel pumpkins but you can also DIY it yourself if you get acrylic paint and paint over either real or craft pumpkins.
Since I was trying to go for a more “glam” halloween look I went with this sparkly skull and the silver pumpkin. Aren’t the bats adorable? Those are handmade by my mother in law!
Simple and Modern DIY Halloween Decor Ideas
Here’s a peek at my fireplace! I love that it’s just the right amount of Halloween and not overwhelming.
Even the smallest touches can make a difference. I put halloween ribbons on the little pumpkins and found a cute halloween jar at the craft store and filled it with candy corn. I also found the felt ball garland at the craft store and since I bought everything a little later in the season, everything was 60% off!
I just love both the prints as I wanted to keep them simple and to the point. They also make for really great Halloween party decor!
I made these a bit bigger so that they can print up to 18×24 inch print size, which is the size in my photos here. If you want to print them on your printer at home, you will be able to print them out on regular 8.5 x 11 paper.
How to get large prints for cheap
Getting large photo prints can be expensive so to save money, I sent my files over to Staples and got the white one printed as an engineering print. Because of the way those print, it costs way less than if you sent it as a photo print. It was only $2.99! The black one can not be printed as an engineering print but the sales associate was very helpful and recommended a poster print that cost about $9. $12 for two large size prints is not bad at all!
And since these are just temporary, you don’t need to buy expensive frames for them. I picked up ones similar to these frames that are less than $10 each!
Enter your info below to get both prints emailed to you!
.
Have fun and if you use them, tag me on social media (@tiffanyish on instagram) I would love to see!
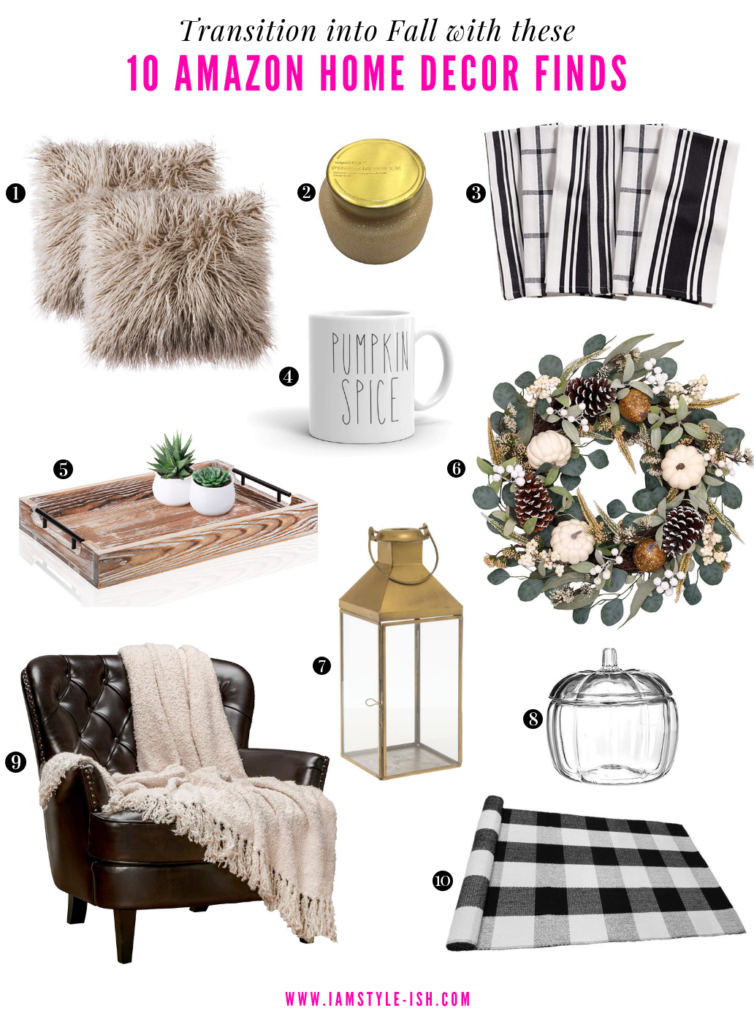
I am sad to see Summer go, but I am so excited to start transitioning into Fall. The weather, the fashion and the home decor are my favorite in the Fall. As the seasons change, I love to update my home decor to fit the season and feel festive. I have found some great Amazon Home Decor Finds that are a quick (hello prime!) and easy way to add touches of Fall to my home and make the transition from Summer to Fall more seamless.
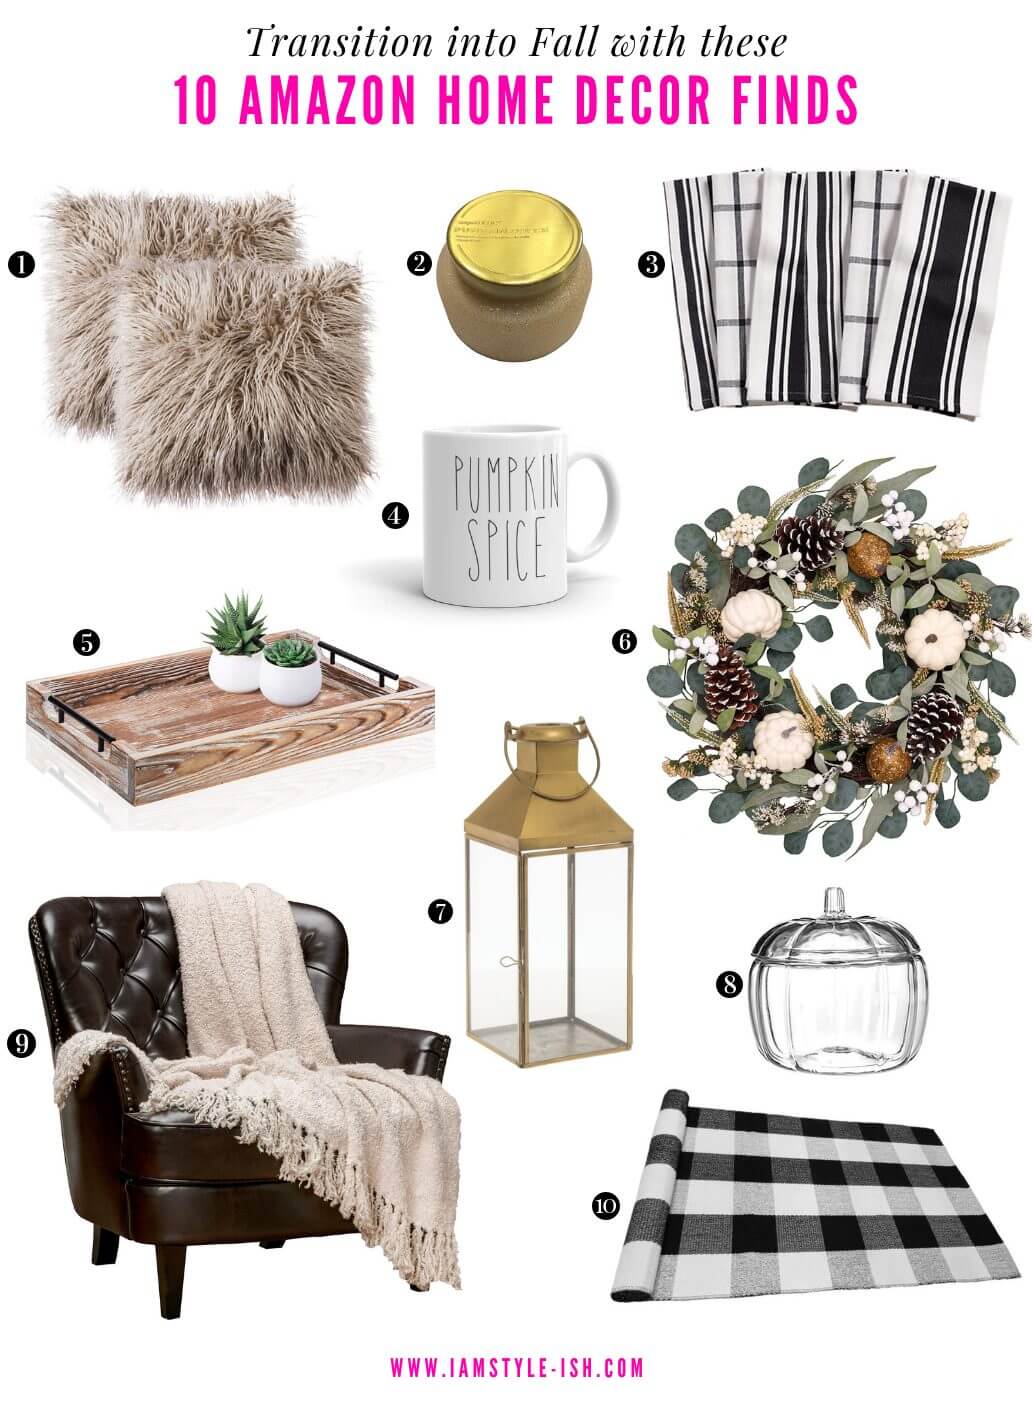
Check out my top 10 Amazon Home Decor Finds to help you transition into Fall below!
Transition into Fall with these 10 Amazon Home Decor Finds
Throw pillows are a simple and instant way to update a space. These pillow covers can go right over pillows you already have and have a fun faux fur texture that feels cozy for cooler weather.
Kitchen towels are another small thing I change per season as it’s just a simple detail that can really change the tone of the room. These black and white printed towels are so pretty and I love that they go with everything.
I love entertaining and as the cooler temps come in, it’s so fun to entertain inside and outside. A great tray like this is great for those nights or even would look cute on your coffee table with some coffee table books and candles on top.
Instantly amp up your exterior with a pretty Fall wreath. I love that this one mixes in the white pumpkins and could be left up even through Thanksgiving.
This post is sponsored by SimpleHuman. All opinions are my own.
Moving into a new home is so exciting. Packing up though is the not so fun part. In addition to buying/selling your house, having to physically pack and move all your belongings is tiring, exhausting and so stressful.
We moved into our new home 2 months ago but we still have a lot way to go to feel completely settled in. We are still waiting on furniture, we have nothing on walls, we are waiting to paint some walls, etc… It’s an ongoing process. But one thing that I’m happy about is how much my husband, my daughter and I LOVE our new home. It’s been an easier transition than I thought to our house in the suburbs after living in the city for more than 15 years but it’s been so great.
Since I just got done with my move, I was able to see what really worked for us. Here are the top things to do to make moving day easier and less stressful along with some moving day essentials.
Use boxes that are the same shape/size
Collecting boxes from friends/family and packages in the mail are great (and free) but honestly, you will end up will some weird shaped ones, some that may end up falling apart after you’ve loaded them up with stuff and some that might just be dirty. I didn’t want to deal with that headache so we purchased a few packs of moving boxes and found it to be a great way to keep things organized and stacked neatly. This really helps when you end up living with boxes for several weeks or even months!
Categorize the boxes
It also helped to keep things organized as we tried to just use certain size boxes for clothes/shoes and certain sizes for stuff in the kitchen as things can tend to get heavy really fast and in some cases, it’s better to keep the large boxes for the items that aren’t going to be too heavy so that it’s easier to move.
Label every box and keep a spreadsheet of contents
We hired movers and at the end of our move, they thanked me for having clearly marked labels on our boxes. It really helped them not having to ask me or my husband where every single box went.
I bought these labels and just used Microsoft Word (they have really easy to use templates, just find the brand/style you are using and it’ll populate the template for you) and printed them from our printer.
How to label and organize your boxes
My labeling system also included numbers as I kept a spreadsheet that let me know what each box contained. So I would have KITCHEN 1, KITCHEN 2, KITCHEN 3, etc… and next to the label would be a general list of contents so after I moved in, I could easily know what was in each box without opening it. My husband also had access to the spreadsheet so he didn’t have to ask me every single time he went looking for something too.
A peek into my spreadsheet. Yes you guys, I really was that specific. Haha! Call me crazy but it really did help especially because we moved some boxes over before the official move, so when we were going in between houses, I always knew what we had already moved over. And yes, there’s some random stuff mixed into there like my daughter’s crib sheets obviously don’t go into the kitchen but we ended up using those things as padding for some of the more delicate items in our kitchen.
Hire movers and have a game plan
Professional movers are an expense that I think you should always try to include in your moving budget. They really know what they are doing as they move people every day and can be fast, efficient and of course strong!
Walk through each room and large pieces of furniture
We also made sure that we were all onboard with how we were going to move things. We walked through our old house with our movers letting them know which items could go first, which ones to watch out for in terms of being delicate and which furniture items needed to get wrapped/padded before moving. They advised us which items they preferred to move first as well and which items we could put to the side until the very end.
Once we got to the new house, we did a walk through with them and let them know what each room was called, according to my labels (some are obvious like “kitchen” but some like “Baby’s Room” they wouldn’t know unless I told them) That way, they were informed before they started doing all the hard labor of bringing in boxes and furniture
Take your basic necessities/appliances with you
There are some things that movers do not need to take in their moving van. It’s kind of like traveling where there are some things that you can send through checked baggage but some things are just necessary for you to have in your carry on. Moving is the same in that when you get to your new house, you will be swimming in boxes and unassembled furniture so not searching for these necessities is so helpful for your own sanity.
We made sure to hold on to a few boxes of valuables as well as boxes of necessities that we could take with us in our car. This includes things like your coffee maker, coffee mugs, dish towels, soap and cleaning supplies. And don’t forget things like toilet paper and paper towels!
The most basic but essential appliance in your kitchen
One thing that also really helped? Having garbage cans handy. It sounds so silly and not something I would have put at the top of my list but honestly, when you move, you also end up with a lot of garbage and if you don’t have a garbage can handy, you end up finding a random bag to put your trash in and it ends up piled up in a corner and not something fun to manage later on.
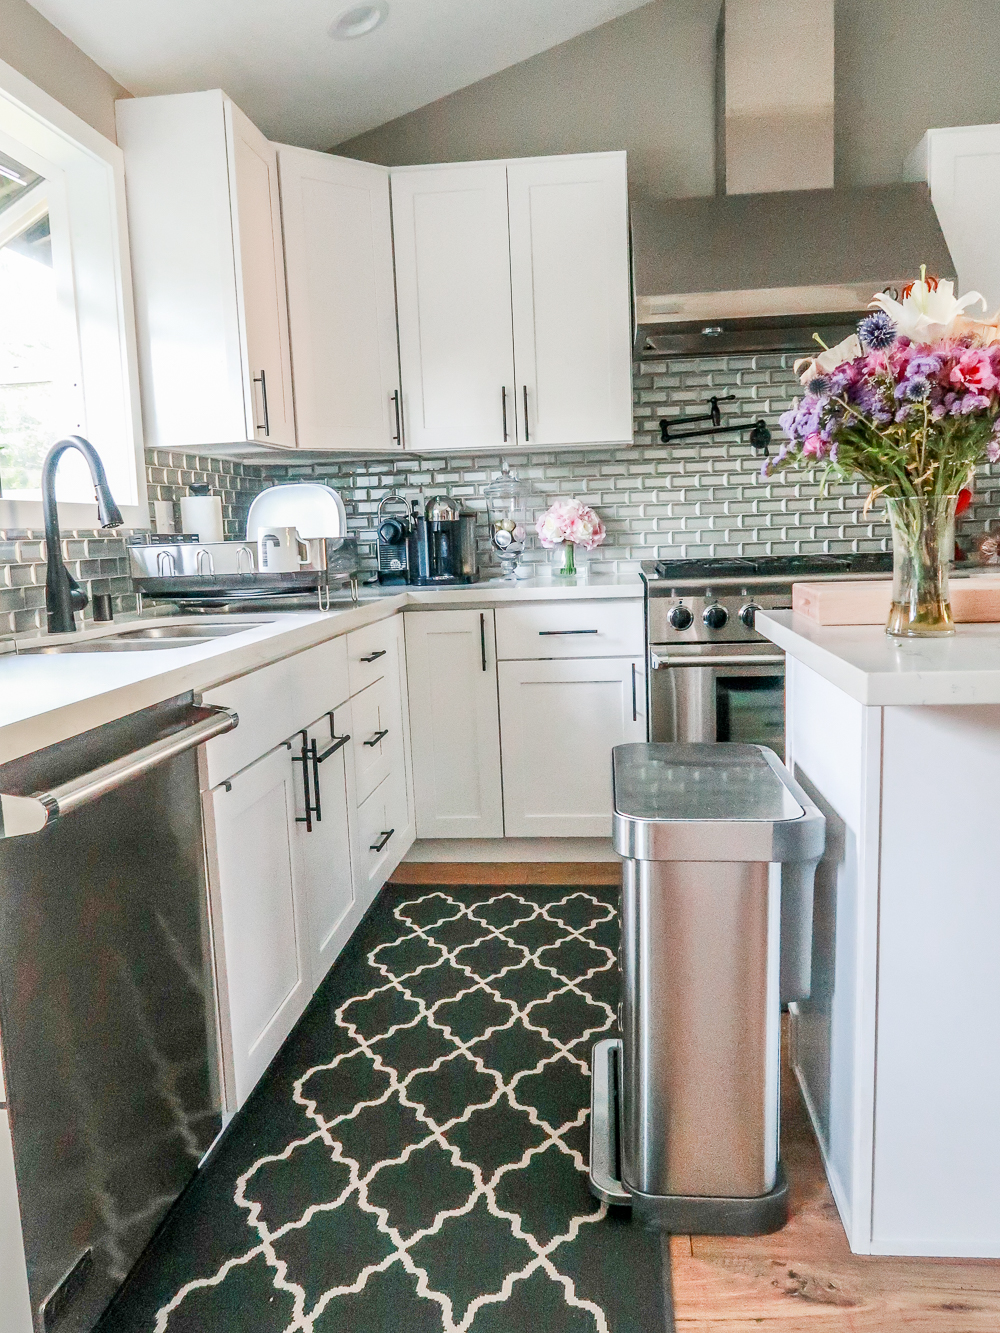
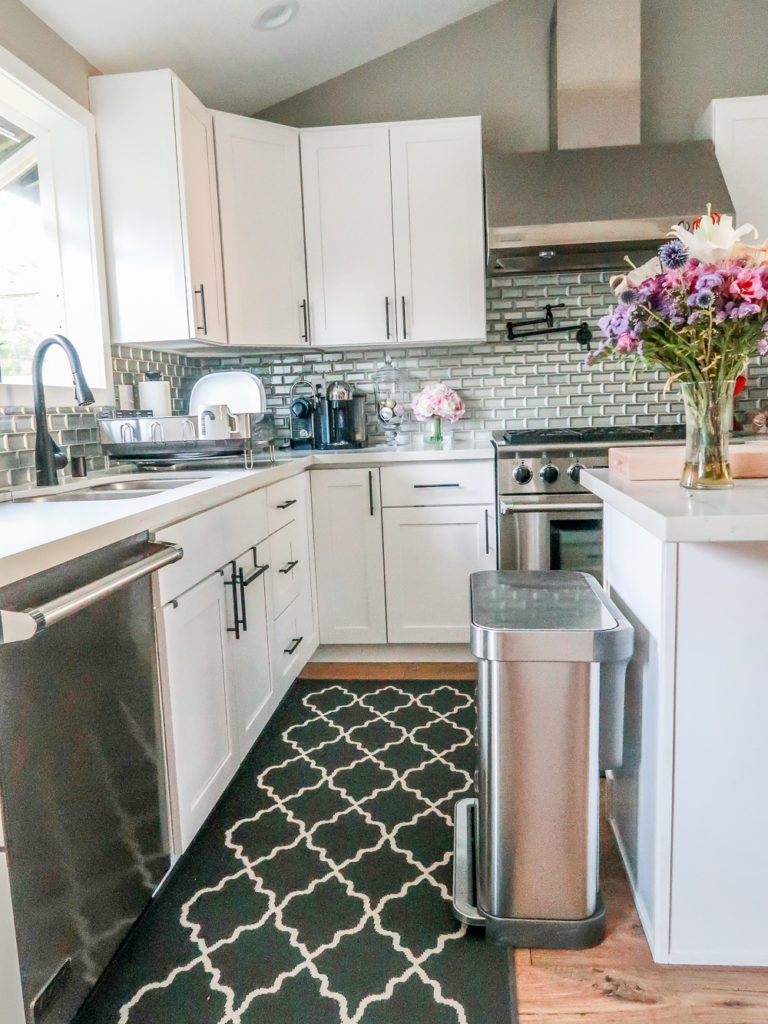
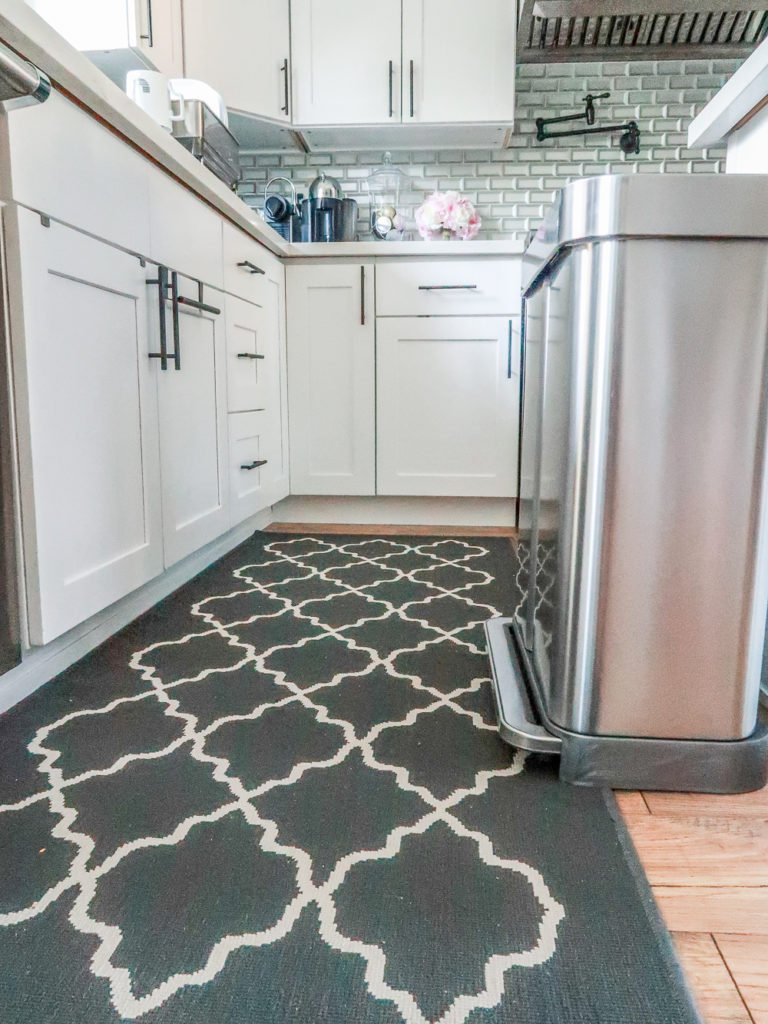
I got these SimpleHuman Garbage Cans that not only were super handy for our move, but they also went so well with the decor in our kitchen. I really wanted to find garbage cans that could blend in and not be an eyesore and I’m such a fan of the SimpleHuman designs as they are sleek and modern but also blend in with the decor.
Keep your high traffic areas clutter free
Once we got our boxes and furniture in, we still had to live our daily life and that included being in the kitchen a lot! It was a pain once I started unpacking and having to move things around or declutter just so I could get some cooking done. I ended up not allowing any sort of clutter in the kitchen just so I could get through cooking dinner without having to go crazy.
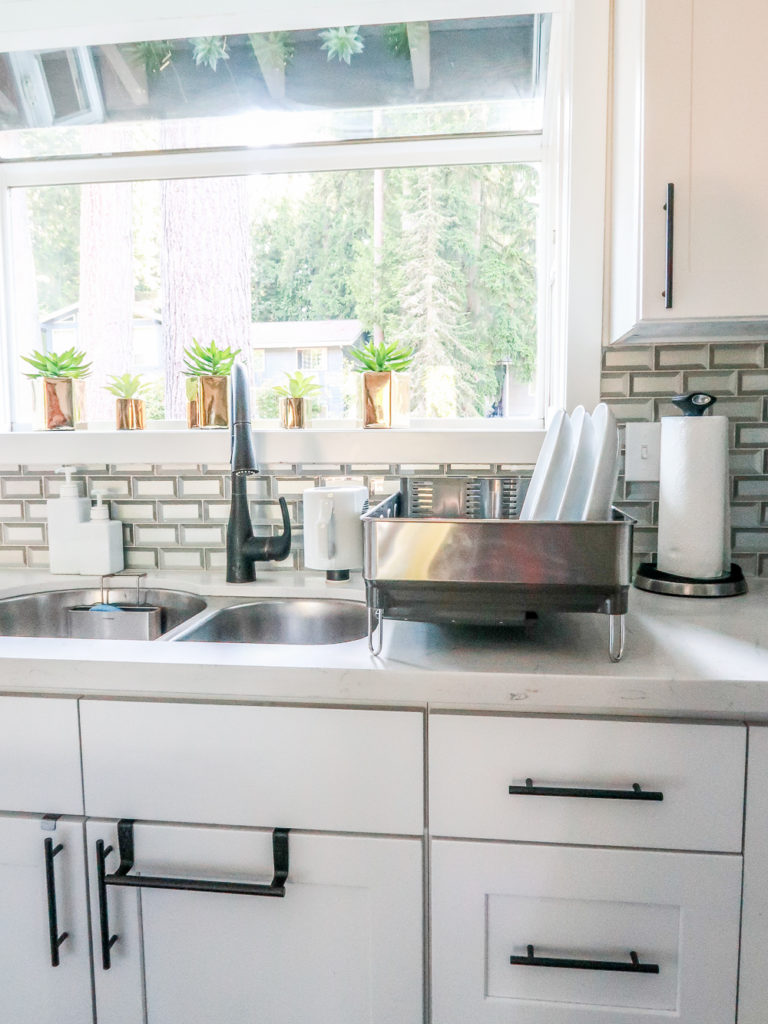
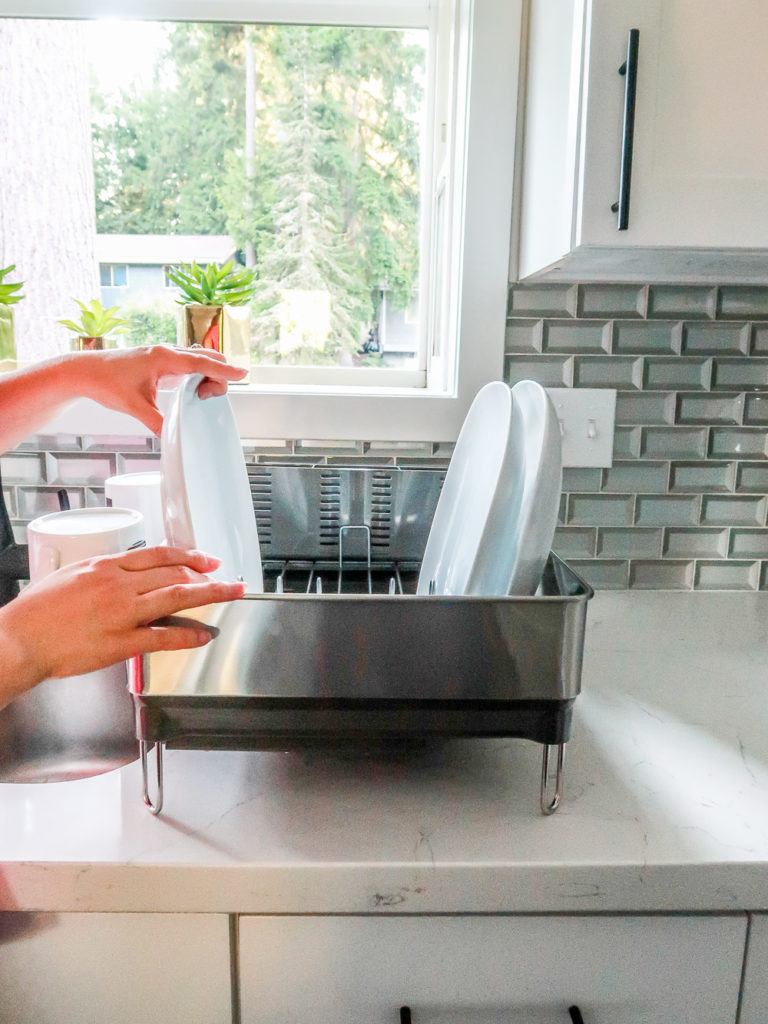
A huge plus was having our SimpleHuman Dishrack. Once we moved in and started cooking and cleaning, we realized that a lot of things that we had used in our old house just didn’t work in our new house. And since I needed to make sure that I didn’t have a huge cluster of dirty dishes hanging out everywhere, I made sure that my husband and I were washing and drying our dishes as we used them. (Our dishwasher was new but there was still an issue with it so we couldn’t use it just yet).
This dishrack is not only simple and sleek – which in itself is pretty hard to come-by with dishracks, I love that it easily drains out the water and keeps your dishes clean and dry.
Moving can be quite stressful and moving day is always a bit crazy with not knowing how things will go. On one of our last moves (before this one), we were scheduled by our movers to be the 2nd move of their day. They ended up being so delayed by their very first appointment , that they ended up showing up 6 hours late for our appointment and I didn’t think they were going to show up at all! I was freaking out and crying and trying to schedule last minute movers which is next to impossible in a busy city like Seattle.
This move was a lot less stressful due to my tips above (and finding more reliable movers!) and I hope that if you are moving, you find them helpful too!
I have a confession to make. I HATE cleaning. I love organizing and putting things away but the cleaning part, ugh, I get irritated just thinking about it. And being that my husband works full time, I own a business that keeps me busy all hours of the day and night, and we have a 3 year old + 2 dogs, you can say that our house can get quite messy. My husband is amazing and does most of the cleaning so I know I’m very lucky but of course I pitch in when I can. And even though we both feel like we clean all the time, it just seems to be a never ending battle. We decided to tackle on a full spring cleaning weekend so I prepared some lists and found some amazing hacks and tricks so I thought I’d share them with you!
First though, I came across Grove Collaborative and I was hooked from the start. Because I hate cleaning so much I’m always on the lookout for cleaning products that will make my life easier and more efficient when it comes to cleaning. I’m also a big fan of environmentally friendly products not only because I have a child that I don’t want around harsh chemicals but I also am just generally concerned about the environment and the types of chemicals and materials that are put out there. I usually buy my cleaning products at Target and Costco and Grove Collaborative carried most of the brands that I already used, plus quite a few more that I was excited to discover. Being that I am so busy, trips to Costco and Target are not that frequent so I love that these get delivered to me and I don’t have to make any “emergency trips” when I discover that we are out of something. Oh and the prices are comparable or even less expensive that what I would buy at the stores so don’t feel like you are paying premium prices for this! I would not recommend it otherwise because what’s worse than cleaning? Paying a ton of money for cleaning products!
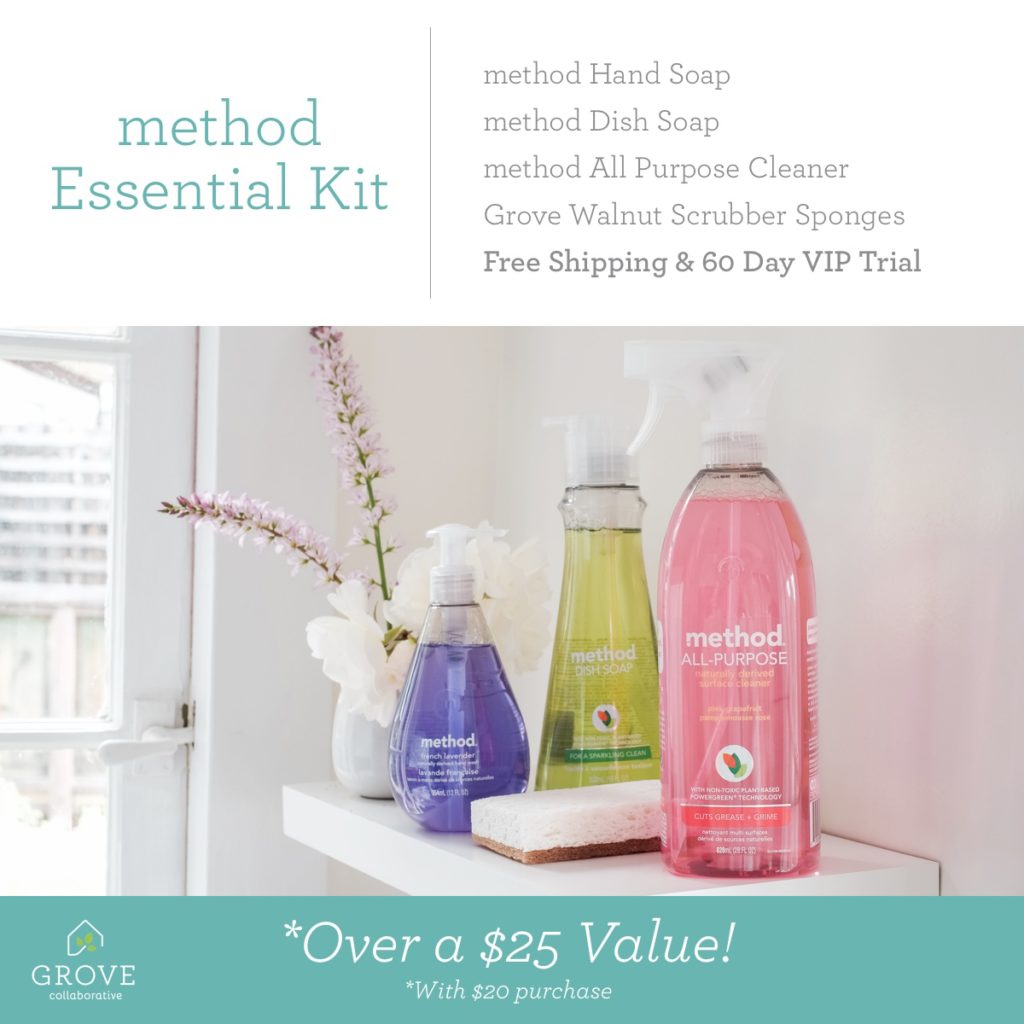
This week only if you sign up for Grove Collaborative and place an order of at least $20 (trust me, you’ll find plenty of things to buy!) you will get the method Essential Kit for FREE! All you have to do is head HERE to sign up for Grove Collaborative and you’ll receive everything pictured above for free when you sign up and spend $20 or more on your first order. You’ll answer a few quick questions about your home that they’ll use to customize your basket. Then you’ll finalize your basket by adding or removing items to get exactly what you want. Before you check out make sure your order totals at least $20 to get the free gifts!
If you need some recommendations, here’s my favorites that I got in my first order.
Full Circle – Squeeze Cellulose Sponge Cloths ($3.99): I didn’t know I needed these in my life until I got them but I can say that I can’t live without them now! Stop wasting paper towels now and get these. They do a much better job of cleaning than paper towels and they can go straight in the dishwasher too! My husband and I love them and agree that we need more! Ecover – Stain Remover ($4.99): When you have kids, you have stains. I need a good stain remover and this is it. I like the scrubby brush so that you can really work it into the stain. Mrs. Meyer’s – Multi Surface Cleaner ($3.89): I already use Method (which is why the free gift is amazing!) and I have a stock of the Method Multi Surface Cleaner since I use it, literally every day, multiple times a day. But I wanted to try out Mrs. Meyer’s and it’s just as good! I love the different scents but like I said, the multi surface cleaner gets plenty of use so you can never not have enough of this. We keep one on every floor of the house so that it’s easily accessible. Seventh Generation – Auto Dish Packs ($5.99): These make washing the dishes even easier! Just throw one in, no messes, no measuring. And it gets my dishes so clean.
Once you place your order, it gets to you pretty quickly (I think mine was less than a week). Then each month after you’ll get an e-mail reminding you to adjust your cart and choose what items you need. You really don’t need to order things every month, you can skip it and move your date to a further date. It’s not a monthly subscription where you automatically get charged and get products sent to you. It’s so great that you can pick and choose exactly what you want and then get it sent to you when you need it. I keep a running list on my phone of what cleaning essentials we are almost out of and then I adjust my order from there.
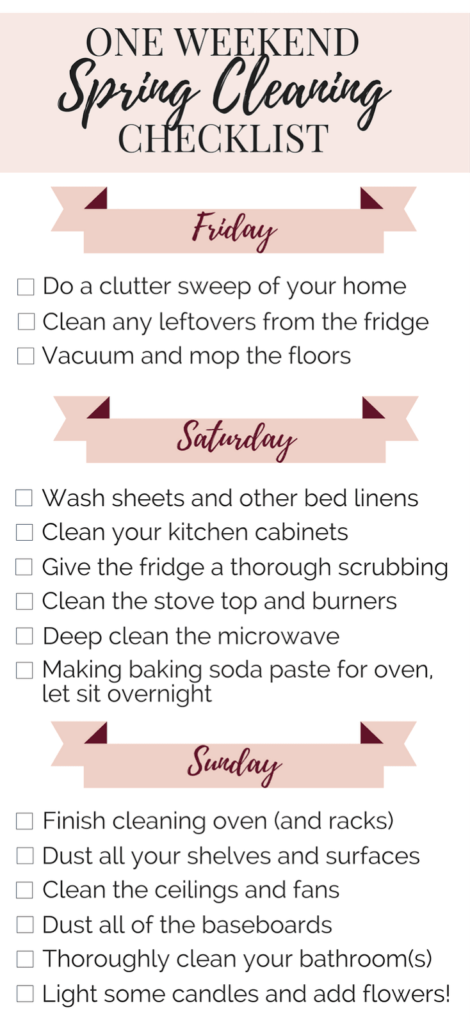
So, as I was saying, I rounded up some of the best Spring Cleaning hacks, tips and tricks to help get you (and me) motivated to do some cleaning! My husband and I are trying to attack it all in one weekend so I love this checklist. Check out the full post and download the list HERE.
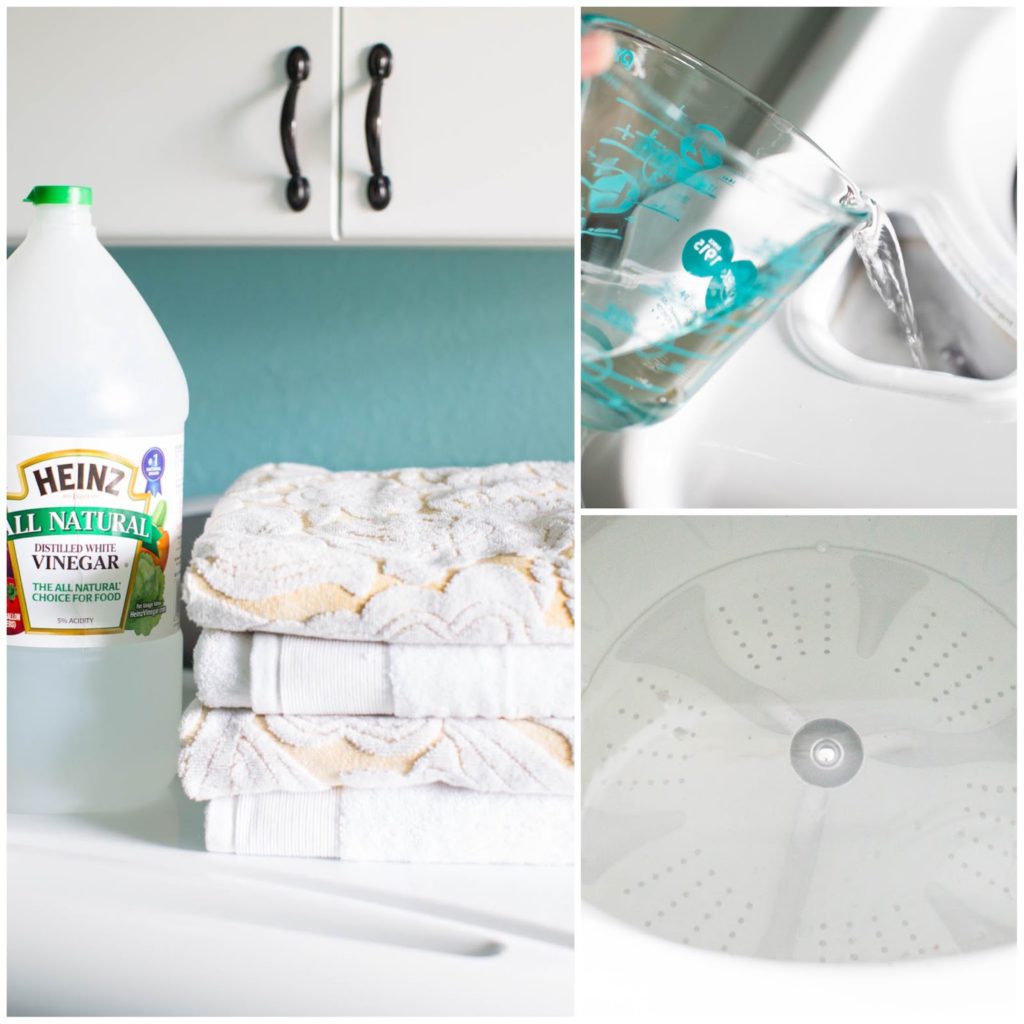
It’s so easy to forget to clean your appliances like your washer. Spring cleaning time is a great time to make sure that you do! Love this quick and easy tip to clean your washer!
I love planners and lists so was excited to stumble upon these printable pages that includes a full spring cleaning checklist by room, a monthly undated calendar, a weekly cleaning schedule page, cleaning task planner stickers and a ton more! Grab them HERE, it’s only $2 for the download!
And another checklist – this time it breaks it down by the hours! I love it! It keeps you on schedule and efficient! Get the step by step break down HERE. It’s so thorough, I feel like it’s given me a good game plan to tackle on all this cleaning!
I think that J and I are fortunate that we have the same taste in home decor. There is never any fighting over what kind of lamps or couch or wall decor. We pretty much agree on everything. We have pretty simple modern decor at our place but the one eyesore of the whole place was the dang dog bed. It is, of course a necessity, but no matter what kind of dog bed we bought, it just turned into a messy looking dog area. It bugged us. A lot. So we did something about it.
I’ve seen “modern” dog furniture online but everything was over $1000. I mean seriously? I love my dogs and everything but there is no way I would buy something that pricey for my dog who would probably chew the corners. J, being the genius designer he is, drafted up a brilliant plan for a dog bed using tables. When we were at Ikea picking out the tables, I noticed that they have really great looking fabric and so we ended up buying some and then we were in the dog section and found a dog bed that would fit perfectly within the space.
I’m always a bit wary of DIY projects because you know how sometimes you can have this fabulous idea in your head but when it comes out it is nowhere near as fabulous? Well, this project actually turned out just as fabulous. Maybe even better.
I present to you, our DIY modern dog bed…
It is basically two tables stuck together. Do not ask me about how it was assembled as I don’t go anywhere near power tools, actually any kind of tools. J handled that part. I however, took the ugly dog bed (which was covered in black and white spots) and covered it with the fabric. I then took one of their favorite blankets and sewed the fabric on top so that underneath is their favorite plushy furry fabric that they can snuggle under. I found a little pillow in our closet and sewed up a pillow case just for a laugh. I like that it makes it look like a human bed.
And here are our babies enjoying their new bed!
An added bonus of this is that we now have an extra table to put things on! Most of our furniture is that dark wood so it blends in well with everything.
So there you go! Who knew Ikea sold modern dog furniture right? 😉 All it took was some creativity and now the dog area actually matches the rest of our place.
I have to mention that painting on the table. We were in the Fremont neighborhood and stopped in the Orange Splot art gallery. We ended up loving these paintings by Ryan Henry Ward and J bought one for us. Later on we found out that he’s doing murals all over Seattle (for free) and we have been going around the city hunting for them. They are incredible pieces of art and it is so cool that he is brightening up the city with his artwork. Click here to read more.
p.s. I know it looks weird that there’s just that one picture of J above the dog bed, but the rest of the pictures on that wall are individual pictures as well so it looks good when you see the entire thing. J is not THAT vain that he would have a picture of just him hanging up. haha!