Categories
beauty Hair tutorial Uncategorized

Creating volume with your flat iron

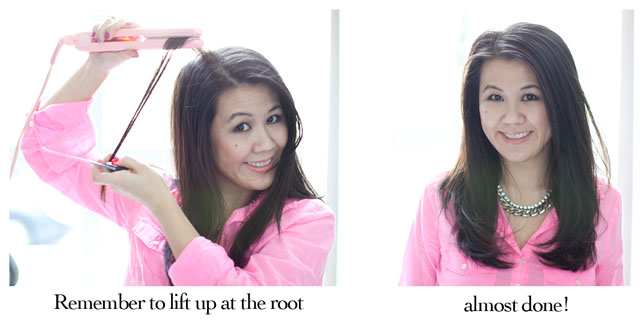
 I usually use my flat iron to curl my hair (see my video tutorial) but lately I’ve been wanting sleek straight hair instead of my usual curls.  I usually just blow dry my hair straight and leave it but it’s been so bleh lately and no matter how much teasing I did, I’d never get the volume that I get when I curl my hair.  I finally put two and two together and thought about giving my hair volume the same way that I curl my hair but just leaving it straight instead.  Whenever I thought about using my flat iron to straighten my hair, I always had the idea of just taking it straight down and getting straight hair that way.  It never occurred to me (until now) that all you need to do is to just lift up at the roots before gliding it down which is where the volume comes from.  Really, it’s that simple!  And this may be something that a ton of you already know but since I just recently discovered it and now love doing my hair like this I thought I’d share my tutorial.  It only takes a few simple steps to have sleek and voluminous straight hair.

The tools: Solia 1″ Flat Iron | Blow Heat Protective Styling Mist | Oscar Blandi Dry Shampoo | Teasing Brush
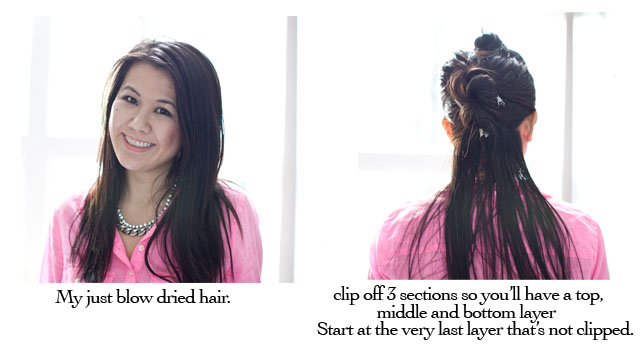
 
Make sure to spray your hair with the heat protectant spray before you start.  (I skipped showing you the bottom 2 layers as it was easier to photograph the top 2.  The technique is the same)
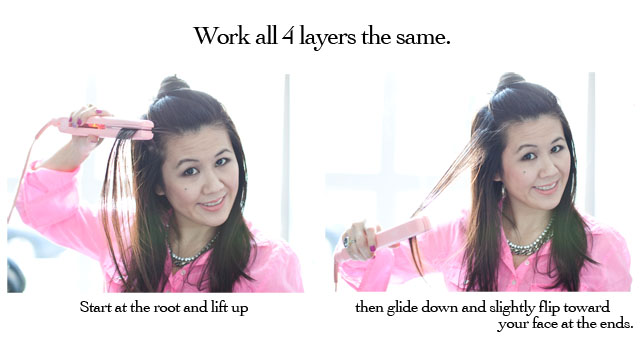
 
The trick is after you lift at the roots, bring it down in a curve, kind of like you are drawing the letter C.
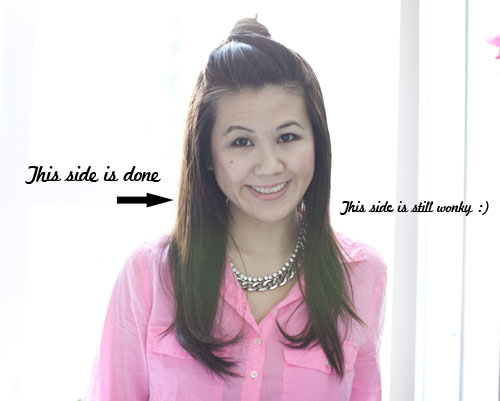
 
At this point, you should have a lot more volume all around and sometimes I just stop at this step depending on how cooperative my hair is that day.
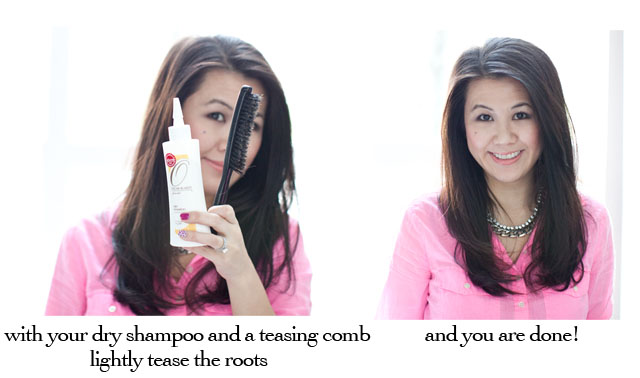
 
I need the dry shampoo for the texture in my hair to hold the tease but if you don’t need it, you can skip it.  The teasing should be very light as you already have the volume there, you just want to bring it up a little and smooth it out.

I completely wasn’t thinking and didn’t take pictures of the sides and the back of my hair for comparison but if the pictures don’t show it well, it really does give good volume all around.  I know it’s not revolutionary or anything but for someone with very thick hair that gets weighed down a lot, this has been a great and easy way for me to style my hair and keep the volume without a lot of product and teasing.  I hope it’s helpful for some of you too!

I’m wearing a J Crew top and our brand new Luxe Chain Crystal Necklace – it’s my favorite piece, I wear it all the time!
Categories
beauty Uncategorized video

My First Video!

Guess what guys? I finally put together my first Video Blog!! (or Vlog as I think the kids call it these days.  😉 )

I’m still learning how to use the video function of my camera so I’m out of focus for the first minute or so but I get in focus later on. I still need to figure out a few other things as well. BTW if you are wondering, this was shot on my Canon 5D Mark II so using a dslr camera as a video camera is a bit different than a regular video camera. I’m pleased with my first video but hope that I can get better in later videos. I hope you guys enjoy it!

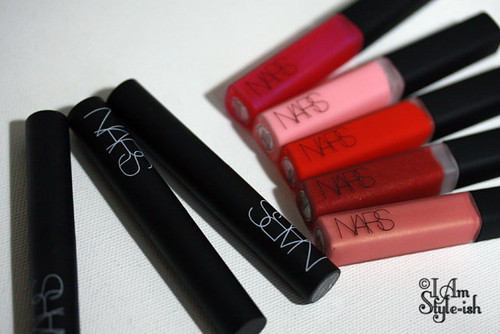
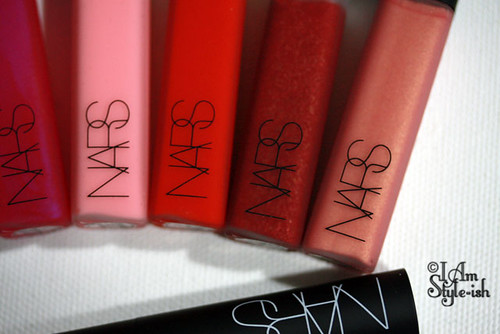
And I know for those of you that are at work or don’t have time to watch it right now, below are pictures of the products I talked about in the video. (but I hope that you come back later to watch my video!) For all my future videos I plan on doing the same, having a video and a corresponding post so don’t worry, I’m not jumping into the video blogging thing just yet. I still enjoy writing my blog but now will have some videos mixed in!

Oh and if you guys want to know when I put new videos up (you will most likely get a sneak peek of the videos before the blog post since I have to upload them first) then please subscribe to my channel!   (And let me know if you have a channel, I’m new to the whole youtube thing and would love to subscribe to some channels!)

Nars_Pure_Matte_Lipstick3
Nars_Pure_Matte_Lipstick4
NARS Lip Gloss Coffret, Crazy Heart,

Nars_Pure_Matte_Lipstick2
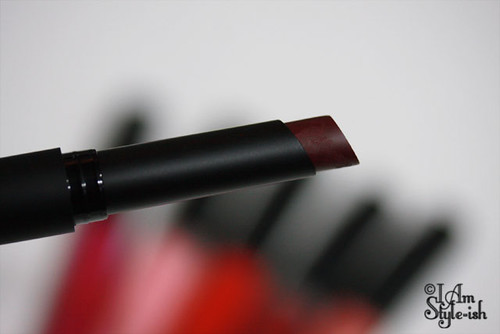
NARS Pure Matte Lipstick, Volga

Nars_Pure_Matte_Lipstick
NARS Pure Matte Lipstick, Tonkin 
side note: I pronounced the name wrong in the video (I said “Tomkin”).  It was impossible to read that little label!
Not pictured: NARS Pure Matte Lipstick, Bangkok

Urban_Decay_Nail_PolishUrban_Decay_Nail_Polish3Urban_Decay_Nail_Polish2
Urban Decay Apocalyptic Nail Kit

Would love to get your comments/feedback about the video and if there are any topics you’d like me to cover in my future videos!

Oh! I have new buttons on the side of my blog.  They link to my videos, blog shop and reviews blog so if you are reading through your reader, click on over to check them out, they are soooo cute!  (thanks to my hubs) 🙂

P.S. It’s going to be a light posting week as I, like many of you, are going to take a little Thanksgiving break!  I will also be slow (err slower than usual) to answer emails but will get back to you as soon as I can. XOXO

Categories
beauty Hair tutorial Uncategorized

The Poof

vintage_gucci_bagvintage_gucci_bag

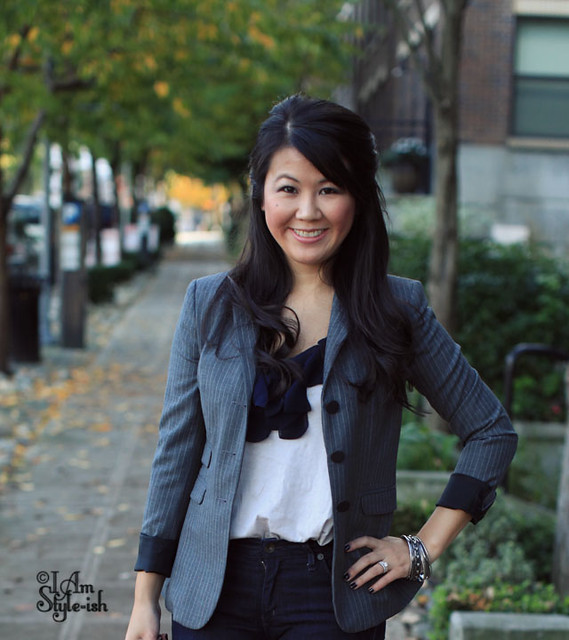
How to “poof” your hair without looking like Snooki. 😉

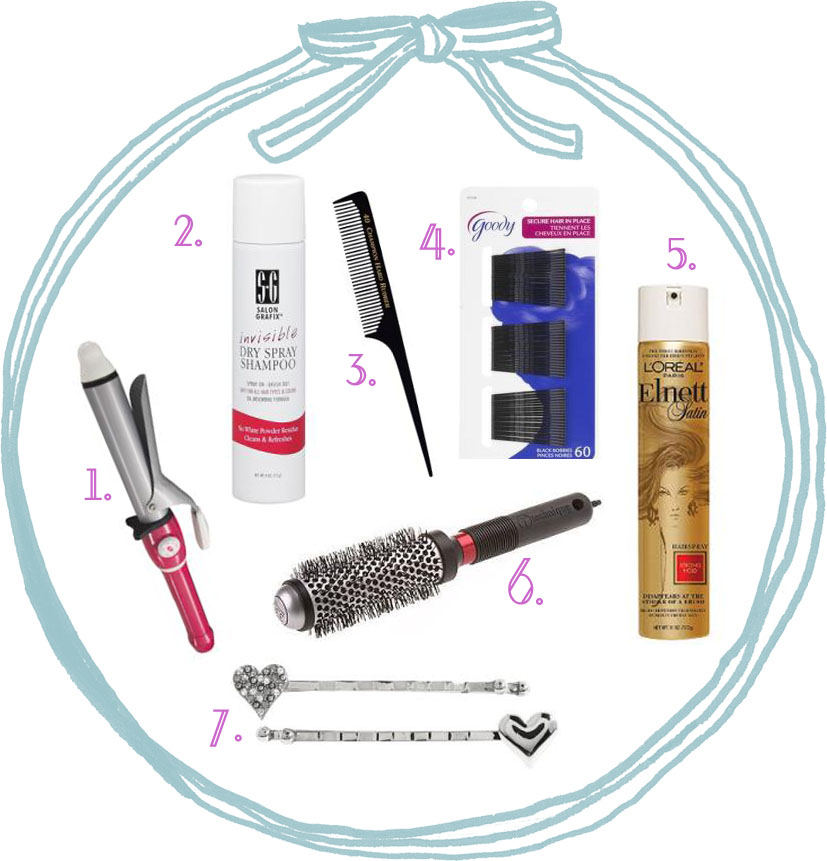
(the #’s correspond to the product list below)

  • Curl the bottom of your hair with a curling iron (#1), just for a slight curl (not necessary but I did for this look)
  • Using a rat tail comb (#3), divide the section at the top of your hair that you want to poof.
  • Spray that section, with dry shampoo to give it some texture.  I used this one which was gifted to me by Salon Grafix (#2) and it worked really well.  (as a side note, this dry shampoo does not work well to absorb oil for a “non hair wash day” but works great as a styling product – in my experience at least)
  • Tease the part of your hair – with the rat tail comb (#3) – that you want to pull up, paying attention to the underlayers to give it a bigger poof.
  • Clip the sides back with bobby pins (#4) at a slightly high part at the back of your head
  • Using a round barrel brush (#6), smooth out bumps and pull sightly to give the sides a bit of a poof.  I find that the round barrel brushes are easier to do that then a regular brush.
  • Gather the middle part that is teased and bobby pin to the same area as the sides are clipped to
  • Use the same comb (#3) that you tease with, gently pull out more hair, the more you pull, the bigger the poof will be so make sure not to pull too much!
  • I used about 6 or 7 bobby pins to hold up my hair so don’t be afraid to use as many as you need to make sure it’s secure!
  • Comb out your bangs and then use a bit of hairspray (#5) to hold everything together and you are good to go!
  • Add an “accent” bobby pin (#7) for some sparkle to your hair!

Products used:
1. T3 Bespoke Labs ‘Twirl’ Curling Iron (1 1/4″)
2. Salon Grafix Invisible Dry Spray Shampoo
3. Champion Rat Tail Comb 8″ Edged Back Wide Teeth
4. GOODY Bobbypins
5. Elnett Satin Strong Hold Hair Spray
6. Technique Thermal Round Brush with Tourmaline
7. Marc by Marc Jacobs Love, Marc Bobbies Hair Accessories

vintage_gucci6
    Categories
    beauty Uncategorized

    All About Brows!

    First, the winner of the Alainn Bella Giveaway is Pamplemousse1983!  Congrats!  Please email me with your mailing address.

    I’m one of those people that are obsessed with brows.  I always notice people with nice brows and I’ve been known to go up to women and ask where they get their brows done at. I really think brows make the hugest difference and if done right they totally open the eyes up more and you just look more put together.  The same goes for the other way around and bad brow shapes can ruin everything!  For me, I go in between stages of getting them professionally done or thinking that I can just do them myself but in the end, a little professional help is always needed.  I recently had them done so they are a nice shape now but that doesn’t mean that I don’t need brow products.  I have tried so many eyebrow pencils, powders, gels trying to find the perfect product.

    I also know I’m not the only one that’s concerned about brows as I get lots of questions about my brow maintenance, so when Anastasia, the well known eyebrow cosmetics company, reached out to me and offered to send me a few products to try out.  I was excited and glad that I might have some new products to recommend.  They asked me to pick out a few products from their website that I was interested in, so I picked out a brow powder and a pencil just to test out the different textures.  When the package arrived I about died from the amount of goodies they sent me.  An eyebrow/cosmetics junkie’s dream!!  (thank you Tiffany from Anastasia!  You are the best!)

    Anastasia_Brows2Anastasia_Brows4
    from top left:
    Illumin8 With Youthful Synergy Complex Eye Shadow Palette
    Blush Quad
    Beauty Express (new product but Brow Express is similar) 
    Brow Wiz

    Center:

    The Kit for Perfect Brows and Eyes

    Not pictured:
    Brow Duality
    (oops! I left it out on accident)

    Everything you could ever want in one handy little case!  Tweezers, stencils, brow powder, brush, even highlighter and mascara!
    Anastasia_Brows5

    I’ve been using this kit these past few days and I LOVE it.
    Anastasia_Brows3

    These eyeshadow palettes aren’t just eyeshadows, they are also like skincare!  They help the eye area appear firmer, smoother, lighter and less puffy!  I haven’t put it to the test yet but definitely will be doing so soon.  If it does what it claims, I’m super impressed!  I only knew Anastasia as an eyebrow company so was pleased to try their color range.  I’m loving the blush quad.  Great size to keep in my purse and the pinks are just right for my skintone.

    Anastasia_Brows

    I didn’t take another picture of the Brow Wiz but I’m really liking this pencil as most pencils that I’ve used can go on real heavy and I can end up with super dark brows.  This pencil is thin and gives better control over how dark you want your brows to go.

    I would like to note that Anastasia sent me these products for free but did not require a post in return.  I was really impressed by these products and wanted to share!  Please see my disclosure about gifts from companies.

    And to prove to you how well they work, here is my no brows to brows look!  Using the Beauty Express Kit as shown above but I didn’t use a stencil since my brows are already shaped.

    anastasia
    Categories
    beauty Uncategorized

    Review: Eyelash Extensions

    Okay, finally my review of the eyelash extensions! It’s been a few weeks now and I can honestly say that they are so worth it. I absolutely love that I can wake up, put on a little powder, blush and lipgloss and I’m ready to go. On the days that I do my eye makeup (which realistically is almost every day) my eyes are that much more dramatic without having to deal with all the eyelash maintenance that I used to do. (Curling lashes, putting on false lashes, million coats of mascara) It is such a time saver and they seriously look so real that I’ve gotten so many “wow, your eyelashes are so long!” compliments that I should probably start making a commission on how many people I’ve convinced to get lash extensions 🙂

    Here’s my makeup free eyes before the extensions. (see those freckles creeping up on my face from the sun? Ugh. I need freckle remover, stat.) My lashes have always have a good bit of length to them but the problem was that they were never full enough. With the lash extensions it definitely filled them out and added a good amount of length.

    eyes_before


    And here is an “after” shot! Obviously, full make up on here but as you can see it makes my eyes that much more dramatic.

    extensions1

    With the eyes closed you can see how full and pretty they are. The process of the lash extensions is that they attach each lash individually to one of my own lashes. Because of that, it’s a very long and tedious process but obviously well worth it in the end. Mine took about 2 hours total but it was a pretty easy 2 hours for me as I was asleep for most of it. My esthetician had the hard job of applying them while I snored in her face! 🙂

    extensions2

    The cons of the extensions is that it’s impossible to rub your eyes so if you are an eye rubber like me, you will be going through some eye rubbing withdrawal. For the first week I was super careful about getting my eyes wet and avoiding direct splashing of water by my eyes. I used a lot of eye makeup remover but not directly washing them. BTW, you must use oil-free eye makeup remover as anything with oil is bad for the glue that the extensions use. After the 2nd week or so, I was washing my face like normal and being careful just not as careful as before and they still look great. You will see the lashes fall out sometimes but that’s a normal eyelash cycle. I’m ready for my refill now (4 weeks later) and my lashes are still pretty full, but there are some sparse parts that need filling.

    extensions3

    The lash extensions are not cheap and it’s certainly not something you want to cheap out on as you need a very experienced and licensed professional to apply them as it’s a very tedious process, but to me the cost is definitely worth the results. It’s something that I recommend for special occasions, especially for brides or if you have a photo session coming up (engagement session or budoir session, is a great excuse to get them!) I got mine because of my crazy travel schedule and knowing that I needed to cut down on the time I get ready in the morning and also not having to pack extra things in my make up bag just for my eyelashes.

    Oh one thing to know, one of the first steps was that my esthetician had to tape down my bottom lashes so that the glue wouldn’t stick to them and at the end of the process when she pulled off that tape – OUCH! I wanted to cry. I did actually tear up a bit. It hurt! But that’s the only part of the process that was painful.

    I went to Lady Lam on a recommendation from a friend. She is absolutely fantastic and very professional. We had a consultation about how I wanted my lashes to look. I told her that I wanted long and full but still wanted them to look real. She showed me examples of her clients with long, dramatic lashes and other clients with shorter but still full lashes. I definitely wanted the long lashes as I’m used to wearing false lashes so didn’t mind the dramatic look. It’s great that she takes your tastes into consideration so she knows what lashes to apply on you. I highly recommend that you check out her website for more examples of lash extensions and she also has a great FAQ on them.

    I’m going to get my refill this week and will probably keep them on for at least another month or so. I know many of you have been waiting for this review so thanks for your patience! I hope that this helps you decide if you’d like to get them for yourself.