Categories
beauty popsugar shopping Uncategorized

Pop Sugar Must Have August box

Got my Pop Sugar Must Have box and compared to last month it was quite different so wanted to share a quick review with you guys. 

Here’s most of the contents.  My inital reaction was that it was packed!   The box it came in was huge and filled to the brim. 
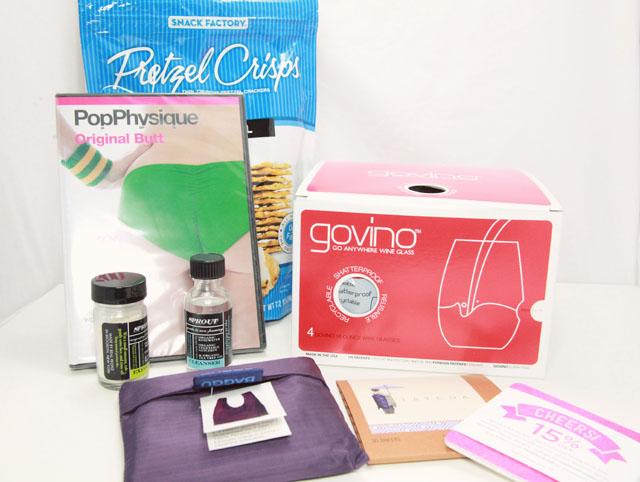
 
The most notable item that I liked was the govino Wine Glasses.  They look just like real wine glasses but they are shatterproof, reusable and recyclable!  I need the shatterproof as you do not even know how many wine glasses I’ve broken. Sometimes I just look at them and they break!  I’ve never seen these before so am glad that I was introduced to them.  Will be great to use them for when we have guests over and you don’t have to worry about anyone shattering a glass.
Read more for the rest of my review (it’s kinda long)

The thing that I was most meh about was the food (a bag of granola and pretzel chips) I mean, I know it’s just filler to make it seem like there’s more in the box but I’d still prefer not to get food items.  I don’t know, I’m picky about food and don’t really need a box like this to be sending me snacks. Also, the PopPhysique DVD is potentially good but considering I have absolutely no space to do any kind of working out, I’ll never use it until we move somewhere bigger.  I prefer to get my workout on at the gym anyhow.  Maybe I can convince my gym to install a TV and DVD player for me?  LOL.
Moving on, here’s the stuff I did like. First, the Baggu Reusable Bag.  As I’ve mentioned before, I’m a reusuable bag hoarder.  I love those things so am always happy to get another one.  I like these ones better where they fold up into something small so they are easy to keep in my purse.  I always have at least one with me. 
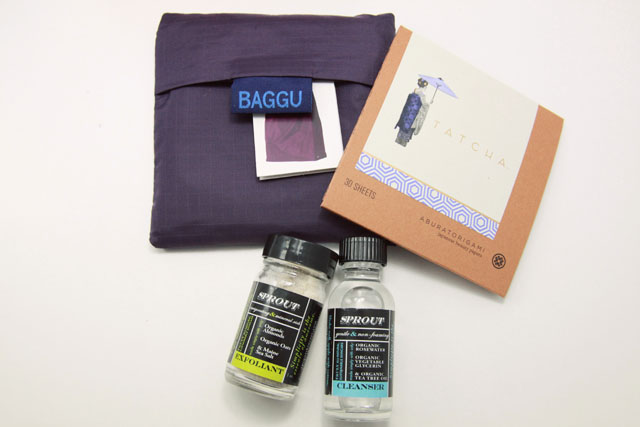
The Tatcha Blotting Papers are pretty amazing.  They do an awesome job of soaking up all the oil on my face.  I’ll for sure be keeping this in my bag.  I’ve seen these before but have never bought them.  I’m totally sold though.
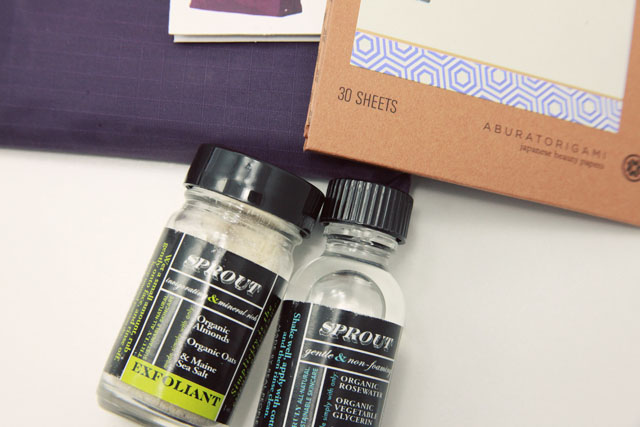
The Sprout Skincare Exfoliator and Cleanser is really neat because the ingredients are truly all natural.  Like the exfoliator is made with just almonds, oats and sea salt.  It’s definitely not as harsh on your skin but I don’t think it works any better than my favorite exfoliator only because I love the consistent exfoliating beads and this one just doesn’t get that.  The Cleanser, is also a little mild for me.  I like to really cleanse my face to get rid of makeup and anything else at the end of the day but with this cleanser your supposed to put on a cotton pad and clean your face with it that way which I just don’t feel like that will do a whole lot of cleaning. (I prefer a cleanser used with my clarisonic to get my make up off).  I’ve been using it more as a toner instead which I think it works great in that sense.  I love the natural aspect of this line and although these two didn’t impress me a whole lot (but I’ll still use them) I did see that they make a makeup remover which I may try.
 
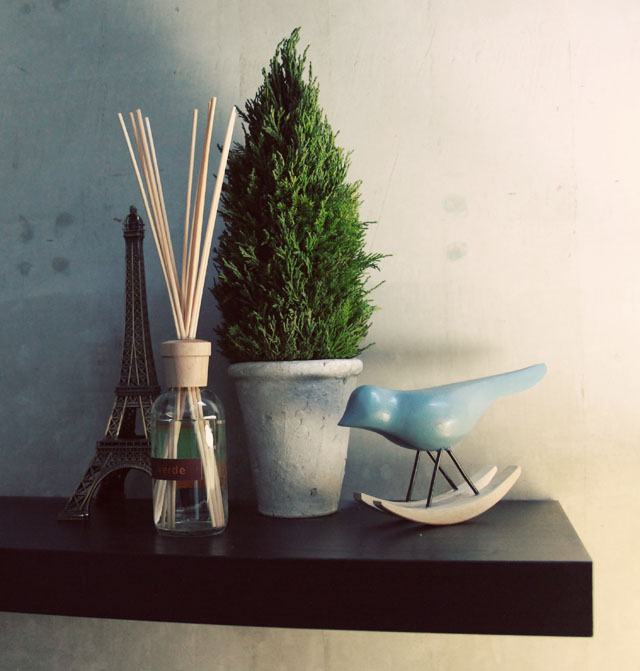
And not pictured above is the Alora Diffuser
which I had already put on our shelf (next to our very cute Rocking Bird!) and I have to say, I’m impressed with this diffuser.  We live in a loft with very high ceilings so fragrances usually get lost in this space but this diffuser does a great job of getting the fragrance out.  I’ve used several diffusers and this one is definitely the best one for our space so I’ll be checking out the other fragrances once this one is done.

So overall, a pretty good box!  There were a few other things in there that I didn’t think were worth mentioning but you can see the entire box over at the Popsugar website.  For the price, you definitely get a lot more than what you paid for.  For me, these boxes are just fun to get because I feel like I’m getting a surprise every month.  If you want to subscribe to the box, click here! (my referral link is attached)  I just got a coupon code for you guys too!  Use code REFER5 and get $5 off your first box!


Popsugar is not sponsoring me to do any of these reviews, I just want to share them since I’m always curious as to what is in these subscription boxes and thought it might be helpful if there are readers that are thinking about subscribing.

Categories
beauty health skincare Uncategorized

My Skincare Essentials and Favorites

It’s been awhile since I talked about skincare and I’ve updated my routine and found new products so wanted to share!

1. Earth Science Eye Makeup Remover Chamomile and Green Tea – I’m a pretty heavy eyeliner user and I am crazy about getting every last bit off.  I’ve been using Neutrogena Eye Makeup Remover
for years but in the past few months, it’s been irritating my eyes and not getting the makeup off as much as I’d like.  I went searching for a more gentle, non-irritating product and came upon this one in the beauty section at Whole Foods.  It’s more of a gel but I like it because I feel like it does a better job of taking of the makeup in one clean sweep rather than having to go back and remove some more.  (Just a tip, it’s cheaper at Amazon than it is at Whole Foods so don’t get it there.)
2.  Xen-Tan Face Tanner – I don’t mind getting my body tan through the sun but I’m so paranoid of freckles and wrinkles that I use pretty strong SPF on my face and when I go on vacation, I always bring hats to wear in the sun.  To offset the weird pale face/tan body I use a face tanner.  I got this one as a sample but I ended up liking it so much I bought it and have been using it all summer.  Granted, I haven’t gotten much sun this summer so I’m not that much tanner but still it gives my face a slight tan and it’s a very subtle difference which is what I’m looking for.  Many formulas are for face and body which I don’t believe in as what you put on your body should not be the same formula as your face so I like that this one is specifically for your face.  

3. DDF Glycolic 10% Exfoliating Moisturizer – I get breakouts occasionally, especially on my forehead and hair line and my first defense against breakouts is glycolic acid.  It’s been pretty effective for me and I really like having something a bit stronger like this when it’s needed.
4. Alba Facial Scrub, Sea Algae Enzyme – I love exfoliating.  It’s so soothing and I love the feeling of getting all those dead skin cells off.  I spend a lot of time testing exfoliators and I finally found one that I love!  This one has the perfect size of granules where it’s not to harsh but also not too soft.  It just feels like it’s getting it’s job done, know what I mean? 
5. Glytone Mini Peel Gel – I was looking for something to make my skin glowy and “fresh” (which is a funny word for skin but I don’t know how else to explain it.  I caution if you have sensitive skin from using this.  It doesn’t irritate my skin or anything but it certainly reacts to it.  You put on a thin layer and leave it on for 10 minutes.  The whole time it’s on, your skin tingles like crazy.  You can really tell it’s doing something!  It’s not the most comfortable feeling but I do feel like it helps my skin as every time I do it my skin gets super glowy afterwards.  My husband even remarked on the glowineess of my skin!  I’ve used quite a few Glytone products and really like everything I’ve used from them.

One last thing worth mentioning that you guys may think I’m crazy for…

Wedderspoon Raw Organic Manuka Honey Active 16+
Yes, honey for skincare.  Specifically Manuka Honey.  So the story is, I have stomach/digestion issues and have had it for about a year now.  Doctors can’t tell me what’s wrong and no treatments have worked.  You don’t even want to know how much time and money I’ve spent on tests, labs, xrays, etc… to find out absolutely nothing.  Just guesses which leads to more tests which leads to more guesses and yeah, not fun.  I spend a lot of my days not being able to function because of my stomach.  ANYWAY, not trying to share my health problems but I was doing research on stomach problems and remedies when I came across Manuka Honey which is supposed to be this kind of “miracle” product that can heal a lot of things including stomach/digestion issues.  It’s also been found to be great for skin healing and acne treatments.  (There’s a ton more benefits but I don’t want to list it out so google it if you are interested in finding out more)  I figured, with everything I’ve been going through why not give it a shot.  It hasn’t cleared my stomach problems but my skin loves it!  Everytime I get a big ol zit that I have to get rid of, I just dab a little bit of honey on it and overnight it shrinks a ton and then disappears a lot faster than if I had used any other treatment.  The trick is DON’T SQUEEZE IT!  I know it’s so tempting with zits especially those massive ones that you want to kill, but leave it alone, put some honey on it and before you know it, it’ll be gone and you aren’t left with any ugly dark marks or scars.  I don’t know if this will work on everyone and obviously, proceed with caution if you have sensitive skin but it worked for me so wanted to share.
Categories
beauty nail polish popsugar shopping Uncategorized

Popsugar Must Have Review

So I mentioned last month that I subscribed to the Popsugar Must Have box. I received it last week and wanted to do a quick review for those of you that were curious about it.  They were pretty vague about what was going to be in it, unlike the other boxes that are popular now that just focus on cosmetics, nail polish, etc… they were pretty general about what they were going to include so I was intrigued.
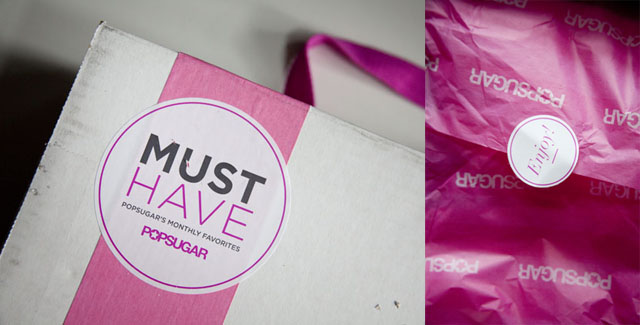
First, the fun packaging!  I’m a sucker for anything pink and white so I was excited to see the box 🙂
 
The contents minus two KIND bars that I gave to my husband (I’m not a fan of nuts)
 
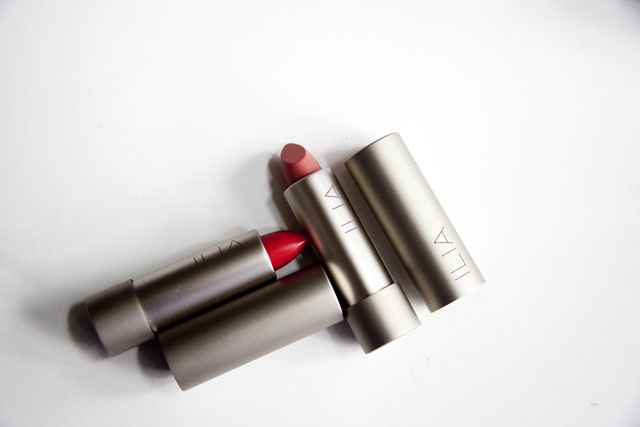
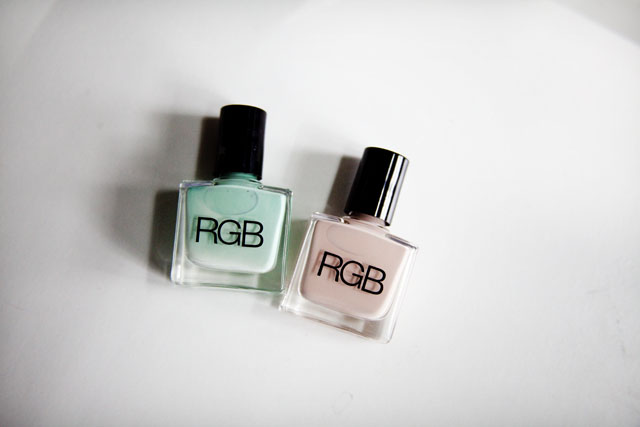
Body Scrub and Body Lotion by Body Drench | nail polishes by RGB | Lip Products by Ilia | Reusable Bag
Read more for the rest of my review…

My inital reaction was just “oh”.  Slightly unimpressed but still happy by the contents.   The cost of the box is $35 so I did expect for the products to be nicer (and not samples) so I was happy about that.  I had never heard of two brands (Body Drench & Ilia) so I just didn’t know if they were good or not.
I’m impartial to the body lotion and scrub.  The body lotion does smell good but it’s not anything that I would’ve picked out.  I have yet to use the body scrub as I already have a brand that I love but will test it out after mine is done.  I have a huge stack of reusuable bags (Seattle has a ban on plastic/paper bags) but I can always use another one because you need them even when you shop at Nordstrom! This one is pretty roomy and sturdy so great for the grocery store.  And I know my husband is excited to carry a Popsugar bag out of the grocery store. hahaha 😉
So at this point, I was feeling a bit ‘meh’ about the box.  What changed my mind was after I used the Ilia lip conditioner and lipstick.  The lip conditioner looks bright red but when it goes on your lips it’s a very sheer and pretty color.  The nude lipstick is also really great on.  Both go on smoothly, the lip conditioner definitely moisturizes my lips and the lipstick doesn’t dry out my lips.  They work great layered together too!  I’ve worn them consistently through the past week and they both get a thumbs up from me.  They retail for $24 each so that in itself already pays for the bag.

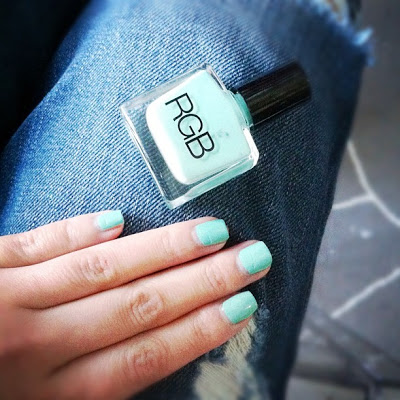
I’m a total nail polish addict so I of course didn’t mind adding more polish to my collection.  I’ve heard of RGB but have never bought it before.  Mostly because I’ve never seen it at a store around here so I’ve never been able to test it out. I have been wanting a good mint color and so happy that I got this one.  This color is perfection. I love love it and the polish itself is fabulous.  It goes on smoothly, not too drippy or thick.   I have yet to try the nude but come fall, I’m sure I’ll be wearing it a lot paired with other colors.  These retail for $16 each so definitely well worth the price of the box.

Here’s my instagrammed picture of the color on my nails.  It’s more closer to the green than the blue (you gotta love instagram filters but it definitely changes the colors).  **Follow me on Instagram: TiffanyIsh**


So in the end, after using the products I do think that the cost of the box is great for what you get inside.  Obviously the downside is that you don’t get to pick your colors or anything like that and you get brands that you’ve never heard of but the good thing about that, is trying out the brands that you many never have tried before.  I’m signed up for this month’s box too so I’ll do a review on that once I get it!  If you want to try out the box, sign up here (my referral link is attached)  Did anybody else get the box?  What are your thoughts? 

Categories
beauty crafts crafty-ish DIY Uncategorized

DIY Magnetic Makeup Palette

I have to tell you how excited I am about this DIY Magnetic Makeup Palette only because it is something that I desperately needed.  I’m so happy that I can make an endless supply of them!  I buy a lot of palettes but it always ends up that I like some colors better than others which is fine, except when I travel, I have to take the entire palette with me just so I can use those 2-3 colors.  My makeup bag ends up bulging with 3-4 different palettes and I know that I don’t need to bring all of them but I really like those specific colors.  I did end up buying this large magnetic palette and depotted quite a few of my shadows but at $25 for each palette, they certainly aren’t cheap and I’d almost like to spend that money on more make up, know what I mean?

You can find inexpensive palettes easily by shopping at stores that sell makeup geared towards tweens and teenagers. Forever 21 has this palette for under $9 that would work great. I got mine in store at Forever 21 for around $5 and got lucky since these have a mirror built into them.

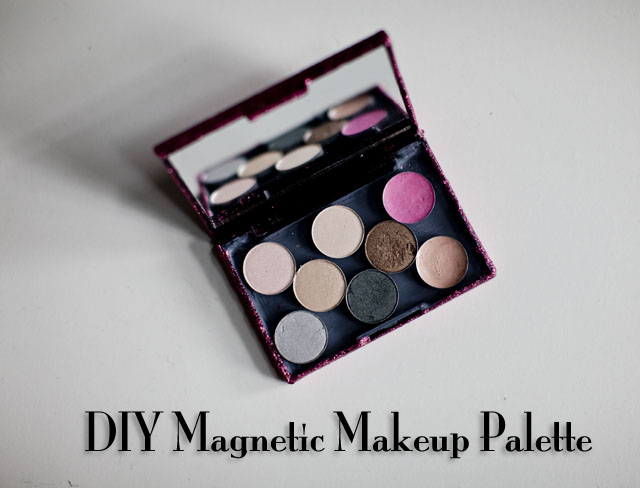
Here’s my finished product!  And of course I glittered it too. 🙂

DIY MAGNETIC MAKEUP PALETTE

You want to know what my secret ingredient is?  Magnetic Paint!  I didn’t even know they made such a thing I just googled it, hoping something like that existed and indeed there was!  Just a tip, if your local craft store is small it’s going to be impossible to find it as I found most places here didn’t carry it (even my local Jo-Ann’s).  I just ended up ordering it on Amazon. 

Even though I wasn’t sure it was going to work, I documented the process.  So thank goodness it did work!

First your tools:

DIY MAGNETIC MAKEUP PALETTE

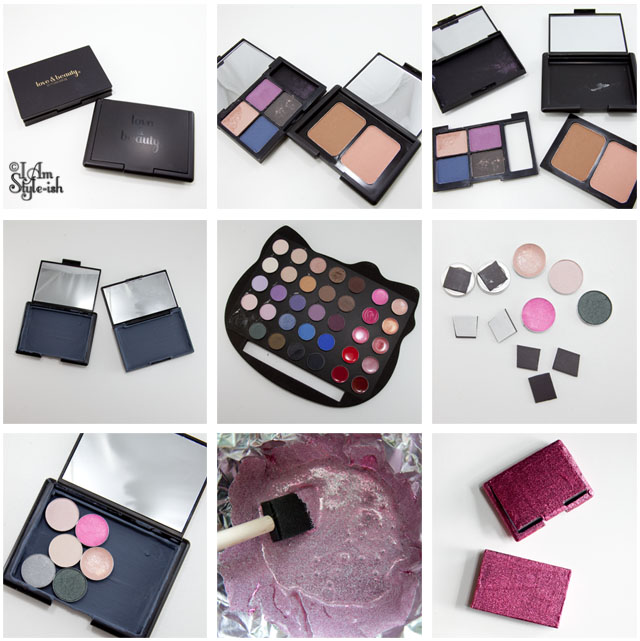
1ST STEP: REMOVING THE CURRENT MAKEUP PANS

  • With your palettes, take out the entire part that is holding the current pans.  In most of the palettes, you can usually find where it’s glued together and with a little strength, it’s easy to pull off or use a tool to get it underneath and pop it off.
  • Clean the glue residue off the inside of the bottom of the palette.

2ND STEP: PAINTING AND ADDING MAGNETS

  • Paint the inside with the magnetic paint (it took me about 4-5 coats before I was happy with the magnetic-ness.  I tested my magnets to make sure it stuck.  You can paint coats every 2-3 hours but once it’s done, let the paint dry overnight.
  • Take your palette and depot the pans.  This palette was easy as it popped right off.  It was just a bit of glue on cardboard but some are harder to depot.  (I’m not going to get into depotting as that it’s own animal but google “depot eyeshadow” and you’ll find tons of tutorials)
  • Cut the magnet sheet to the size as needed.  Stick the adhesive side to the bottom of the pans.

3RD STEP: ADD YOUR CUSTOM COLORS AND GLITTER!

  • Fill your pans to see how it looks/fits and if the magnets are sticking well.
  • You could stop here if you didn’t care what the outside of your palette looks like.
  • I have so much glitter left over from my previous glitter projects (here and here) so I wanted to use it and make my palettes even prettier.  (ha! I just love any excuse to glitter!)
  • I’ve gotten a lot of questions about the mix of glitter to mod podge.  You want to make sure that all your specks of glitter are covered in mod podge.  This is how you ensure the minimal fall out.  1 parts glue to 2 parts glitter is what I aim for.
  • If you have your pans still in the palette, take them out before doing any painting.
  • Coat in glitter and let dry between coats.  Paint until every single area is covered in glitter!
  • Instead of glittering it, you could also just paint the case and it would look just as cute.

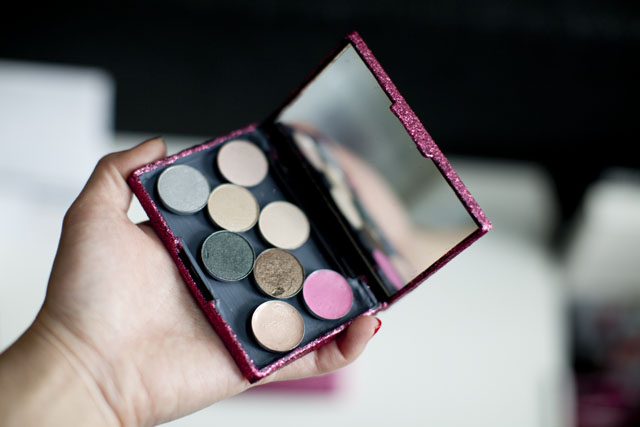
And there you go!  A glittery, magnetic case that you can change out the pans to suit your different looks!

DIY MAGNETIC MAKEUP PALETTE
Here it is with a few other items that I keep in my hangbag so you can see the size.  It fits in perfectly don’t you think? 🙂
DIY MAGNETIC MAKEUP PALETTE

*If you are wondering about my makeup palette that I depotted, it is this Hello Kitty for Sephora palette.  I loved the colors but hated how big and clunky the case was so I rarely took it out to use it.   Now that I’ve depotted all the makeup, I’ve got a fun case to hold other stuff and am actually using the palette now.

If you liked this post, check out my other glitter DIY posts!

Categories
beauty nail polish organizing Uncategorized

Julep Nail Polish Storage

It’s no secret how much I love Julep and the Julep Maven boxes.  I get so excited when I get my box in the mail, I loooove getting new nail polish every month!  But because of this, I’ve collected quite a few nail polishes and needed a solution to store them.  The problem with nail polish is that the bottles are all different shapes and sizes so what works for one brand, doesn’t work for another.  If you may recall with my nail polish storage video, most of them are in a clear shoebox holder with my Zoya polishes in a fancier acrylic box.  I didn’t like storing the Julep polishes in either of those because the way that the Julep polishes are shaped, you can’t see what color you are looking for.  You just see a sea of black caps.  And I don’t want to store them upside down because then the polish would all be trapped up by the lid and that’s not a great way to store them.

If you don’t know what Julep Maven is, it’s a subscription box where you get at least 2 polishes each month along with other goodies for $19.99.  If you haven’t joined yet, well you should because if you use the code COLOR2012 it’s going to cost you 1 cent!  Yup no joke.  Join here. (my referral link in included)

I went to storables and found these great little stackable trays that fit them perfectly and what I like best is that there are dividers.  So now I divide them into colorways so reds/pinks are in one section, purples/blues are in the next section, etc… That way at least I know which section to look for when I want to choose my colors.

 
Nothing fancy but just wanted to share because storing nail polish is one of those annoying things that it’s hard to find just the right thing to put them in.
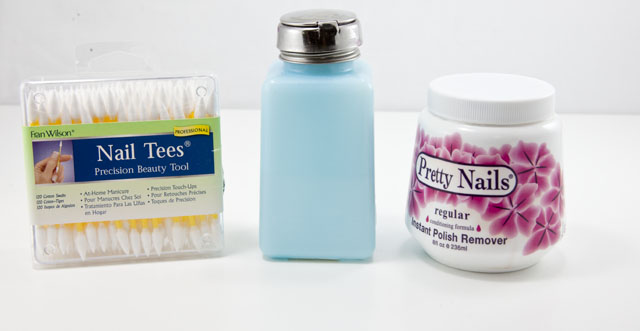
I change my polish on a weekly basis so I am kind of crazy about finding the right products to make it easier for me.  I stopped getting my nails done professionally because it was getting too expensive and now I really enjoy doing my nails but having the right tools is crucial.  These are the 3 things that I love and need to have when doing my nails.

Nail Tees Precision Applicators – I LOVE these. It’s nearly impossible not to get nail polish on your cuticle or sides of your nail so these little q-tip like things are slight pointy and less “cottony” than regular q tips (you know how it q tips always unravel a little? These don’t so they don’t get into the nail polish that you want to stay on your nail.)  I just dip the pointy part into a bit of acetone and drag it along the areas that got polish on them and it creates a nice clean line.  I also use an eyeliner brush
dipped in acetone to do clean up too.  Both work great but these are a bit more precise.

Dispensing Bottle with Stainless Steel One-Touch Pump – my manicurist always had a little pump like this for her nail polish remover and I didn’t realize the genius of it until I started using it for myself.  Rather than having a bottle and having to pour it upside down onto your cotton ball this dispenser pumps UP and onto your cotton ball so that you get just the right amount.  This is especially helpful when using the precision applicators or the eyeliner brush for clean up.  I used to have to try to stick them into my nail polish remover bottle and try to get just the right amount.  The dispenser, when you pump it, leaves just the right amount into the lid part which you can just dip your brush into.  It just makes it so much easier.

Pretty Nails Jar Polish Remover – You know how sometimes just one nail gets chipped and you want to fix just that one but then if you have to get your cotton ball and polish remover out, it potentially ruins other nails?  Well, these jar polish removers make it so that you can just stick one or two fingers in and remove the polish and let the others stay pretty! 

It’s the little things that make the biggest difference sometimes!  Do you have any great tools/tips on doing at home manicures?  I’m not the best so love to learn what others do to get a nice manicure as well!

Categories
beauty Uncategorized

Revlon Lip Butters – my favorites

I, along with many other bloggers, have become obsessed with the Revlon Lip Butters
and since I’ve tried out quite a few, thought I’d let you know my
favorites in case you get stumped as to which color you should get! Oh
and Ulta is currently having a buy 1, get 1 50% off so a great time to stock up!

From lightest to darkest.

  • Creme Brulee – a nude shade with a hint of shimmer.
  • Creamsicle – a pale peach that is almost a bit frosty but in a good way
  • Strawberry Shortcake – the perfect light pink with shimmer
  • Peach Parfait – an orange with a gold shimmer
  • Berry Smoothie – deep pink, almost mauve.
  • Sugar
    Plum – it’s plum but I’d also categorized it in the red area but it’s
    not too pigmented so a great color if you just want a hint of color.

Out of all of them, I use Creme Brulee and Strawberry Shortcake the most.  They are the best everyday “neutral” colors for my skintone.

 Creme Brulee | Creamsicle | Strawberry Shortcake | Peach Parfait | Berry Smoothie | Sugar Plum

 If you guys use the Lip Butters as well, let me know what your favorites are!  Whenever I go to the drugstore I always have to see what colors they have in stock and can’t resist picking another one up.

Looking for a few ideas on what to wear to all those summer weddings you are going to?  Check out my picks over on the Smarter blog!
Categories
beauty nail polish reviews Uncategorized

Butter London Lippy!

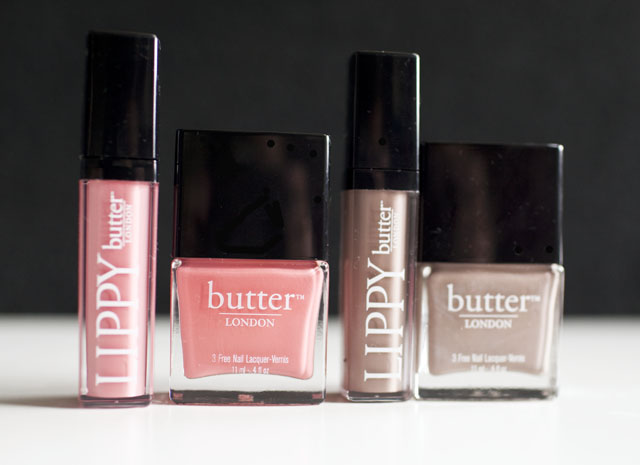
I’m not one to match my nails and toenails when painting my nails.  I like mixing it up!  However, have you ever thought of matching your nails to your lips?  I haven’t but when I saw the Butter London Lippy and the matching polish, I loved it!

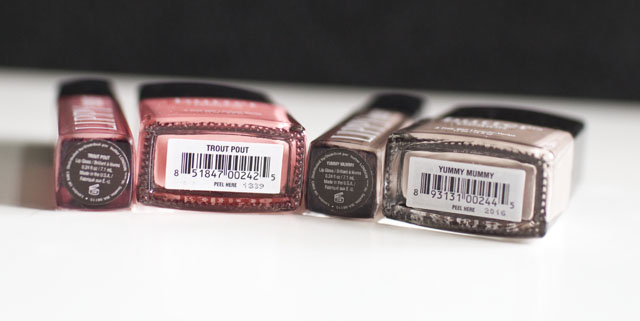
 Trout Pout Lippy and Nail Polish | Yummy Mummy Lippy and Nail Polish

I tried out Trout Pout which is a vibrant peachy-orange and Yummy Mummy which is a beige-y nude.  I loved the combo so tried a scalloped mani.  It didn’t turn out as well as I’d like but wanted to show you the colors.  They really go well together and Yummy Mummy is a great color on it’s own for the “mannequin nail” trend.

click here for my bow ring!
It’s really pink in that picture but Trout Pout is more orange in person.  It’s a lovely color and really great for the summer.  And swatches of the Lippy glosses to show you that it comes out pretty true to the color shown in the tube.  On the lips, they are true to the lip gloss consistency of being more sheer which I liked.  So although they are pretty perfect matches in the tube, if you wear them together nobody will really notice that you are wearing the same color on your lips and nails, it just coordinates in a good way.
Trout Pout is my favorite on the lips as it’s a perfect glossy peach that looks great on it’s own or layered on top of lipstick.  Yummy Mummy makes my lips look a little gray so I don’t wear it alone but it works well to neutralize a too bright lipstick so I have been wearing it as a top gloss for my lipsticks.
These are my first Butter London polishes and I really like how creamy they go on.  I barely needed a second coat!  The Lippy glosses are really smooth on and are a bit sticky but not as bad as MAC Lipglass sticky.  The one thing that I did not like was the fragrance of the lip glosses.  It’s almost a fruity scent, reminds me of watermelon candy.  If you aren’t a fan of fragrances in your make up then probably stay away but if you don’t mind it, I do recommend these glosses. 
Here are the other colors in the collection.  I definitely want to get another but can’t decide which one, I love all of them!
Disclosure: Product samples were provided by PR for consideration but does not affect my review or opinions in any way. 
Oh and I posted on how to do DIY Polka Dot nails so check it out!  It’s easier than you think!