Categories
costume crafty-ish DIY halloween sponsor Uncategorized

DIY Minnie Mouse Costume

I love dressing up for halloween but try to come up with cute but easy to put together costumes.  This DIY Minnie Mouse is definitely one of the easiest ones that I’ve made and you only need a few pieces to pull it all together.

EASY DIY MINNIE MOUSE COSTUME IDEA

I was big on Halloween as a kid and teenager; I LOVED picking out my costume and trick-or-treating. In the past few years, Halloween has been less about costumes and more about passing out candy to the neighborhood kids. But this year, my daughter is old enough to be excited to dress up for Halloween and I’m so loving that!

I wanted to dress up with her and, since Minnie Mouse is her favorite character in the world, I had to dress up as Minnie.
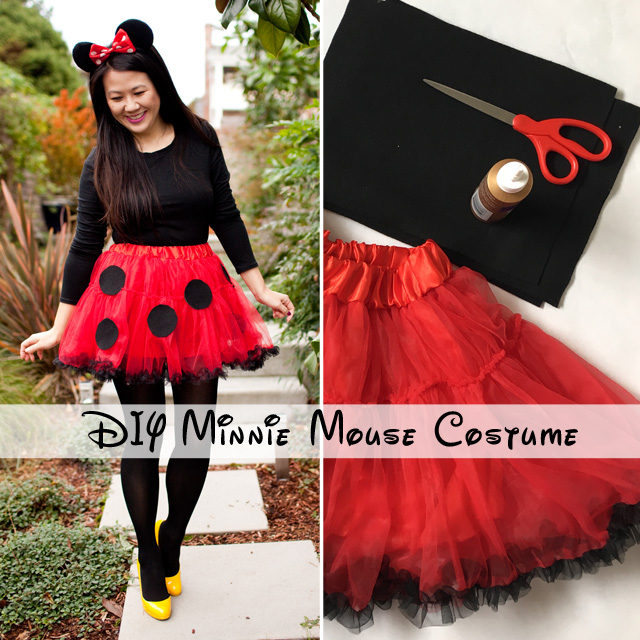
MINNIE MOUSE COSTUME MATERIALS

Although you can get plenty of pre-made costumes, I wanted the costume to be a little bit more me, so I ended up getting a red tutu and Minnie ears, and I had the makings of a cute Minnie Mouse!

I stopped by the craft store to pick up some felt to make polka dots on my tutu and got to work! And, seriously, this is the easiest DIY ever.

Let’s be real: I don’t have time for extensive DIYs, so this took me all of 10 minutes to do.

I used a mug as a stencil, and then just cut out all the circles, used tacky glue, and stuck them on the skirt.

Supply list for the DIY Minnie Mouse Skirt

  • Red Tutu
  • Black Felt
  • Scissors
  • Mug (or anything round as your template)
  • Tacky Glue

Complete your Minnie Mouse costume with items from your closet

I added the Minnie ears, a black long sleeve shirt, black tights, and, of course, my yellow pumps to become Minnie Mouse!

Tip: If you are headed out to trick or treat and it’s a bit chilly, add a pair of fleece lined tights to keep your legs warm
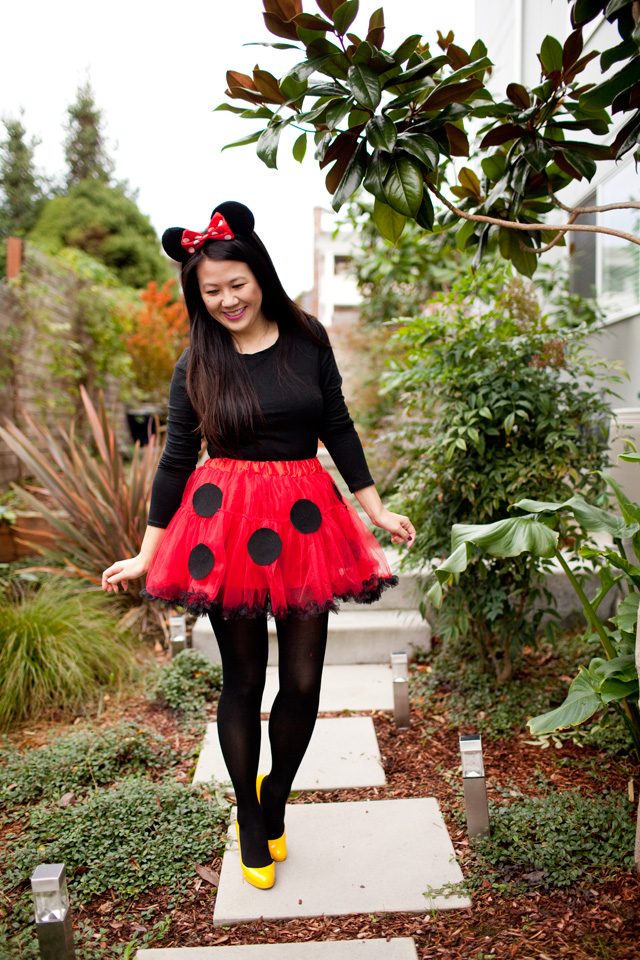
EASY DIY MINNIE MOUSE HALLOWEEN COSTUME WITH TUTU

I had fun creating my costume and loved that I could just grab what I had in my closet with a few additional pieces.  

I really only had to buy the tutu, mouse ears and felt which was not expensive at all so I was happy to not have to spend a ton of money on my costume!
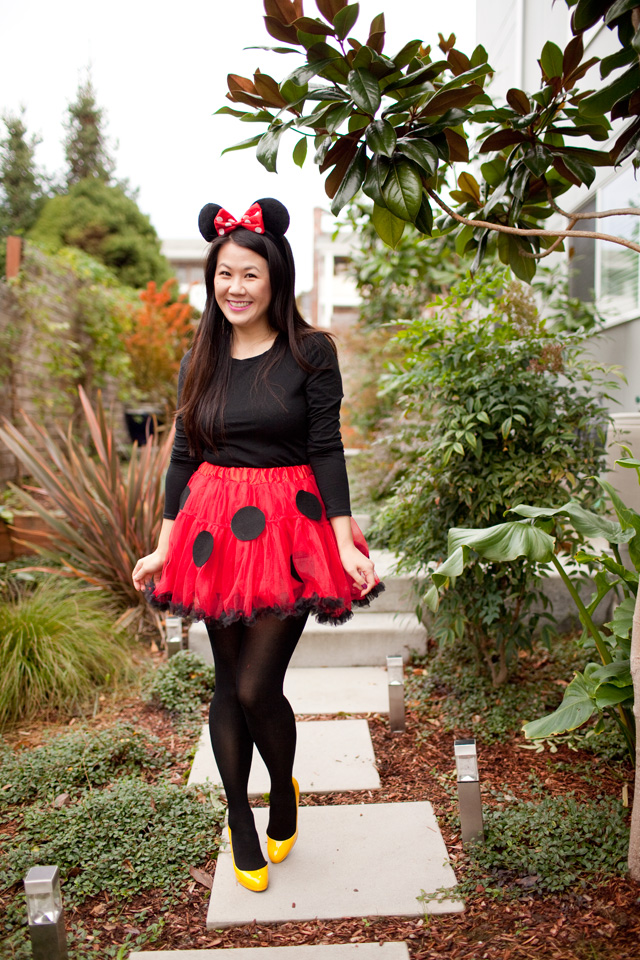
For more fun Halloween ideas check out these posts!

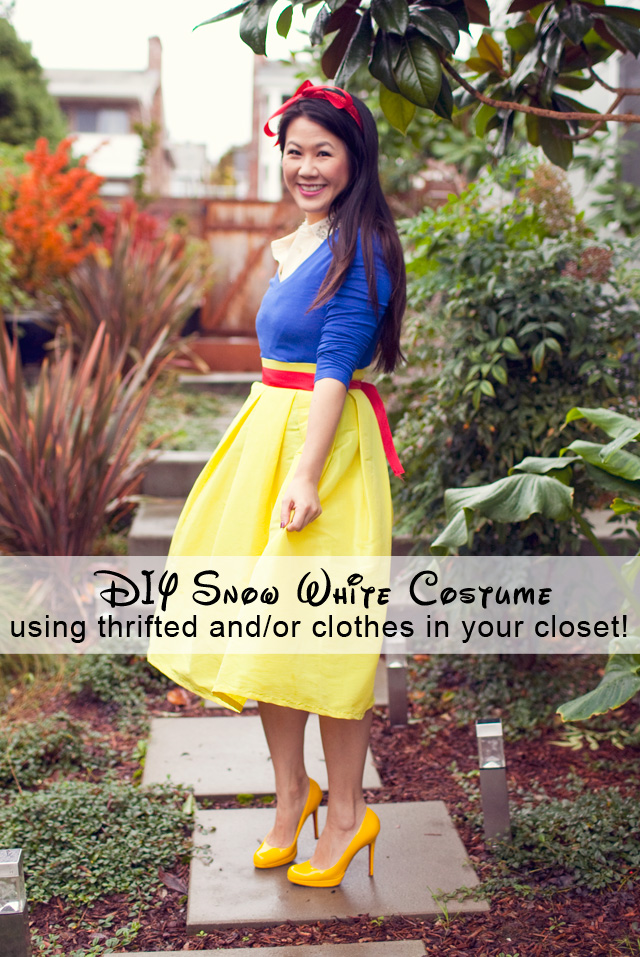
Easy DIY Snow White costume (using clothes in your closet!)
5 Cute and Easy Mommy and Me Halloween Costume Ideas

halloween costumes for moms, halloween costumes for moms and daughters, mommy daughter halloween costume ideas, DIY halloween costumes, DIY costumes for moms and daughters, halloween 2019, cute and easy halloween costumes for moms and daughters, mom blog, halloween ideas, cute halloween costumes for kids
Categories
beauty crafts crafty-ish DIY Uncategorized

DIY Magnetic Makeup Palette

I have to tell you how excited I am about this DIY Magnetic Makeup Palette only because it is something that I desperately needed.  I’m so happy that I can make an endless supply of them!  I buy a lot of palettes but it always ends up that I like some colors better than others which is fine, except when I travel, I have to take the entire palette with me just so I can use those 2-3 colors.  My makeup bag ends up bulging with 3-4 different palettes and I know that I don’t need to bring all of them but I really like those specific colors.  I did end up buying this large magnetic palette and depotted quite a few of my shadows but at $25 for each palette, they certainly aren’t cheap and I’d almost like to spend that money on more make up, know what I mean?

You can find inexpensive palettes easily by shopping at stores that sell makeup geared towards tweens and teenagers. Forever 21 has this palette for under $9 that would work great. I got mine in store at Forever 21 for around $5 and got lucky since these have a mirror built into them.

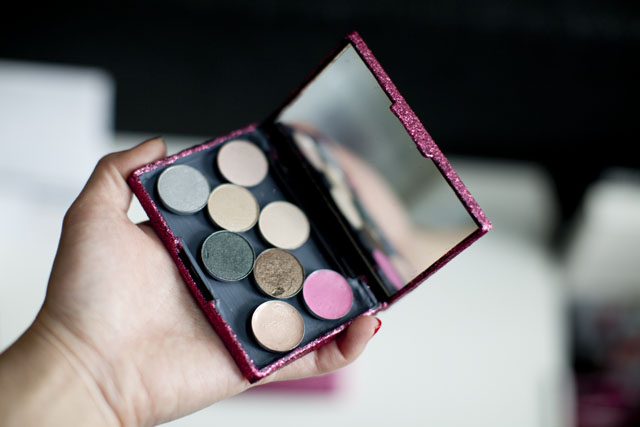
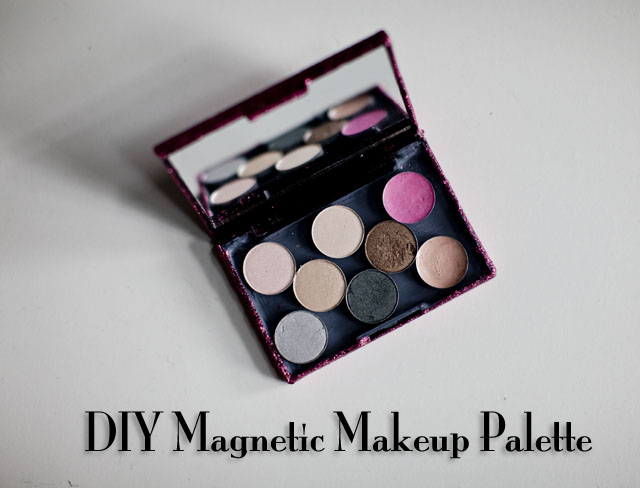
Here’s my finished product!  And of course I glittered it too. 🙂

DIY MAGNETIC MAKEUP PALETTE

You want to know what my secret ingredient is?  Magnetic Paint!  I didn’t even know they made such a thing I just googled it, hoping something like that existed and indeed there was!  Just a tip, if your local craft store is small it’s going to be impossible to find it as I found most places here didn’t carry it (even my local Jo-Ann’s).  I just ended up ordering it on Amazon. 

Even though I wasn’t sure it was going to work, I documented the process.  So thank goodness it did work!

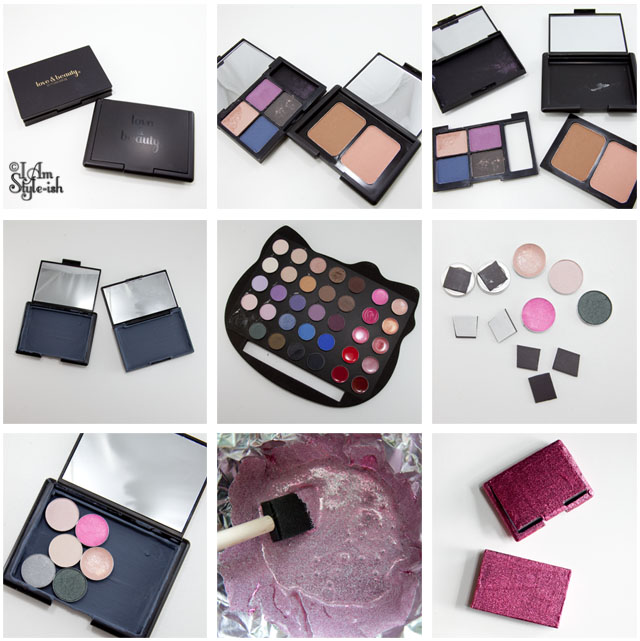
First your tools:

DIY MAGNETIC MAKEUP PALETTE

1ST STEP: REMOVING THE CURRENT MAKEUP PANS

  • With your palettes, take out the entire part that is holding the current pans.  In most of the palettes, you can usually find where it’s glued together and with a little strength, it’s easy to pull off or use a tool to get it underneath and pop it off.
  • Clean the glue residue off the inside of the bottom of the palette.

2ND STEP: PAINTING AND ADDING MAGNETS

  • Paint the inside with the magnetic paint (it took me about 4-5 coats before I was happy with the magnetic-ness.  I tested my magnets to make sure it stuck.  You can paint coats every 2-3 hours but once it’s done, let the paint dry overnight.
  • Take your palette and depot the pans.  This palette was easy as it popped right off.  It was just a bit of glue on cardboard but some are harder to depot.  (I’m not going to get into depotting as that it’s own animal but google “depot eyeshadow” and you’ll find tons of tutorials)
  • Cut the magnet sheet to the size as needed.  Stick the adhesive side to the bottom of the pans.

3RD STEP: ADD YOUR CUSTOM COLORS AND GLITTER!

  • Fill your pans to see how it looks/fits and if the magnets are sticking well.
  • You could stop here if you didn’t care what the outside of your palette looks like.
  • I have so much glitter left over from my previous glitter projects (here and here) so I wanted to use it and make my palettes even prettier.  (ha! I just love any excuse to glitter!)
  • I’ve gotten a lot of questions about the mix of glitter to mod podge.  You want to make sure that all your specks of glitter are covered in mod podge.  This is how you ensure the minimal fall out.  1 parts glue to 2 parts glitter is what I aim for.
  • If you have your pans still in the palette, take them out before doing any painting.
  • Coat in glitter and let dry between coats.  Paint until every single area is covered in glitter!
  • Instead of glittering it, you could also just paint the case and it would look just as cute.

And there you go!  A glittery, magnetic case that you can change out the pans to suit your different looks!

DIY MAGNETIC MAKEUP PALETTE
Here it is with a few other items that I keep in my hangbag so you can see the size.  It fits in perfectly don’t you think? 🙂
DIY MAGNETIC MAKEUP PALETTE

*If you are wondering about my makeup palette that I depotted, it is this Hello Kitty for Sephora palette.  I loved the colors but hated how big and clunky the case was so I rarely took it out to use it.   Now that I’ve depotted all the makeup, I’ve got a fun case to hold other stuff and am actually using the palette now.

If you liked this post, check out my other glitter DIY posts!

Categories
crafts crafty-ish DIY Uncategorized

Glitter… Everything!

Ever since I made my glitter clutch, I’ve been looking around at everything that we have around the house that I can glitter.  I told you I had a lot of glitter projects to share, I finally gathered them together to photograph!

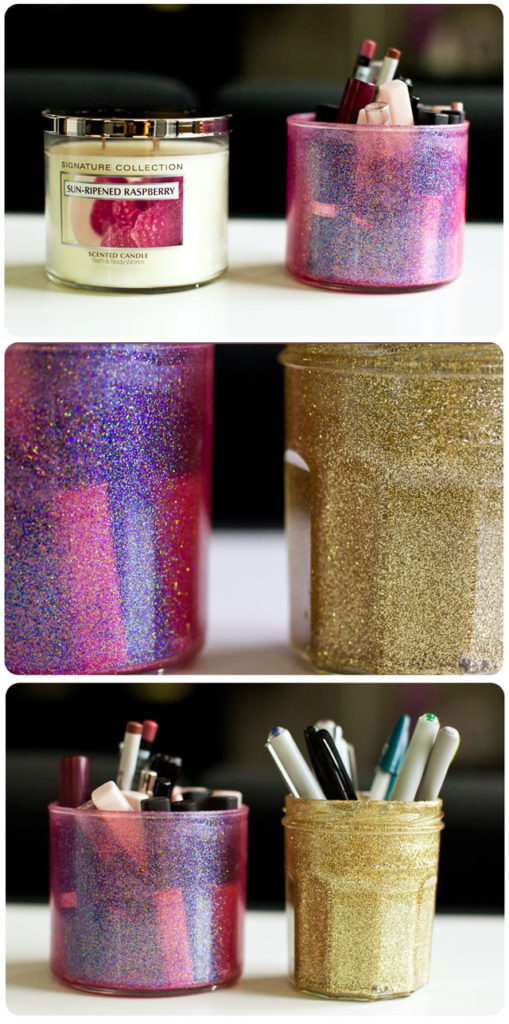
First up are these little tea light holders that were totally boring on their own…


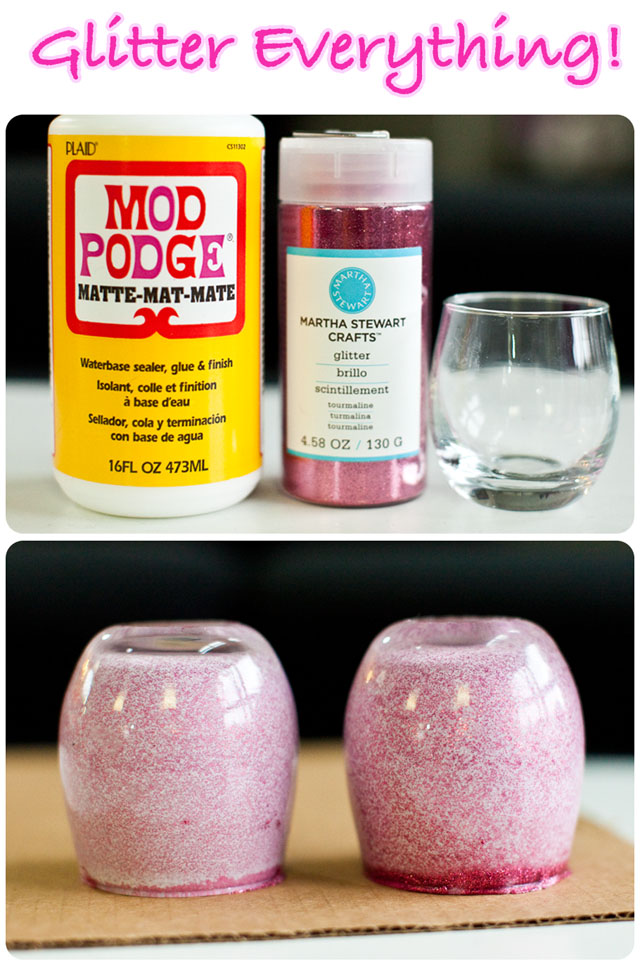
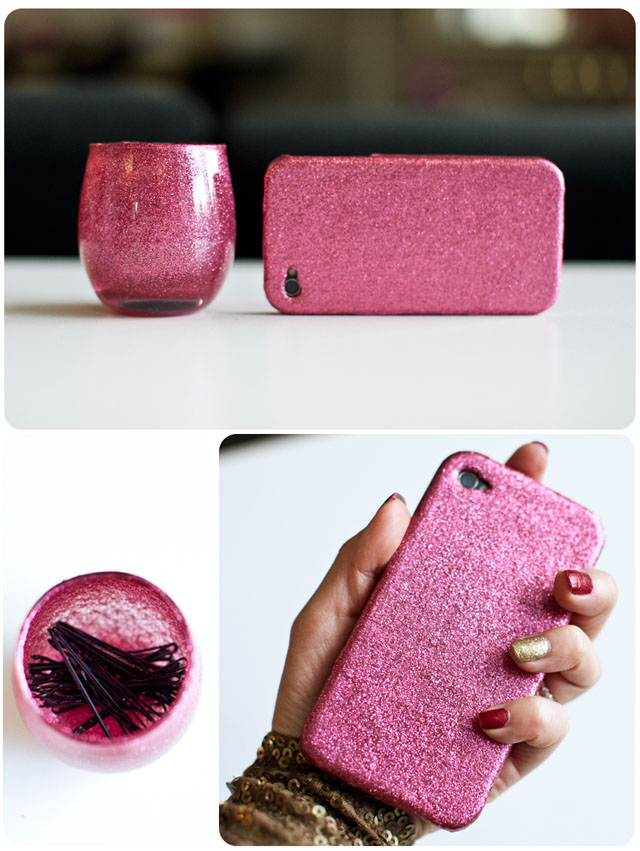
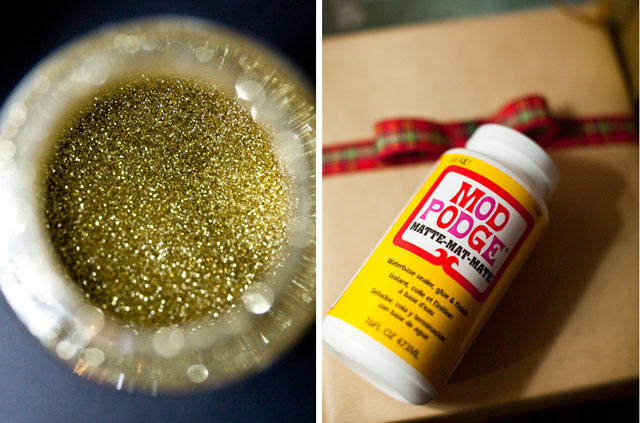
I put together a mixture of Mod Podge and glitter (same as the glitter clutch) but this time I dumped the mixture in the candleholder, swirled it around until it covered every area and then let it dry upside down for a day.  Now, they are adorable and I keep one in the bathroom to hold my bobby pins which has made my life so much easier when doing my hair!  Obviously the other thing I glittered was my iPhone case.  I had a freebie case that I wasn’t using from when Apple was giving out free cases (because of the antenna issue).  A plain black case instantly turned into something very girly and glam that I use all the time now!  (I just used the mixture and dipped a foam brush into it and painted the mixture right onto the case.  It needed about 3 coats.) (get the set of Mod Podge and brushes here)
*A note on the tea light holders, you can still use tea lights in them even with the glitter, just get the battery operated ones. They look just as cute and they even flicker a little!  I have ones that I always keep in my candle holders.
I buy a ton of candles and always try to keep the jars once they are done being candles because they are great storage holders (I use a few to hold my makeup brushes).  So instead of just cleaning it out and leaving it as is, I glittered it!  I used a different glitter than the Martha Stewart for this one and it was a very fine, almost powdery glitter which I didn’t like as much.  It took many more coats to get it to be that glittery.  The Martha Stewart glitter is the perfect consistency and opaque which I think looks better.  To clean out almost empty candle jars, boil a pot of water with about an inch or two of water (depending on how big your candle jar is and how much wax is left) and put the candle in the pot.  It will melt the remaining wax in the jar and then you can dump the wax straight into the garbage and then wash the container out.  Use a fork to scoop out the wick holders.
I filled it with my lipglosses and lip liners.  Now my bathroom has a lot more glittery additions! And lastly, a jam jar converted into a gold pencil holder that makes my desk much more fun!
There are so many things you can do with Mod Podge and glitter. Just look around your house, I’m sure you’ll find as much stuff as I did!
Categories
DIY lookbook rag and bone Uncategorized ysl

Lookbook: Blue and Gold

shopsosie_blouse4
shopsosie_blouse2
shopsosie_blouse

What I’m Wearing:
*Blazer: Hinge (Nordstrom, from a few years ago) – I’m totally in love with this Hinge Waterfall leather jacket.  I think it would look perfect with this outfit!
*Booties: Rag & Bone Lovell Platform Booties – on sale here!  Also in brown and purple.  After wearing these all winter, I adore them and totally recommend.  Very comfy and keep my feet warm and stylish!
*Clutch: Semi-DIY – see my tutorial
*Ring: YSL Arty
*Earrings: t+j Designs Large Diamond Teardrop Studs

The mod podge/glitter clutch is still holding up! 🙂  Anyone else try out this DIY?  It’s one of my favorites.  I have a few other glitter projects I gotta show you!

Categories
crafts crafty-ish DIY Uncategorized

DIY Glitter Clutch

Do you remember this clutch from this lookbook?Rag_Bone_Jeans
Well, now it looks like this!
DIY_clutch2
I made it gold and glittery!  I LOVE it!!  

You see I’ve been in love with the gold sequin Zara clutch that I’ve seen on a ton of bloggers (seen here on my sister) and all over Pinterest.  But I missed out on getting it online and don’t have a Zara nearby so I was searching for other cute sparkly clutches when I thought, “why don’t I just make one?” I wasn’t super attached to the yellow clutch so thought it would be the perfect canvas to make it glittery.  Obviously the Zara one is covered in sequins but I did glitter because it was easier but just as pretty.  Pictures don’t do this baby justice, it looks amazing in person!

What you need:
  • Clutch 
  • Mod Podge
  • Very Fine Glitter – I used Martha Stewart Glitter (and after this project, I’m seriously considering buying this set of all of the colors! I want to glitter everything now!)
    *You could try chunky glitter if you want the look of the clutches above.  I’m not sure how it will turn out but I do like the smoothness of mine. 
  • Foam Brush
  • Bowl
  • Patience 🙂

I don’t have step by step pictures because I did this over two days and it was kind of a trial run for me anyway, but you don’t need the pictures because it’s super easy.

  1. Mix the glitter and Mod Podge into a bowl (I lined my bowl with foil so that it wasn’t a sticky mess and clean up was easy.) I’d say 1 parts glue to two parts glitter is good.  I just eyeballed it though until I thought you could see enough glitter through the glue mixture.  You want more glitter because when it dries you want as much glitter stuck on as possible, otherwise you’ll have to do way more coats.
  2. Start painting the clutch with the foam brush.  Do only one side!  When you paint it on, it will be all white and goopy, don’t worry, it dries clear and all you see is glitter.
  3. Wait 20 minutes or longer until it’s dried and you see the glitter.
  4. Wash your brush thoroughly between layers of painting because you don’t want your brush to get hardened and not be able to paint anymore.
  5. Paint the next layer with the same mixture.
  6. Repeat steps 3 – 5 until the entire surface is covered in glitter or until you are happy with how it looks!

(I wasn’t sure how much Mod Podge and glitter I needed so I just bought the big sizes of both, but ended up using about only 1/3 of both of them.)

Tada!  That’s it.  Mine took about 4 coats on each side.  My clutch has a zipper on the back and I just painted over the entire thing so you can’t open the zipper anymore but it didn’t matter that much to me.  I never used that back pocket anyway.

The best part about doing it this way is that there is no glitter fall out!  I have been leaving this clutch all over the place, on our dining room table, on the couch, on my bed and no glitter has fallen off.  Hubs loves it because usually when I do glitter projects, we find glitter EVERYWHERE.  haha!  And it’s great because it doesn’t come off on your hands.  Now I have the perfect glitter clutch for the holidays!

DIY_clutch
Have fun and let me know if you try it too! I’d love to see how yours turn out 🙂  I actually ended up glittering a few other things so will share them soon!
Categories
crafty-ish DIY jewelry Uncategorized

Easy DIY! Make your own cocktail rings

I had a few sharp eye readers notice my vintage earring to ring DIY that I occasionally wear on my lookbooks and ask for a tutorial.  It’s really quite easy and not much skill is needed except the ability to use pliers and glue! 🙂  When I go vintage shopping, I often find pretty brooches or earrings and I think “that would look fabulous as a ring!” which is basically how I came up with the DIY.  I stumble upon a lot of vintage clip on earrings that I love but wouldn’t wear as earrings so this is a terrific way to make good use out of them.

1. Find the pieces that you’d like to turn into rings
2. The tools: Glue | Pliers | Felt | Ring Base
3. & 4. The earring you want to make into a ring + the ring base
5. Take the clip of the earring off by gently removing the entire piece with pliers
6. Cut out a piece of felt that just covers the base of the earring
7. Glue the felt to the earring with glue (I used Beacon Gem-Tac Glue)
8. Glue the ring base to the felt (I used Aleene’s Jewelry & Metal Glue)
Hold the ring base down tightly to the jewelry for a few minutes
9. Voila!  A new ring for you to wear!
A few notes: 
  • I used 2 different glues because the Gem Tac glue is a lot less stronger and glueing the felt to the earring doesn’t require a super strong glue, whereas the ring base is really light and can fly off really easily so I used a much stronger adhesive to glue the ring base on.
  • I searched high and low at all the craft stores around here for ring bases and came up with nothing so you may have better luck at the stores near you.  If not, I went on ebay to get mine.  I don’t remember the seller I bought them from, but these are the same bases.  ($8 for 100 bases so not expensive at all.)  I like that they are adjustable so I can wear them on any finger.
  • The pliers I used are a jewelry pliers that also cut wire and other metals.  Really effective when you have earring bases with posts or a pendant where you want to clip off the loop where the necklace goes.  For the clip on earrings you can use regular pliers too.
  • If the earring back (or whatever you are using) is smooth, you can probably skip the felt part.  That’s just so you have a smooth surface to glue the ring base on.  
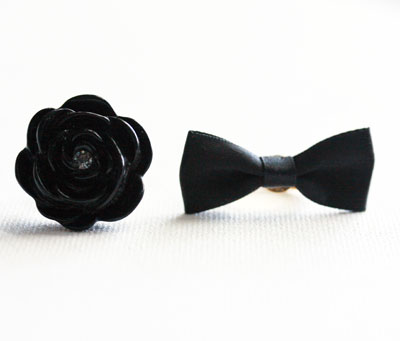
You can make rings with anything that you find that can be stuck on the ring base.  Here are a few that I made: The flower was previously a pendant that I found at the craft store for like $2.  And a bow that I also found at the craft store for really cheap and came with a pack of 6 bows.  Both make for cute rings for very little cost!
 
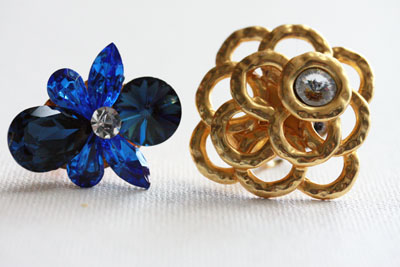
These two are my favorites that I’ve turned into rings.  The blue rhinestones are my mom’s earrings that she wore back in the 80’s.  I rummaged through her costume jewelry box and found lots of fun jewelry to either just wear as is or make into something new.  The gold one on the right is a vintage find from an antique mall that was previously a clip on earring.  The nice part about having earrings is that you always have one to give away to somebody!  My mom loves having her old earring that was just sitting in her jewelry box as a fun ring to wear now.

Have fun with it and even just look through your own jewelry box for things that you stopped wearing long ago and see if you can upcycle them into a pretty cocktail ring for your finger!  Just a caveat that this is not the most effective way to make into rings as the glue can become loose and it can fall off so I do recommend using very strong glue when making these and also jewelry pieces that aren’t too pricey/meaningful in case something does happen to them.  I’ve had to re-glue a few that have come loose after a long day of wearing them and accidentally smacking them into things but really, a dab of glue is not so hard to do so it’s worth it to me!

P.S. A few new posts from me over at the Smarter blog!  Check out my favorite accessory to add a pop of color to your outfit and my tips on how to style pleated skirts!