And for purchases over $50 we are including a free tote bag!
And we are having a Thanksgiving Flash Sale with prices starting at $6! A lot of things are going super fast so make sure to get your order in before it sells out!
*The TDAY30 discount does not apply to the flash sale items, glam gift sets or monogram items.
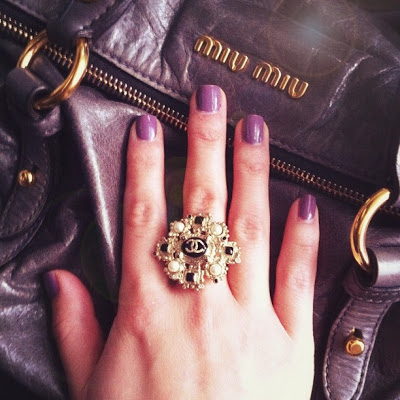
I’m a Chanel lover for life. Wether it’s bags, shoes, jewelry, I love it all. And Vintage Chanel sometimes is better than new! I own a clothing and jewelry line and I have gobs and gobs of jewelry unworn and samples everywhere. I certainly don’t NEED any more jewelry but I am still obsessed with Chanel jewelry. Every time I go to the boutique I love to see their new pieces. My husband got me this ring for my birthday and I can’t stop wearing it, it’s my favorite thing ever. It’s been posted on my instagram a few times (apologies if you are sick of seeing it! haha)
We got my mom a Chanel pin for her birthday and I snapped this picture when I was picking out which one, I just love them all! (In case you were wondering, my ring and these brooches below are not vintage, they are all current season, but everything else in this post is about vintage pieces.)
I’ve been to a couple of vintage Chanel trunk shows and I LOVE looking at the jewelry. Shopbop has a fab section of vintage Chanel and I love seeing their selection.
In my research I’ve found a few authentic re-sellers of vintage Chanel jewelry.
Vintage Five is a seller from Japan but they have an easy to navigate website, free shipping and also a boutique on Malleries. They also have this great page to help you distinguish between the fakes and the real thing. (My caveat: I have not ordered from here personally but just did some research on the web and they appeared to have good reviews and they do take returns)
Yoogi’s Closet, who I mentioned in my Where to Buy: Vintage Chanel Bags post, also has a small section of vintage jewelry. I love that they have the J12 watches as I’d never buy one at full retail but would definitely consider a pre-loved one.
Lastly, I got confirmation from the girls at the Purse Forum that Vineyard Vintage sells authentic pieces and they have quite an extensive selection so definitely check them out if you have a particular piece you are looking for. They also have a great page to help with authenticating pieces. Great to bookmark on your phone if you ever come across a vintage piece while antique shopping and you’re not sure of the authenticity.
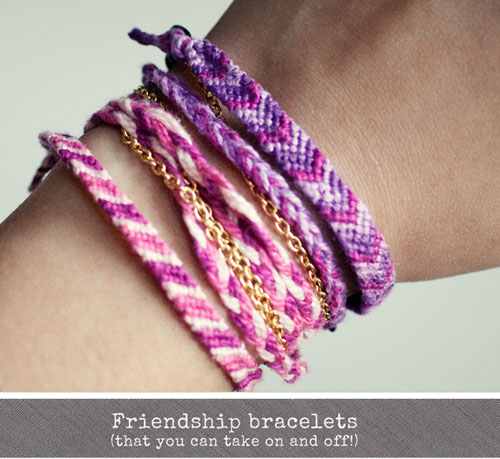
The friendship bracelets trend is back in full force and I jumped on the bandwagon this summer, making quite a few. I noticed quite a few other bloggers making them too and it’s fun just to see how everyone makes them just a little bit differently and the color combinations you put together. I love the look of the friendship bracelets but one thing that I didn’t like was that I felt like after I tied it on, I was kind of committed to wearing them for at least a week before I got sick of it and tried to un-knot it or cut it off. I came up with a super easy way to making them kind of like bangles so that you can actually slip them on and off. I also came up with a really easy way to use your embroidery floss to spruce up old bangles which you’ll find the tutorial at the bottom of this post.
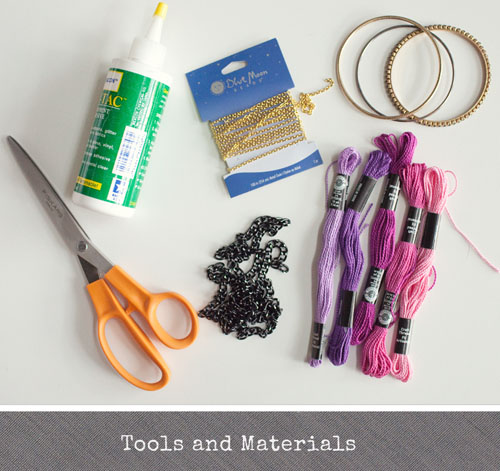
Pretty self explanatory but a few of the essentials to make this project.
Scissors
Glue (to be used as the very last step)
Thin chain – which I used on my middle bracelet above
Bangles (I used ones I already had or get this stack of 20 bangles for $5) – for the last tutorial
Tutorial 1:
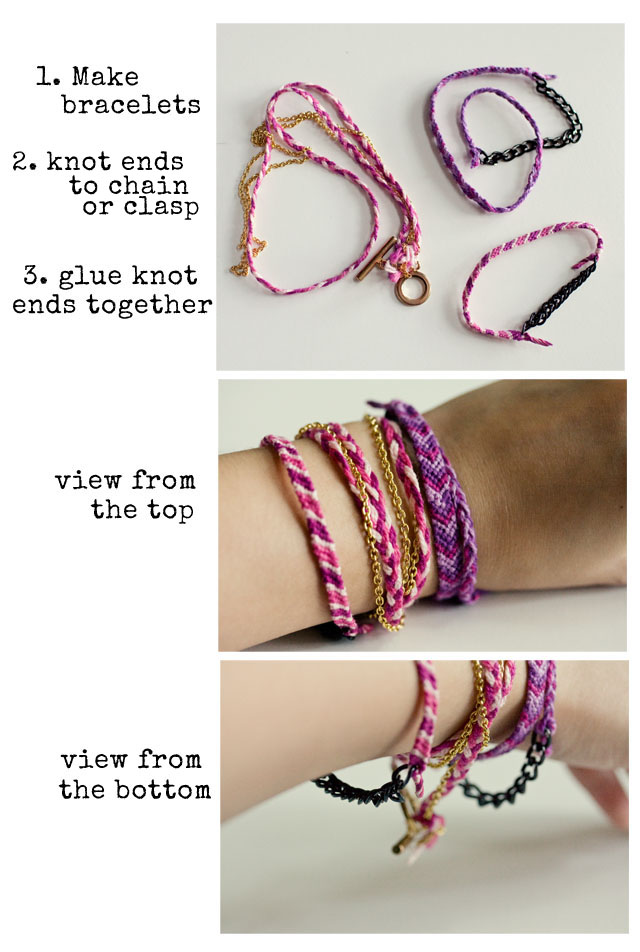
Basically once you are done making your bracelet, take your ends and
knot them through your chain. I try to leave my ends very long so it’s
easy to slip through the chains. Double knot it to make sure it’s
secure. Cut the ends to a shorter length and with a craft glue, dab a
small amount onto the ends and just squish the threads together so that
the frayed ends are glued together.
You’ll notice for the middle one with the chain, I attached a clasp to it because I wanted to be able to open it and wrap it on my arm rather than slipping it on like you have to do with the chain. What I love about this is that the chain or clasp is always going to be heavier than your bracelet so the chain always stays on the bottom and the bracelet doesn’t flip.
Tutorial 2:
This one is super easy and fast! Just take a bangle and start wrapping the embroidery floss around. For the plain
one, I just wrapped it twice in one area and kept the spacing even
between the wraps. If you do it nice and tight, the thread doesn’t
move. You don’t even need glue for this one because when you start it,
keep the beginning trail of thread on the underside of the bangle and just wrap
around it which keeps everything in place. When you are done, just tuck the
end into the already wrapped sections (also on the underside). For the rhinestone bangle I
wrapped in between each of the rhinestones but I didn’t like it with just one time around so I wrapped the entire thing twice.
Almost all of the materials that I used in both bracelets were found at a craft store for pretty inexpensive. The only thing that I bought separately at a jewelry supply store was the toggle clasp for the pink/chain bracelet above. (And of course the bangles but they were just sitting in my jewelry box.) Overall though I think each bracelet probably cost less than a dollar to make!
Have fun and let me know if you make one! 🙂
Like this post? Also check out my “Make your own cocktail rings” post for an easy way to turn old earrings into rings!
I had a few sharp eye readers notice my vintage earring to ring DIY that I occasionally wear on my lookbooks and ask for a tutorial. It’s really quite easy and not much skill is needed except the ability to use pliers and glue! 🙂 When I go vintage shopping, I often find pretty brooches or earrings and I think “that would look fabulous as a ring!” which is basically how I came up with the DIY. I stumble upon a lot of vintage clip on earrings that I love but wouldn’t wear as earrings so this is a terrific way to make good use out of them.
1. Find the pieces that you’d like to turn into rings
2. The tools: Glue | Pliers | Felt | Ring Base
3. & 4. The earring you want to make into a ring + the ring base
5. Take the clip of the earring off by gently removing the entire piece with pliers
6. Cut out a piece of felt that just covers the base of the earring
7. Glue the felt to the earring with glue (I used Beacon Gem-Tac Glue)
8. Glue the ring base to the felt (I used Aleene’s Jewelry & Metal Glue)
Hold the ring base down tightly to the jewelry for a few minutes
9. Voila! A new ring for you to wear!
A few notes:
I used 2 different glues because the Gem Tac glue is a lot less stronger and glueing the felt to the earring doesn’t require a super strong glue, whereas the ring base is really light and can fly off really easily so I used a much stronger adhesive to glue the ring base on.
I searched high and low at all the craft stores around here for ring bases and came up with nothing so you may have better luck at the stores near you. If not, I went on ebay to get mine. I don’t remember the seller I bought them from, but these are the same bases. ($8 for 100 bases so not expensive at all.) I like that they are adjustable so I can wear them on any finger.
The pliers I used are a jewelry pliers that also cut wire and other metals. Really effective when you have earring bases with posts or a pendant where you want to clip off the loop where the necklace goes. For the clip on earrings you can use regular pliers too.
If the earring back (or whatever you are using) is smooth, you can probably skip the felt part. That’s just so you have a smooth surface to glue the ring base on.
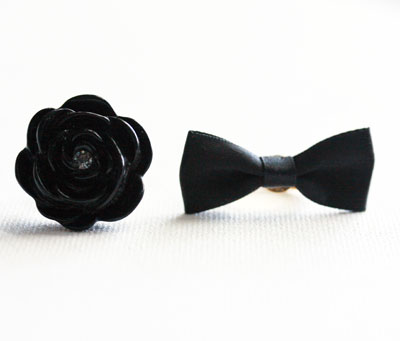
You can make rings with anything that you find that can be stuck on the ring base. Here are a few that I made: The flower was previously a pendant that I found at the craft store for like $2. And a bow that I also found at the craft store for really cheap and came with a pack of 6 bows. Both make for cute rings for very little cost!
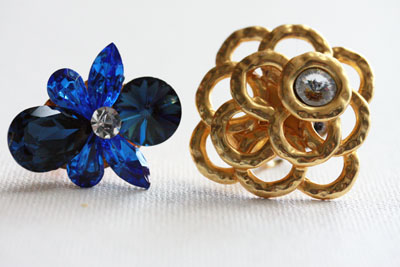
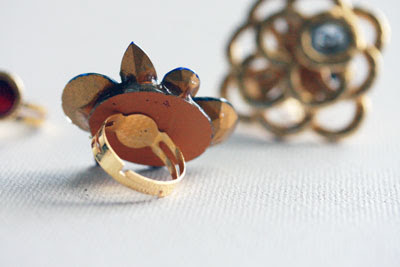
These two are my favorites that I’ve turned into rings. The blue rhinestones are my mom’s earrings that she wore back in the 80’s. I rummaged through her costume jewelry box and found lots of fun jewelry to either just wear as is or make into something new. The gold one on the right is a vintage find from an antique mall that was previously a clip on earring. The nice part about having earrings is that you always have one to give away to somebody! My mom loves having her old earring that was just sitting in her jewelry box as a fun ring to wear now.
Have fun with it and even just look through your own jewelry box for things that you stopped wearing long ago and see if you can upcycle them into a pretty cocktail ring for your finger! Just a caveat that this is not the most effective way to make into rings as the glue can become loose and it can fall off so I do recommend using very strong glue when making these and also jewelry pieces that aren’t too pricey/meaningful in case something does happen to them. I’ve had to re-glue a few that have come loose after a long day of wearing them and accidentally smacking them into things but really, a dab of glue is not so hard to do so it’s worth it to me!
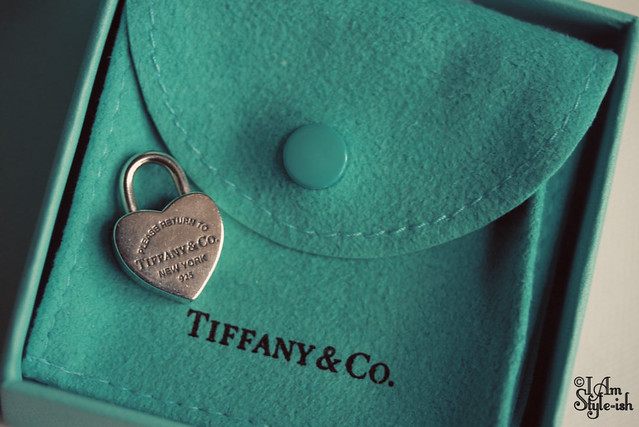
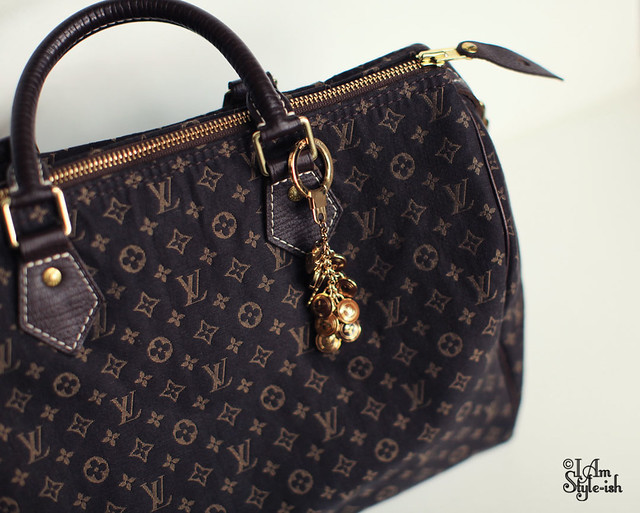
It’s been awhile since I’ve done a photography post! This project came to me a bit randomly as I was organizing my accessories one day. I keep my bags and fine jewelry quite organized and I like to take things out once in awhile to check to see if anything needs cleaning or fixed and I also rotate out my winter bags with my summer bags etc… While I was doing that, I started noticing all the little details that made me love all my things and probably the reason why I bought them. So, I brought my camera out and decided to capture all those details that I love and when I saw all the pictures together, I decided to call it the “girly project” since it’s all these things that I think us girly girls love and appreciate. I’m thinking about printing these out and framing them to put in our bedroom just to add a fun girly touch to our room. I think it will look really cute!
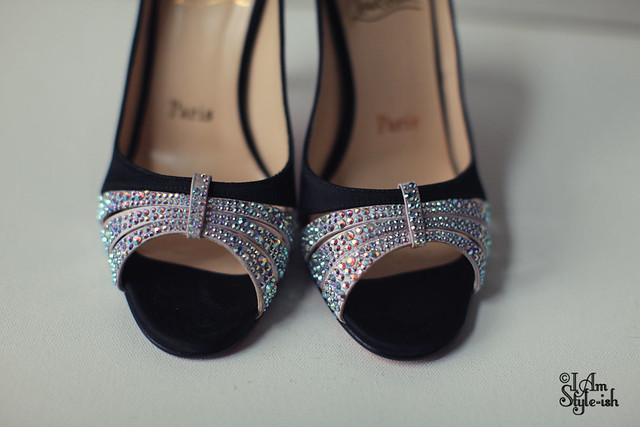
Anyway, here are the pictures and just some of the details that I love. I want to note that I’m not trying to brag here about my material possessions. All these things are years and years of collecting (except the Louboutins are new). It just so happened that I was pulling these things out of my closet that day and they all happened to be recognizable name brands but I do think that’s also what attracts us to them right?
Photography details: most of these were shot with this macro lens on a Canon 40D and some with the 50mm f/1.2L lens on a Canon 5D Mark II. If you are looking for a cheaper alternative to that lens (it’s amazing, I love it) and you aren’t needing it for a lot of low light situations (i.e. you are not a wedding photographer) you can get this lens for a much better price and just as nice pictures! Any other photography questions? Ask here!
All were post processed in Photoshop using some kind of action from Totally Rad Actions.